Handleiding
Je bekijkt pagina 12 van 20
Manufacturer reserves the right to change, at any time, specifications and designs without notice and without obligations.
12
Step 7 - Connect the Signal and Power Cables
All wires must be sized per NEC (National Electrical Code) or CEC
(Canadian Electrical Code) and local codes. See the rating plate and/ or
the installation instructions of the compatible outdoor unit for MCA
(minimum circuit amps) and MOCP (maximum over current protection)
to correctly size the wires and the disconnect fuse or breakers
respectively.
Recommended Connection Method for Power and Communication
Wiring:
The main power is supplied to the outdoor unit. The field supplied 14/3
power/communication wiring from the outdoor unit to the indoor unit
consists of four (4) wires and provides the power for the indoor unit. Two
wires are high voltage AC power, one is communication wiring and the
other is a ground wire. Wiring between the indoor and outdoor unit is
polarity sensitive. The use of BX wire is
NOT recommended. If installed
in a high Electromagnetic field (EMF) area and communication issues
exists, a 14/2 stranded shielded wire can be used to replace L2/N and (S)
between outdoor unit and indoor unit landing the shield onto ground in
the outdoor unit only.
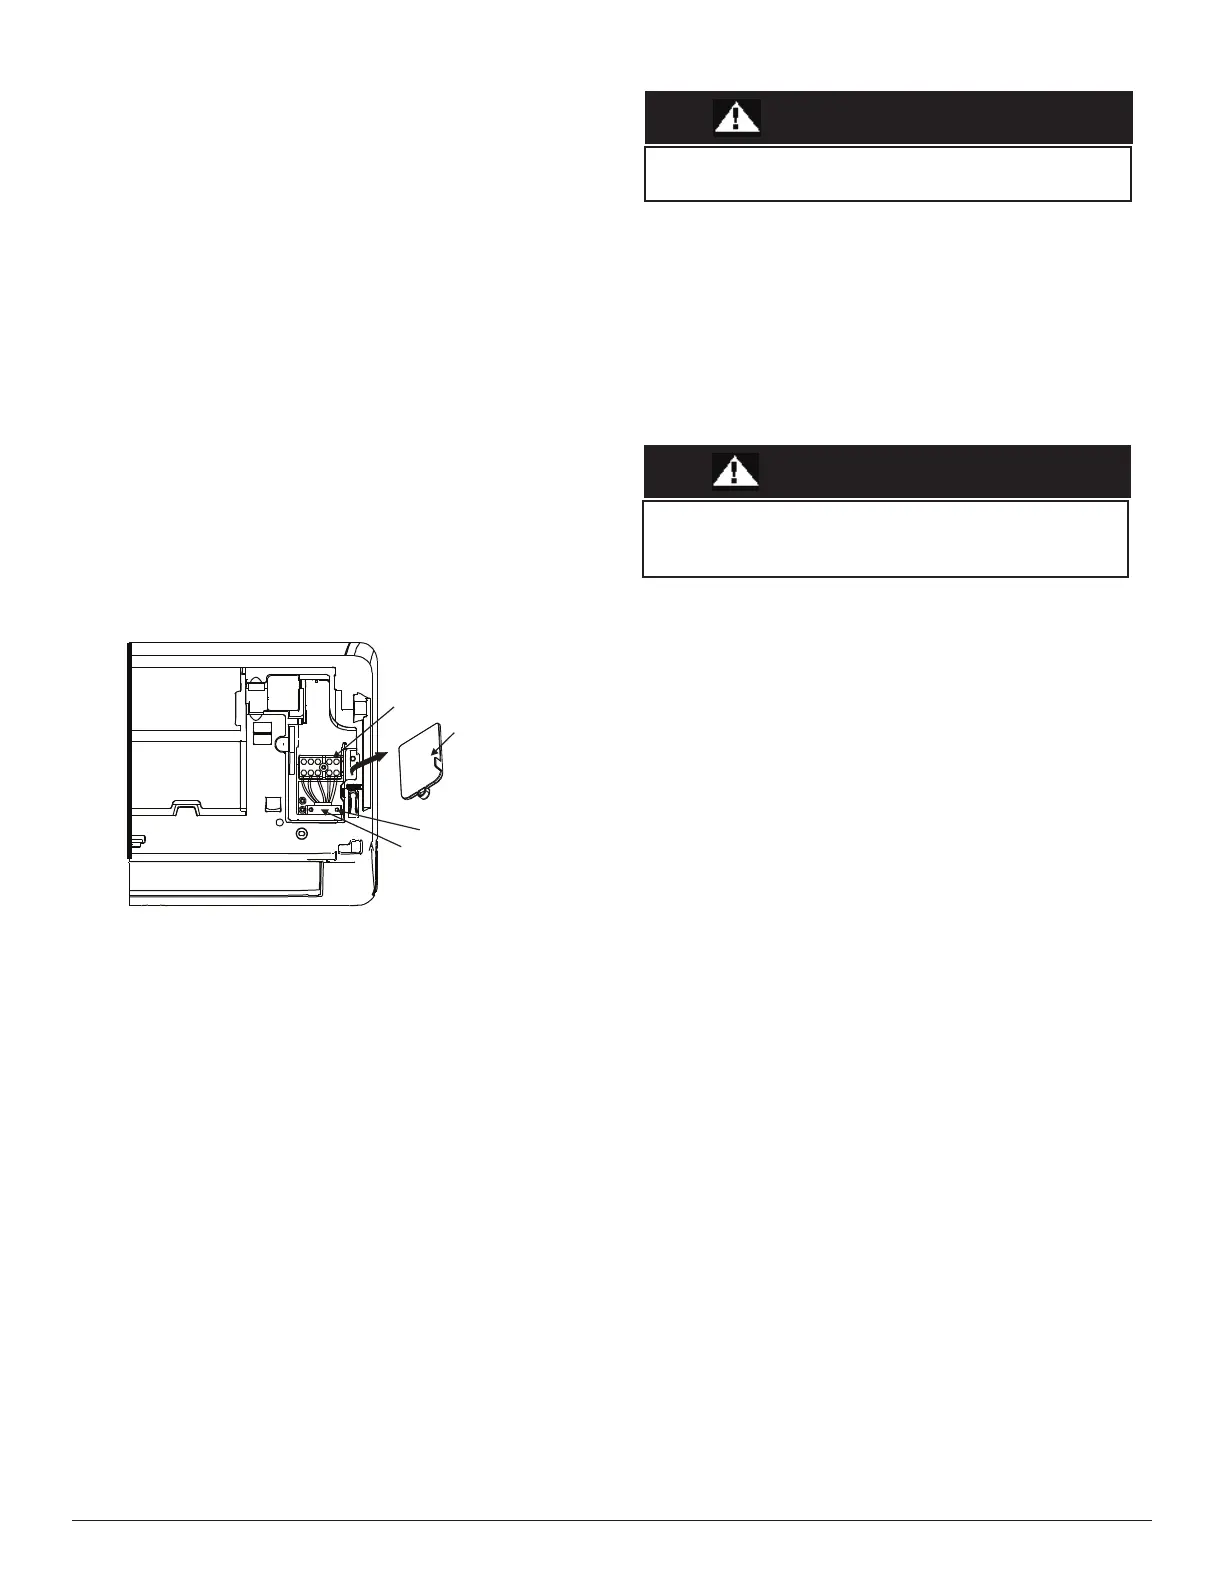
1. Open front panel of the indoor unit.
2. Use a screwdriver to open the wire box cover on the right side of the
unit. This reveals the terminal block.
Fig. 20 — Wire Box Cover
3. Unscrew the cable clamp, below the terminal block, and place it to the
side.
4. Facing the back of the unit, remove the plastic panel on the bottom left-
hand side.
5. Feed the signal wire through this slot, from the back of the unit to the
front.
6. Facing the front of the unit, connect the wire
according to the indoor
wiring diagram, connect the u-lug and firmly screw each wire to its
corresponding terminal.
7. After checking to ensure every connection is secure, use the cable
clamp to fasten the signal cable to the unit. Screw the cable clamp
down tightly.
8. Replace the wire cover on the front of the unit, and the plastic panel on
the back.
NOTE: The wiring connection process may differ slightly
between units and regions.
Terminal block
Wire cover
Screw
Cable clamp
All wiring must be performed strictly in accordance with the
wiring diagram located on the back of indoor unit’s front panel.
WARNING
DO NOT MIX UP LIVE AND GROUND WIRES
This is dangerous and can cause the air conditioning unit to
malfunction.
CAUTION
Bekijk gratis de handleiding van Midea MASAG24-21HS2G, stel vragen en lees de antwoorden op veelvoorkomende problemen, of gebruik onze assistent om sneller informatie in de handleiding te vinden of uitleg te krijgen over specifieke functies.
Productinformatie
| Merk | Midea |
| Model | MASAG24-21HS2G |
| Categorie | Airco |
| Taal | Nederlands |
| Grootte | 3297 MB |


