Handleiding
Je bekijkt pagina 152 van 180
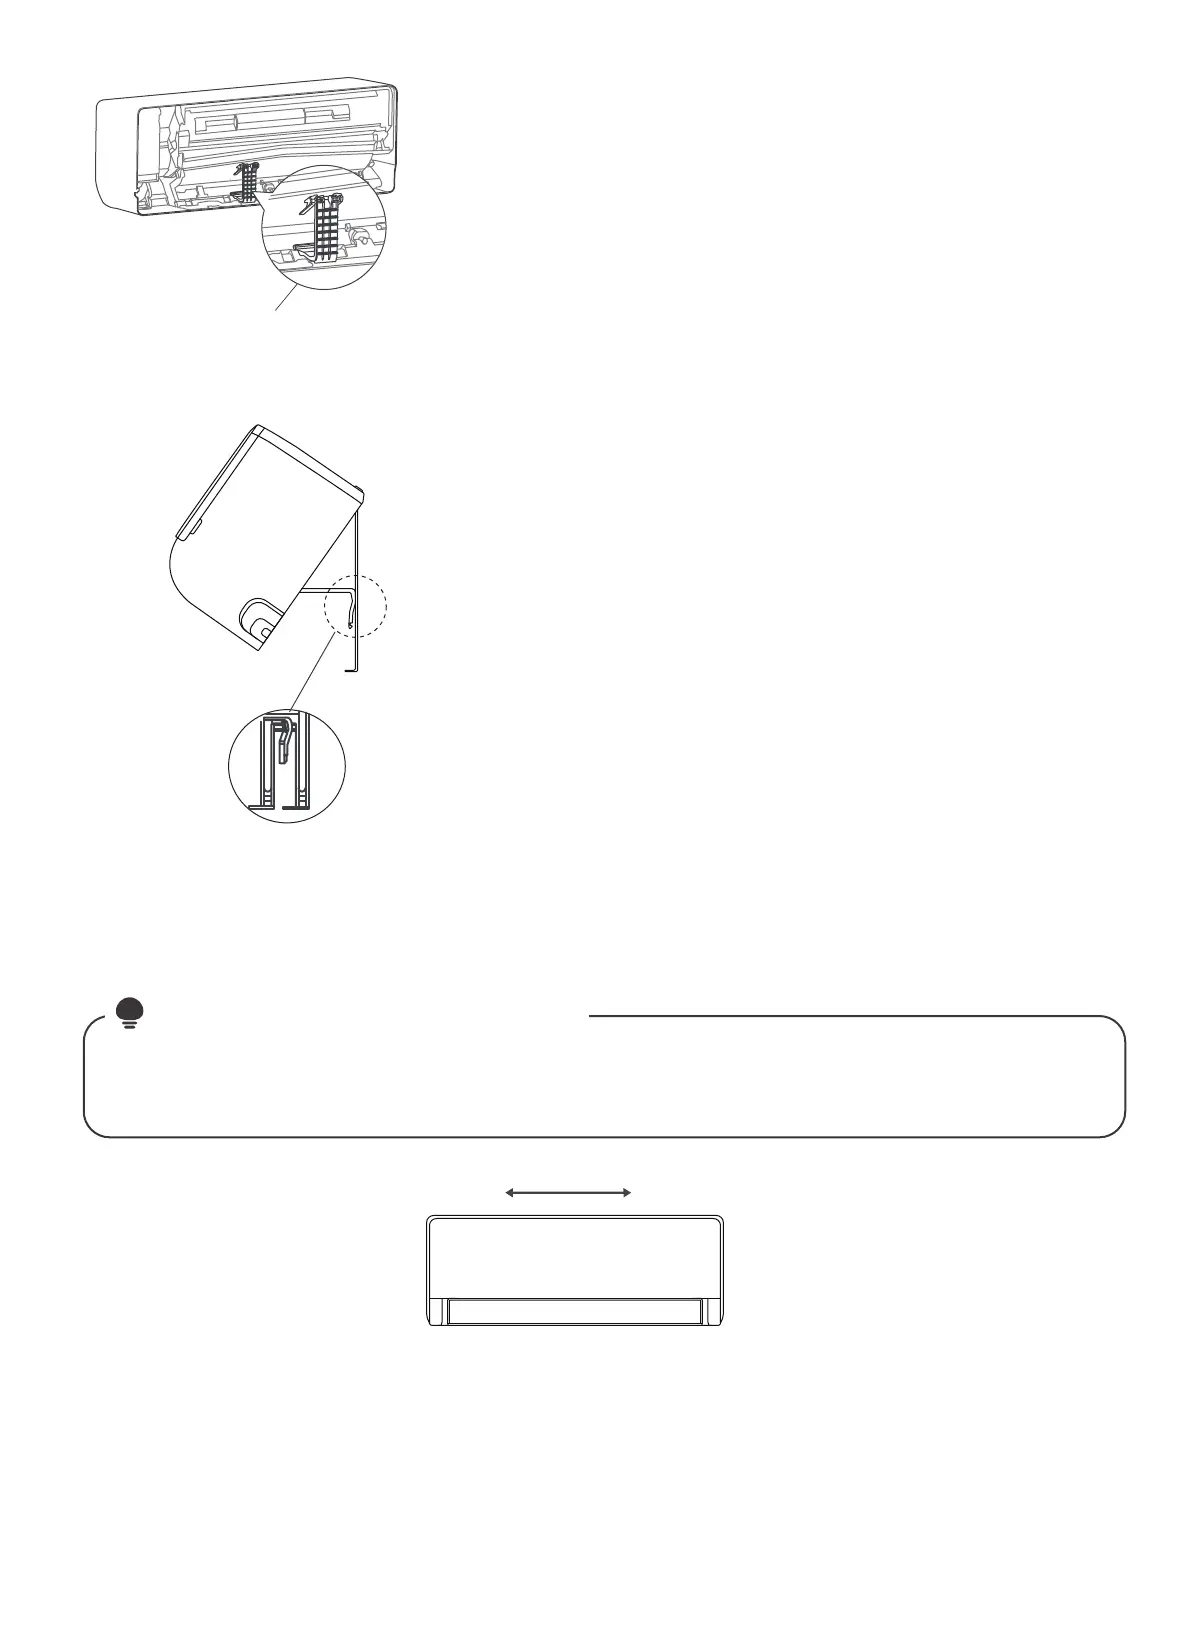
Holder at the back
of the unit
If refrigerant piping is already embedded in the wall,
do the following:
Hook the top of the indoor unit on the upper hook of the
mounting plate.
Use the holder at the back of the unit to prop up the unit,
giving you enough room to connect the refrigerant piping,
signal cable, and drain hose.
Connect drain hose and refrigerant piping (refer to
Refrigerant Piping Connection section of this manual for
instructions).
Keep pipe connection point exposed to perform the leak
test (refer to Electrical Checks and Leak Checks section of
this manual).
After the leak test, wrap the connection point with
insulation tape.
Release the holder that is propping up the unit.
Using even pressure, push down on the bottom half of the
unit. Keep pushing down until the unit snaps onto the hooks
along the bottom of the mounting plate.
Move to left or right
50mm (1.96in)
Keep in mind that the hooks on the mounting plate are smaller than the holes on the back of the unit.
If you find that you don’t have ample room to connect embedded pipes to the indoor unit, the unit
can be adjusted left or right by about 50mm (1.96in), depending on the model.
NOTE
: UNIT IS ADJUSTABLE
●
●
●
●
●
●
●
Use the holder at the back
of the unit against on the
mounting plate to prop up
the unit
30
Bekijk gratis de handleiding van Midea EZ-18RD6-O, stel vragen en lees de antwoorden op veelvoorkomende problemen, of gebruik onze assistent om sneller informatie in de handleiding te vinden of uitleg te krijgen over specifieke functies.
Productinformatie
| Merk | Midea |
| Model | EZ-18RD6-O |
| Categorie | Airco |
| Taal | Nederlands |
| Grootte | 20817 MB |


