Handleiding
Je bekijkt pagina 144 van 180
Drill wall hole for connective piping
2
Determine wall hole location
Correct orientation of Mounting Plate
Remove the screw that attaches the
mounting plate to the back of the
indoor unit.
Secure the mounting plate to the wall
with the screws provided. Make sure
that mounting plate is flat against the wall.
Screw
Step 1:
Step 3:
Step 2:
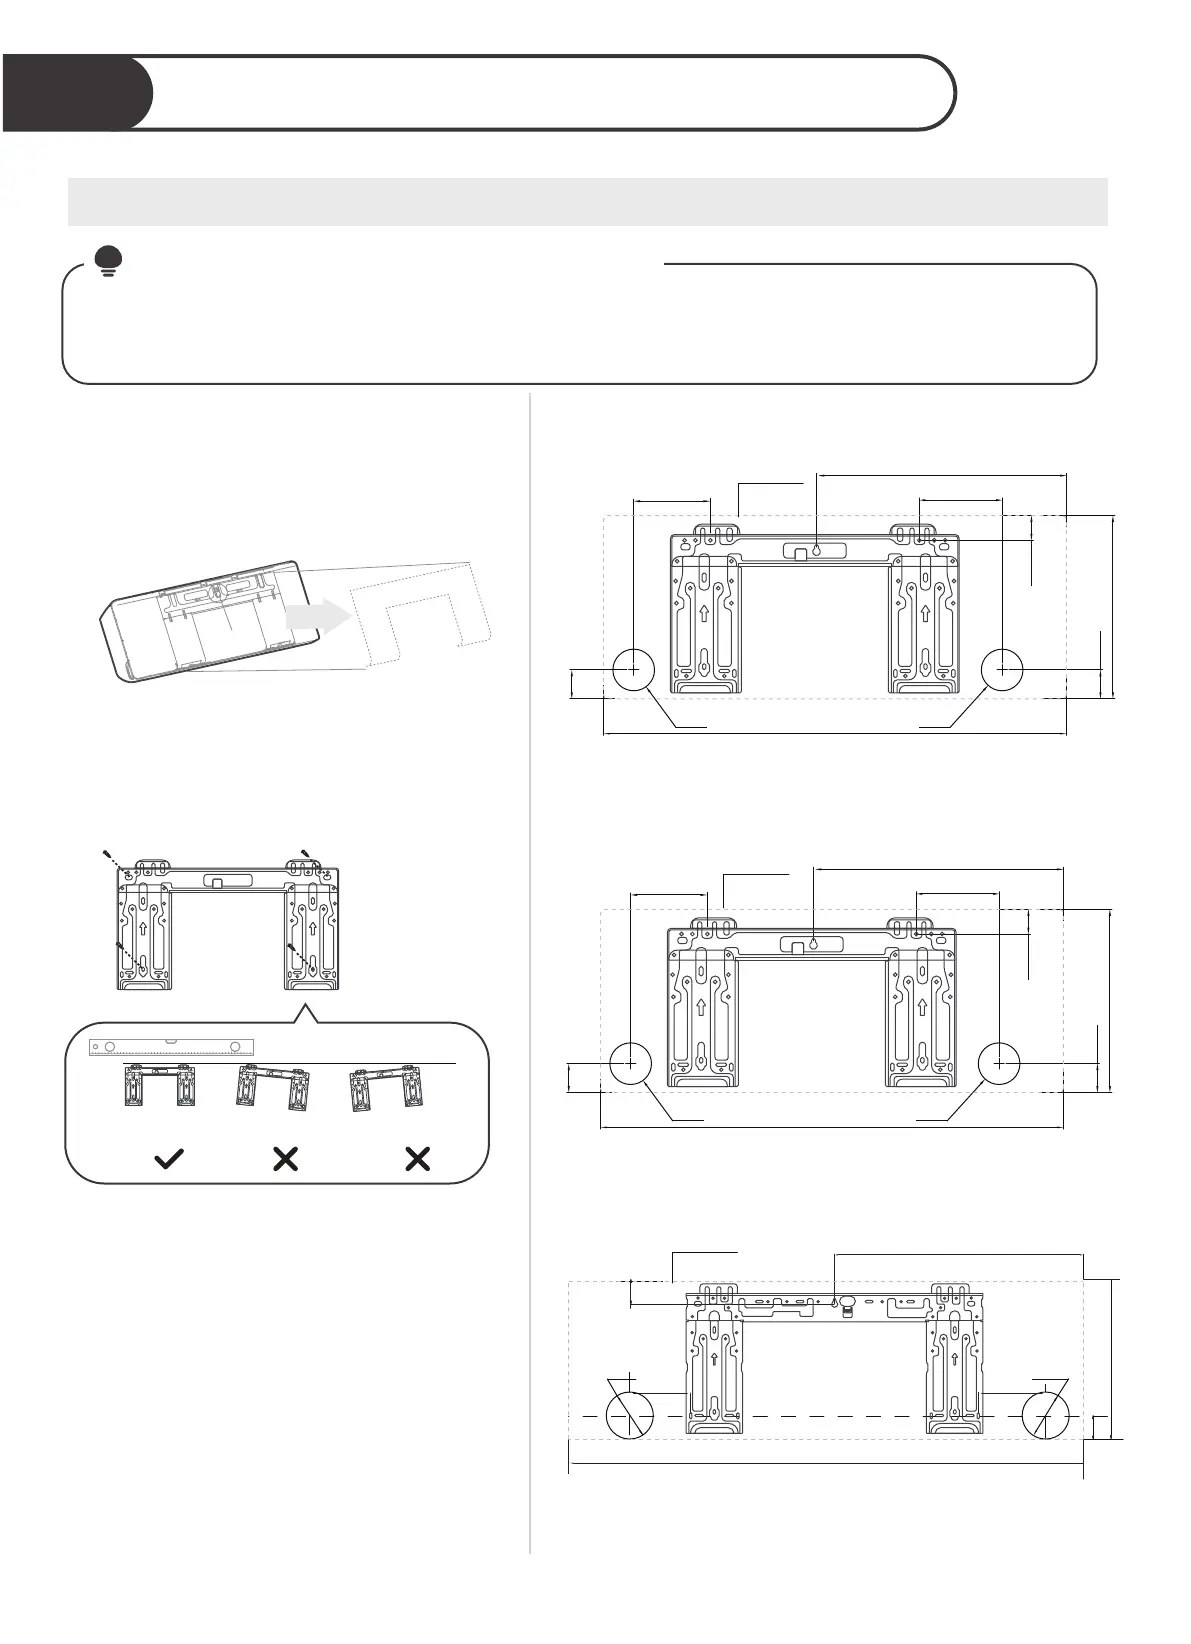
Confirm the mounting plate you own.
Dierent models have dierent mounting
plates. Refer to following mounting plate
dimensions to help you determine the
optimal position.
If the wall is made of brick, concrete, or similar material, drill 5mm-diameter (0.2in-diameter) holes in
the wall and insert the sleeve anchors provided. Then secure the mounting plate to the wall by
tightening the screws directly into the clip anchors.
NOTE
: FOR CONCRETE OR BRICK WALLS
22
Indoor unit
outline
Model A
Model B
Model C
Unit:mm(in)
38.4(1.51)
286(11.26)
45(1.77)
45(1.77)
403(15.87)
723(28.46)
65(2.56)
65(2.56)
137.5(5.41)110(4.33)
Ø
Ø
38.4(1.51)
286(11.26)
45(1.77)
45(1.77)
421.8(16.61)
814(32.05)
65(2.56)
65(2.56)
159.4(6.28)162.2(6.39)
Ø
Ø
Indoor unit
outline
Indoor unit
outline
306(12)
975 (38.4)
116.6 (4.59)
503.5(19.82)
47.5(1.87)
45.5(1.79)
φ
Pipe hole
65(2.56)
φ
Pipe hole
65(2.56)
129 (5.08)
Bekijk gratis de handleiding van Midea EZ-18RD6-O, stel vragen en lees de antwoorden op veelvoorkomende problemen, of gebruik onze assistent om sneller informatie in de handleiding te vinden of uitleg te krijgen over specifieke functies.
Productinformatie
| Merk | Midea |
| Model | EZ-18RD6-O |
| Categorie | Airco |
| Taal | Nederlands |
| Grootte | 20817 MB |


