Middle Atlantic C3-TECHKIT4-SO handleiding
Handleiding
Je bekijkt pagina 7 van 12
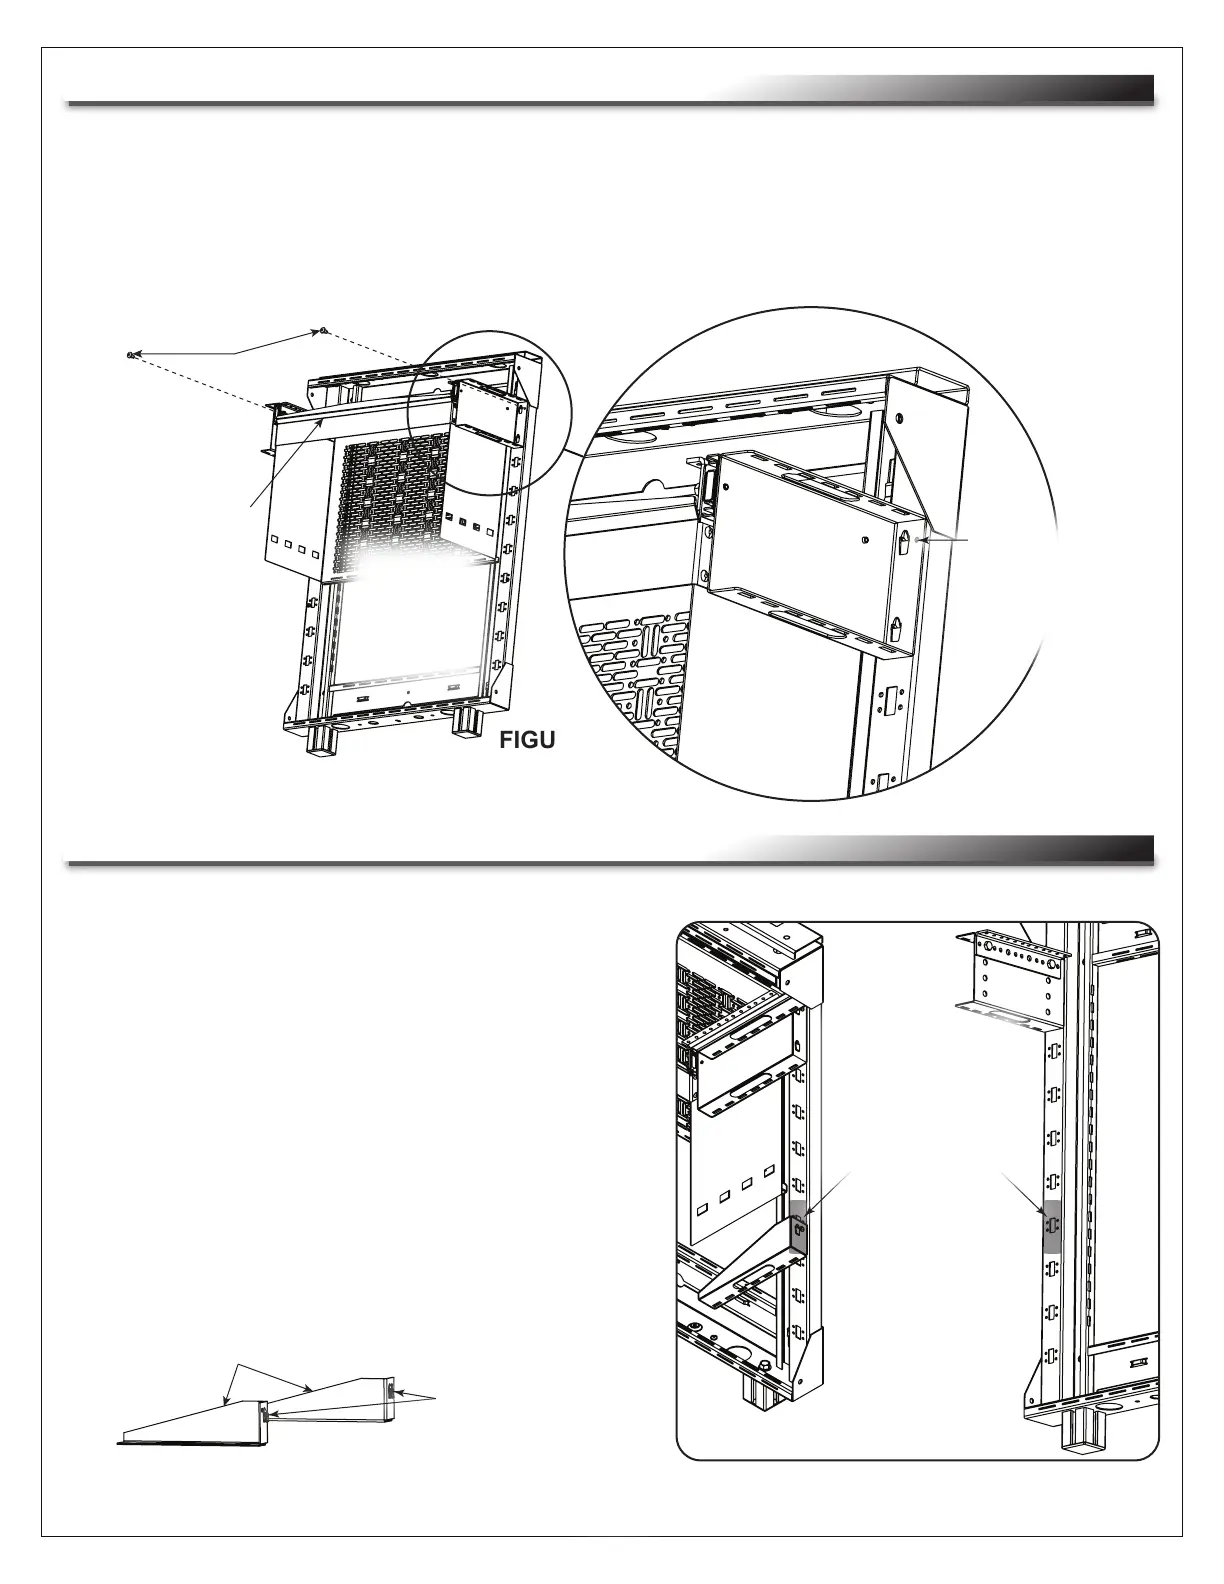
3. With the shovel lances hooked in the holes, push downward on the brackets until the rack locks into
place.
NOTE: Verify the torque on your power driver is on the lightest setting and only increase as necessary.
4. Use a power driver, #2 Phillips bit, and (2x) 8-32 x 5/16” thread forming screws (D) to secure the rack’s
brackets to the frame as shown. (FIGURE C)
Slide-Out Rack
Handle
Page 7
INSTALLING THE SLIDE-OUT RACK OPTION (C3-TECHKIT4-SO, CONTINUED)
INSTALLING LEVER LOCK™ BRACKETS OUTSIDE OF RACK OPTIONS
NOTE:
• Lever Lock™ brackets are installed outside of both the
Slide-Out Rack (C3-TECHKIT4-SO) and Fixed Rack
(C3-TECHKIT4-ST) options. This topic shows the
Slide-Out Rack, but the procedure is the same
for the Fixed Rack.
• Lever Lock brackets (L or AD) and 8-32 x 5/16” thread
forming screws (N or AF) are provided for both the
Slide-Out Rack (C3-TECHKIT4-SO) and Fixed Rack
(C3-TECHKIT4-ST) options.
1. Hook the shovel lances on the Lever Lock brackets
(B) into the 5th set of rectangular holes on the frame
(shaded) beneath the slide-out or fixed brackets as
shown. (FIGURE D)
Use the 5th set of
rectangular holes
beneath the slide-out
or fixed rack option
brackets when
attaching the Lever
Lock brackets.
FIGURE D
Shovel lances on
back of Lever Lock
brackets.
B
FIGURE C
D
NOTE:
Upward view
of slide-out
rack option
attached to
frame.
Hole on the
bracket lines
up with hole
on frame for
screw.
Bekijk gratis de handleiding van Middle Atlantic C3-TECHKIT4-SO, stel vragen en lees de antwoorden op veelvoorkomende problemen, of gebruik onze assistent om sneller informatie in de handleiding te vinden of uitleg te krijgen over specifieke functies.
Productinformatie
| Merk | Middle Atlantic |
| Model | C3-TECHKIT4-SO |
| Categorie | Niet gecategoriseerd |
| Taal | Nederlands |
| Grootte | 2330 MB |


