Melchioni MF 2460IND handleiding
Handleiding
Je bekijkt pagina 10 van 32
9
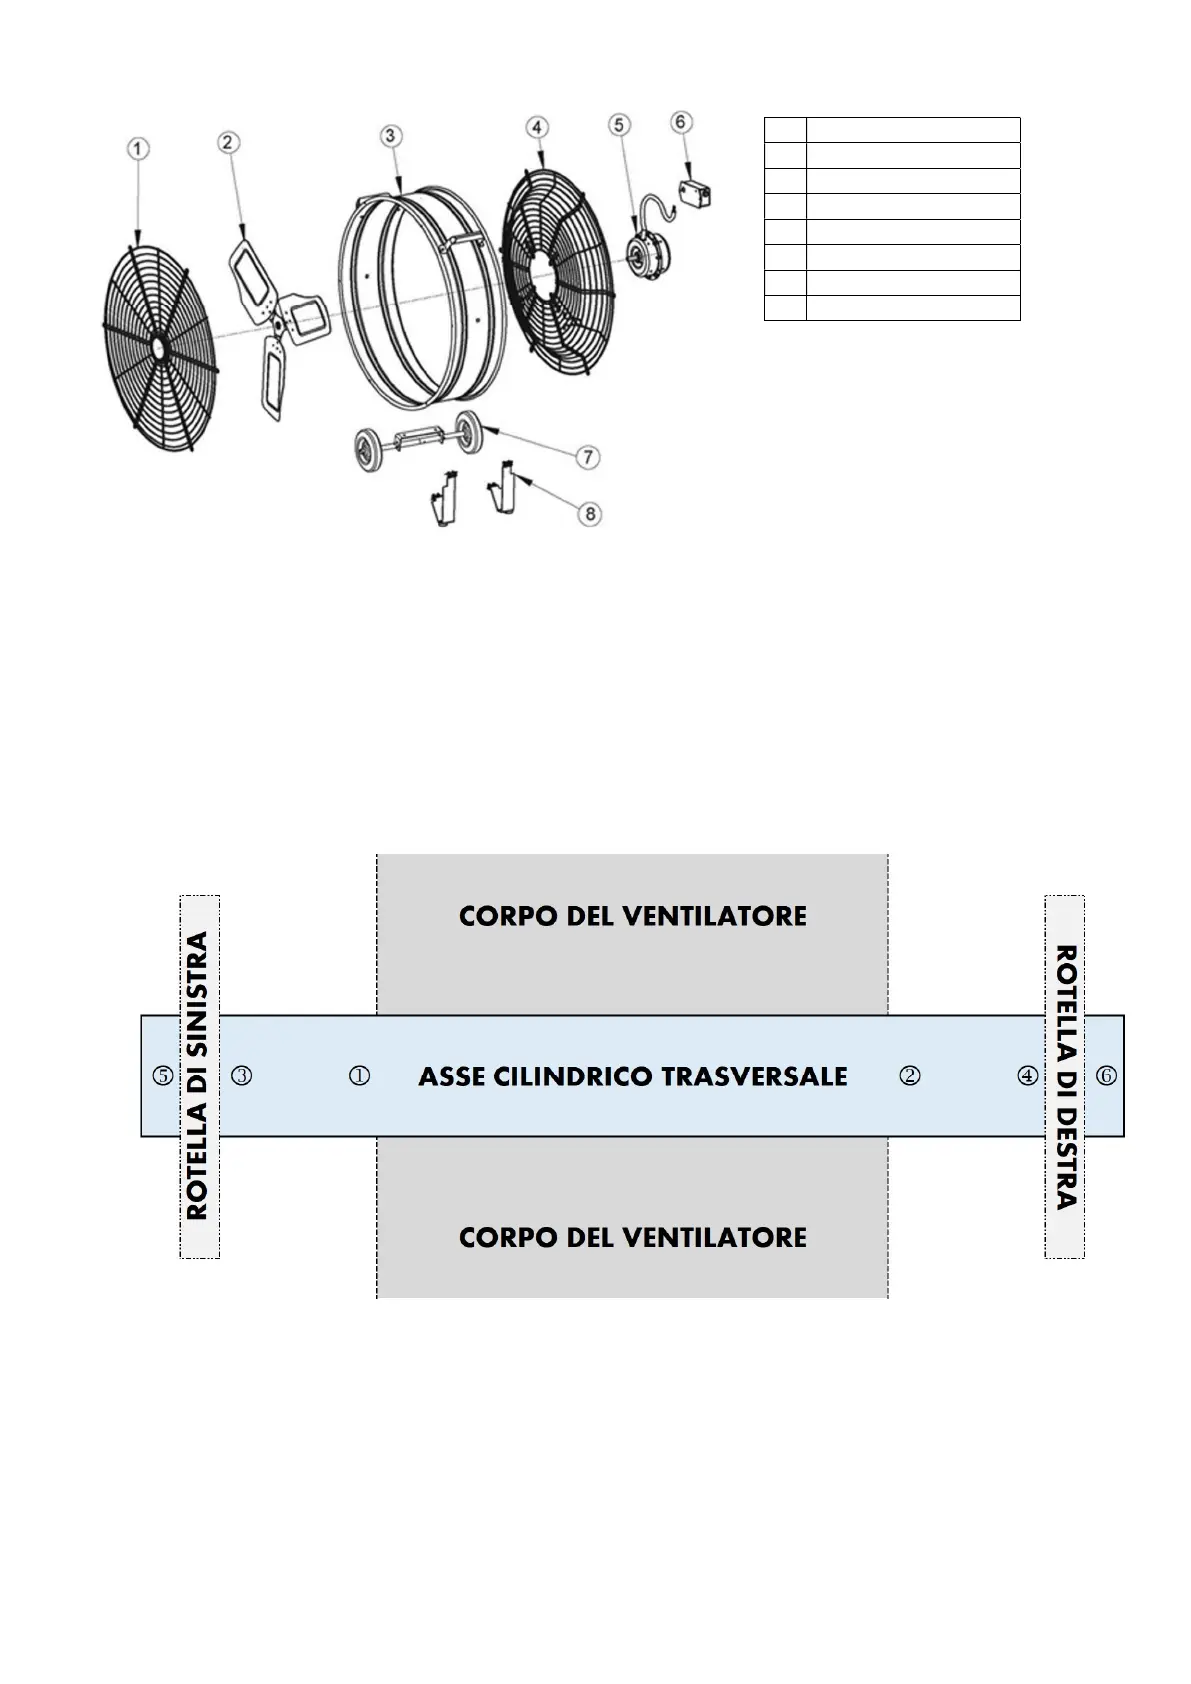
1 Front grille
2 Blade
3 Grille structure
4 Rear grille
5 Motor
6 Keypad
7 Castor assembly
8 Support feet
Parts 1 to 6 and 8 are preassembled and
do not require any action for
commissioning. Only the castor assembly
needs to be assembled and installed
before the first start-up.
4. ASSEMBLY AND COMMISSIONING
The castor assembly must be perpendicularly threaded into the dedicated pair of aligned holes on the bracket
along the bottom edge of the grille. The cylindrical metal shaft must be horizontally threaded BEFORE the castors
are installed as, once they are in place, it will not be possible to thread the shaft into the holes.
The shaft must, therefore, be inserted and placed in a central position. Then the cotter pins (6, supplied) must be
inserted according to the following sequence, taking care to separate their ends once inserted, possibly using a
pair of pliers:
To facilitate centring, the shaft should be threaded into the holes after the cotter pin of hole 1 has been positioned.
The remaining cotter pins must be inserted with the shaft already in place. The castors must be threaded after the
cotter pin of hole 3 (left castor) and 4 (right castor) has been inserted. Once the castor assembly is in place, check
its correct installation by moving the appliance a short distance, grabbing it from the top handle.
The appliance is ready for use.
Bekijk gratis de handleiding van Melchioni MF 2460IND, stel vragen en lees de antwoorden op veelvoorkomende problemen, of gebruik onze assistent om sneller informatie in de handleiding te vinden of uitleg te krijgen over specifieke functies.
Productinformatie
| Merk | Melchioni |
| Model | MF 2460IND |
| Categorie | Ventilator |
| Taal | Nederlands |
| Grootte | 6107 MB |


