Melchioni BBQ2 handleiding
Handleiding
Je bekijkt pagina 11 van 36
10
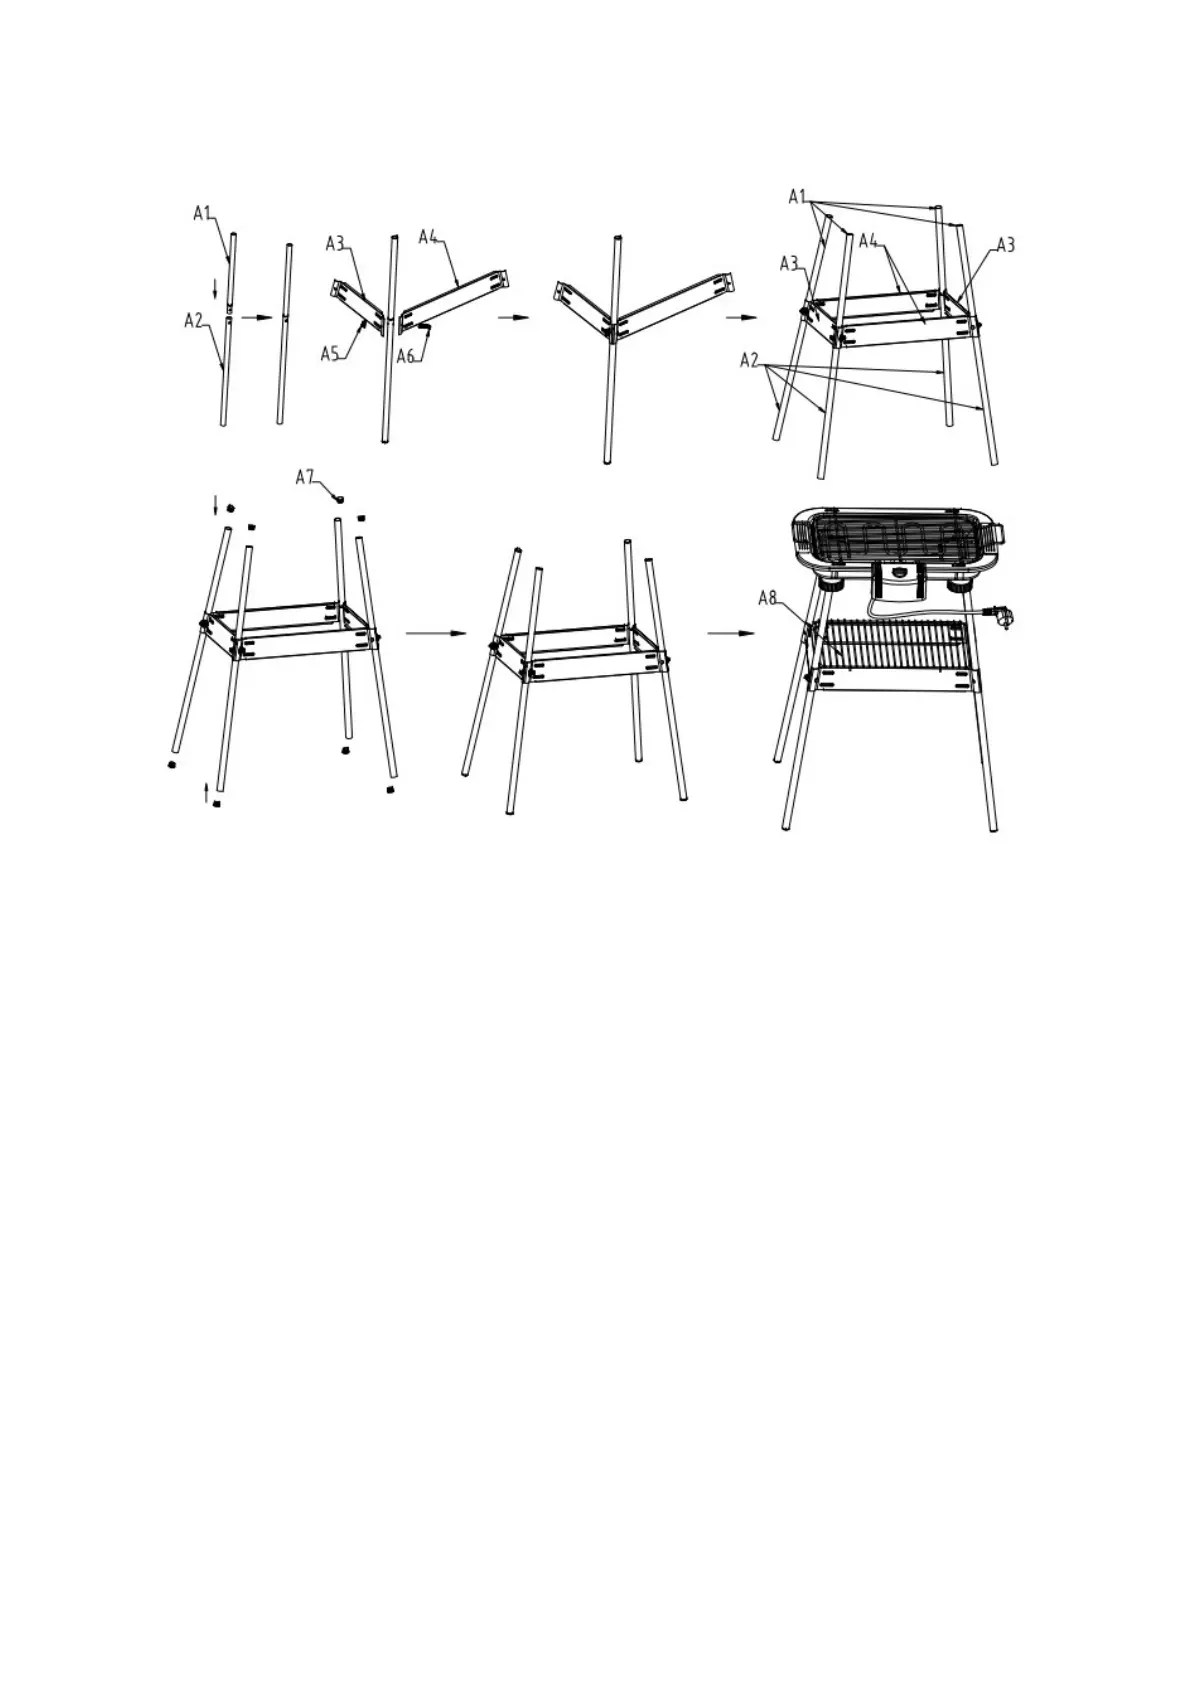
8. Fix the grill rack on top.
A1. Short pipe A2. Long pipe A3. Short metal shelf A4. Long metal shelf
A5. Butterfly nut A6. M5 screw A7. Fitting A8. Small grill
STAND ASSEMBLY
1. Fix part A1 into A2 as above picture
2. Using Screw M5 to fix through A3&A3 together with the party did from above process, then using A5 for
fixing.
3. Finishing all assembling with all other 3pcs of stands as above process, finally completing with fittings as
above picture.
4. Fix up the finished BBQ unit as instruction ‘BBQ assembly” on top of above stand party A8.See picture
above.
5. Let the grill heat up for a moment without any food on the rack. This will reduce the smell when first
switching on a new grill (a slight smell and a little smoke may be emitted, ensure sufficient ventilation).
HOW TO USE YOUR BARBECUE
1. Insert the plug into the mains supply socket.
2. Set the thermostat control knob to its ‘Max.’ position. The indicator light turns on, and the heating
element is permanently switched on.
3. When it is first switched on, the grill may emit a new smell. A small amount of smoke may also be
noticeable. We therefore recommend you to heat up the barbecue for about 5 minutes without any food
stuffs.
4. After approximately 5-10 minutes, the heating element reaches the right temperature for grilling. When
you grilling the food stuffs, you can turn the thermostat control knob back to a lower position and/or
Bekijk gratis de handleiding van Melchioni BBQ2, stel vragen en lees de antwoorden op veelvoorkomende problemen, of gebruik onze assistent om sneller informatie in de handleiding te vinden of uitleg te krijgen over specifieke functies.
Productinformatie
| Merk | Melchioni |
| Model | BBQ2 |
| Categorie | Niet gecategoriseerd |
| Taal | Nederlands |
| Grootte | 6316 MB |
Caratteristiche Prodotto
| Soort bediening | Draaiknop |
| Kleur van het product | Zwart |
| Hoogte | 81 mm |
| Vormfactor | Rechthoekig |
| Afneembaar grillrek | Ja |


