Martin VC-Grid 15 handleiding
Handleiding
Je bekijkt pagina 10 van 32
10 VC-Grid Safety and Installation Guide
Physical installation
Warning! Read “Safety Information” on page 4 and “Precautions to avoid damage” on page 7 before
installing the VC-Grid.
The VC-Grid can be installed in any orientation.
The backs of modules are marked with arrows and the word TOP. To ensure the most evenly matched
optical characteristics when viewing VC-Grids at an angle, install all modules with the arrows facing the
same way. In vertical arrays, install all modules with the arrows pointing upwards and the TOP marking at
the upper edge of the modules.
Allow free airflow around the product and at least 10 mm (0.4 in.) of clearance around the LEDs on the front
surface.
To maintain even pixel spacing across multiple VC-Grids so that they form a seamless display surface,
install them with the following gaps between the edges of modules, both horizontally and vertically:
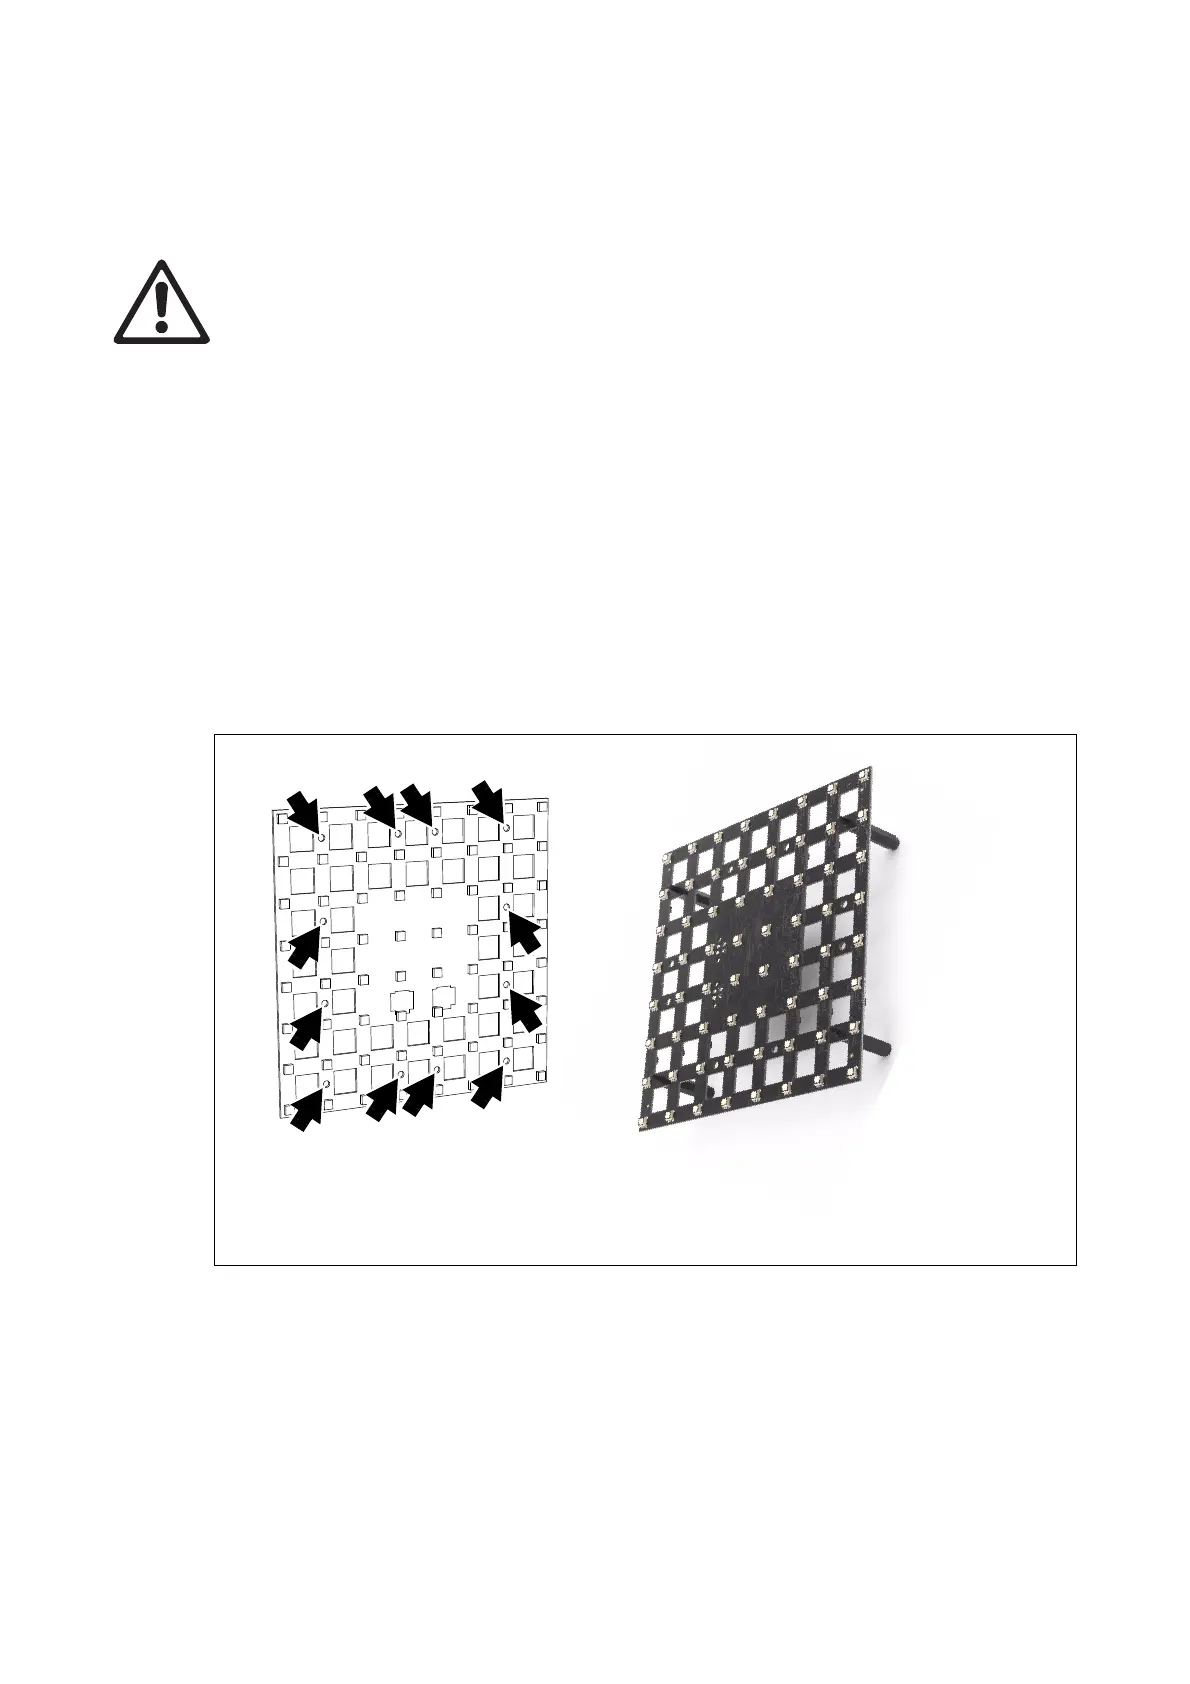
See Figure 2. The VC-Grid can be fastened to a surface or structure using pillar bolts through any four of the
mounting holes (arrowed). Arrange pillar bolts so that they are evenly spaced around the product. Add
non-conductive washers on both sides of the VC-Grid.
• VC-Grid 16x16 15 . . . . 5 mm
• VC-Grid 8x8 25 . . . . . 15 mm
• VC-Grid 8x8 30 . . . . . 20 mm
• VC-Grid 8x8 60 . . . . . 40 mm
• VC-Grid 4x4 60 . . . . . 40 mm
Figure 2: Mounting method
VC-Grid 8x8 25 illustrated
Bekijk gratis de handleiding van Martin VC-Grid 15, stel vragen en lees de antwoorden op veelvoorkomende problemen, of gebruik onze assistent om sneller informatie in de handleiding te vinden of uitleg te krijgen over specifieke functies.
Productinformatie
| Merk | Martin |
| Model | VC-Grid 15 |
| Categorie | Niet gecategoriseerd |
| Taal | Nederlands |
| Grootte | 1816 MB |


