Livarno Lux IAN 286986 handleiding
Handleiding
Je bekijkt pagina 14 van 50
14 GB/IE
Initial Use / Cleaning / Storage / Disposal / Warranty and ServiceInitial Use
Initial Use
Examining the light and the
scope of delivery
NOTE: RISK OF DAMAGE! If you carelessly
use a sharp knife or another pointed object to
open the packaging it could damage the light.
Be carefully when opening the packaging.
1. Remove the light from the packaging.
2. Check that all items included in the scope of
delivery are present (see illustrations).
3. Check to see if the light or the individual parts
are visibly damaged. If this is the case, do not
use the light. Contact the manufacturer using
the service address stated.
Assembling the light
DANGER OF ELECTRIC
SHOCK! A faulty electrical installation or a
supply voltage which is too high could lead to
an electrical shock.
Only connect the light to a power supply if you
have the expertise required to do so. If you do
not have the expertise required, please contact
a professional.
Never install the light if you are having difficulty
concentrating or do not feel well.
NOTE: RISK OF DAMAGE! Ceilings which are
not made from concrete could be damaged during
drilling.
If the light will not be attached to a concrete cei-
ling, consult a professional to procure suitable
assembly material.
Model WS-CLA12WG1 (round):
1. Unscrew the fuse and / or switch off the circuit
breaker and secure the circuit from accidental
starting.
2. Using a metal test instrument, ensure that there
are no cables or pipes in the drilling ranges.
3. If necessary, choose another place to install
the light.
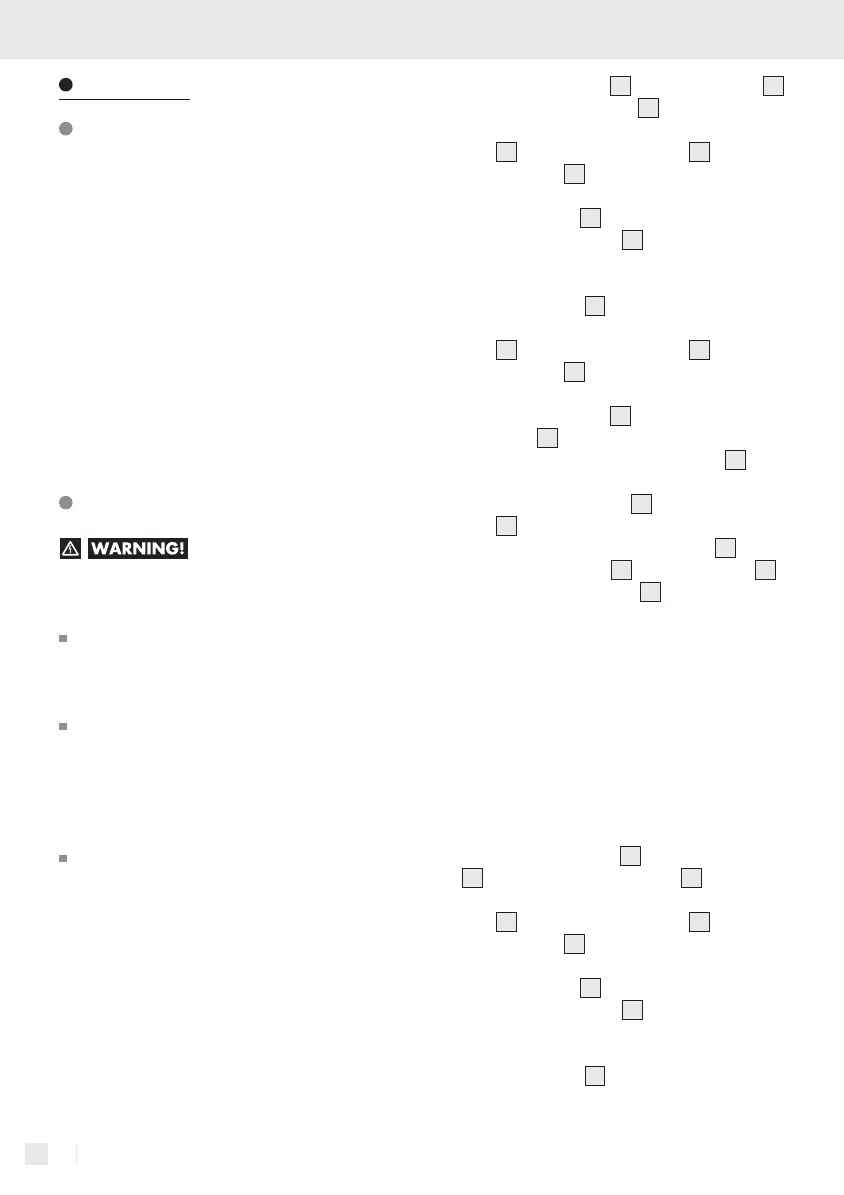
4.
Remove the light cover
6
from the base plate
3
by rotating the light cover
6
counterclockwise.
5. Guide the connection cable through the rubber
tube
1
and the base plate hole
3
and place
the base plate
3
on the ceiling.
6. Mark the drilling ranges using the screw holes
in the base plate
3
.
7. Remove the base plate
3
again.
8. Using a 6 mm masonry drill, drill an approx.
30 mm deep hole into the marked positions.
9. Insert a wall plug
2
into each drill hole.
10. Guide the connection cable through the rubber
tube
1
and the base plate hole
3
and place
the base plate
3
on the ceiling, so that the
screw holes are congruent with the drill holes.
11. Screw the base plate
3
to the ceiling using
the screws
5
.
12. Open the cover cap on the LED driver
4
.
13. Connect the connection cable with correct pola-
rity to the terminal block
7
and put the rubber
tube
1
completely over the connection cable.
14. Screw the cover cap to the LED driver
4
again.
15. Attach the light cover
6
to the base plate
3
by rotating the light cover
6
clockwise.
16. Screw the fuse on and / or switch the circuit
breaker on again.
Model WS-CLA12WR1 (square):
1. Unscrew the fuse and / or switch off the circuit
breaker and secure the circuit from accidental
starting.
2. Using a metal test instrument, ensure that there
are no cables or pipes in the drilling ranges.
3. If necessary, choose another place to install
the light.
4. Remove the light cover
6
from the base plate
3
by rotating the locking lever
8
open.
5. Guide the connection cable through the rubber
tube
1
and the base plate hole
3
and place
the base plate
3
on the ceiling.
6. Mark the drilling ranges using the screw holes
in the base plate
3
.
7. Remove the base plate
3
again.
8. Using a 6 mm masonry drill, drill an approx.
30 mm deep hole into the marked positions.
9. Insert a wall plug
2
into each drill hole.
286986_livx_LED-Wand-und Deckenleuchte_content_OS.indd 14 08.06.17 12:57
Bekijk gratis de handleiding van Livarno Lux IAN 286986, stel vragen en lees de antwoorden op veelvoorkomende problemen, of gebruik onze assistent om sneller informatie in de handleiding te vinden of uitleg te krijgen over specifieke functies.
Productinformatie
| Merk | Livarno Lux |
| Model | IAN 286986 |
| Categorie | Verlichting |
| Taal | Nederlands |
| Grootte | 4672 MB |


