Handleiding
Je bekijkt pagina 26 van 57
26 Part Number 20000095 Rev J 5/15
Maintenance Section 4
15. Install top and bottom fingers in the oven by sliding
them over the plenum flange and setting on the front
bracket. BE SURE THAT THE FINGER SETS SQUARELY
OVER THE PLENUM FLANGES AND THE HOLES POINT IN
THE PROPER DIRECTION. Top fingers point down. Install
in the same position they were removed from.
16. Install the door.
17. Reinstall the conveyor. Ensure front door is in place
prior to installing the conveyor. Trying to install the
conveyor without the door in place is very difficult and
may cause damage to the unit. Insert the conveyor
through the opening in the right side. Sprocket will be
to the right side of the conveyor.
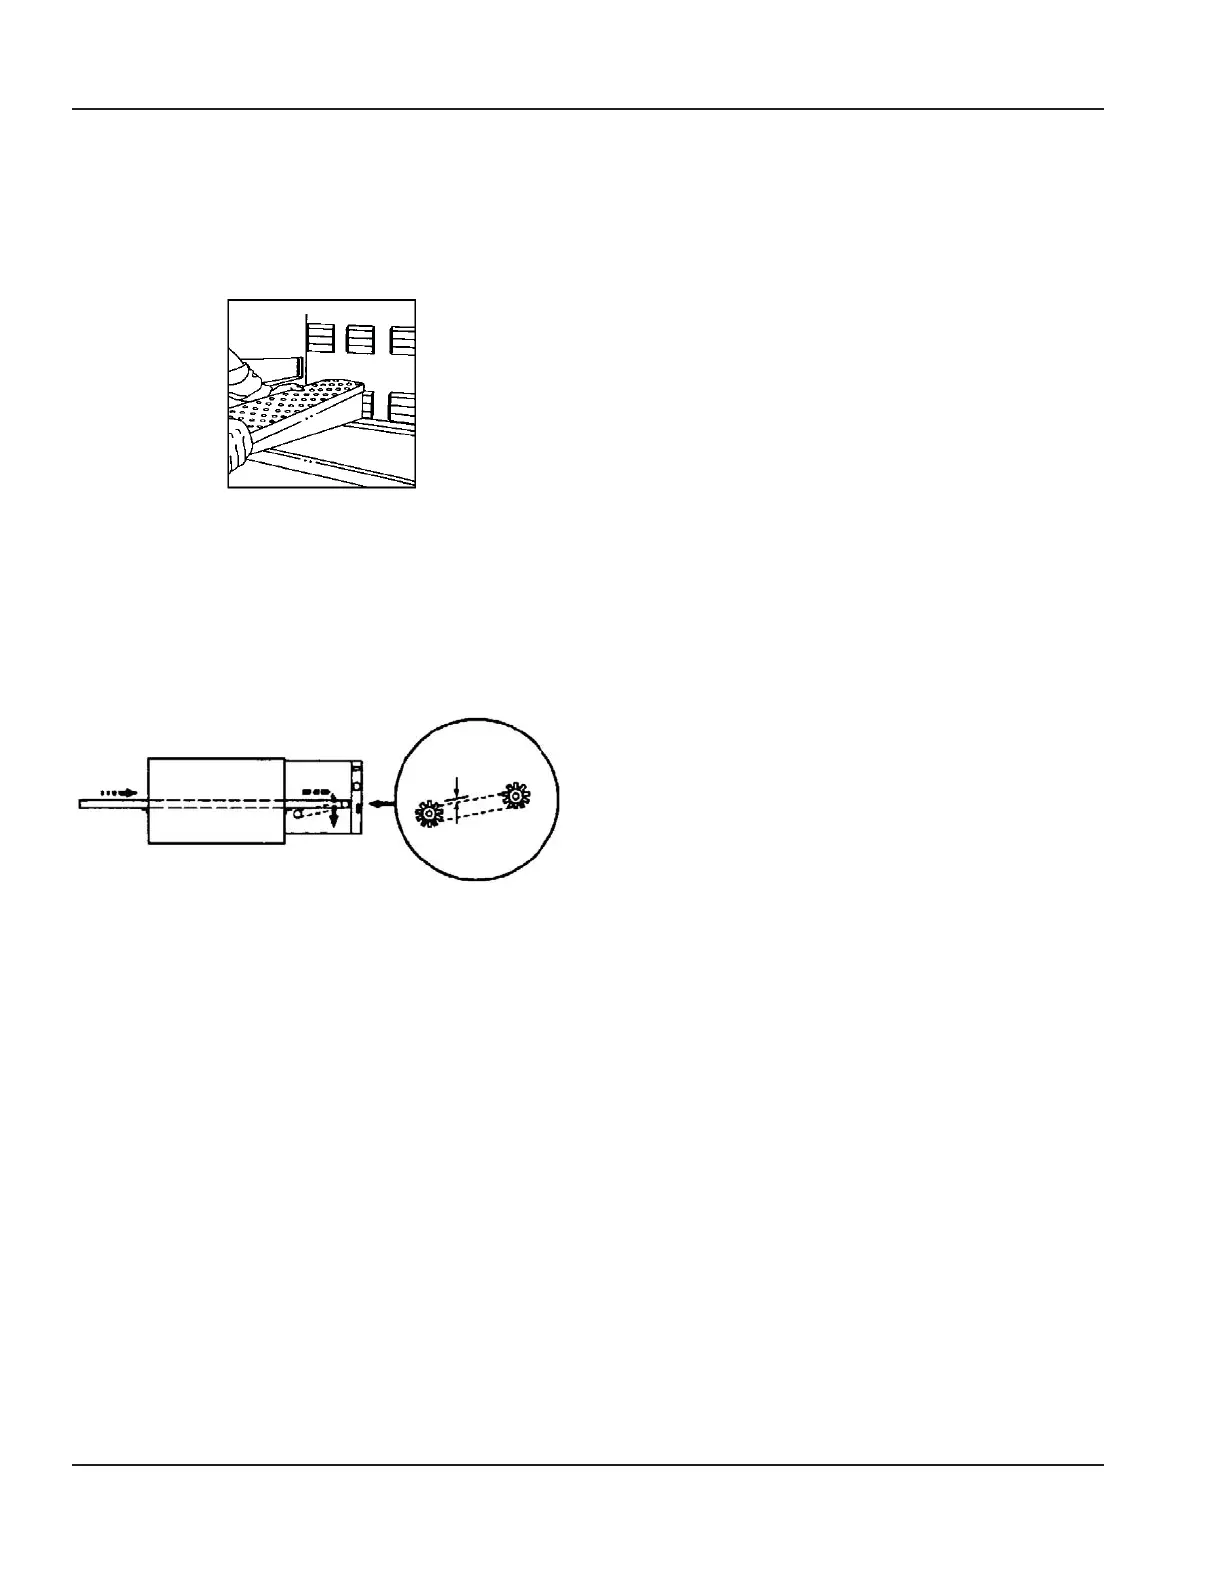
Conveyor Replacement
Conveyor
Drive
Sprocket
Drive Motor
Sprocket
Drive Chain
1/2" Sag
18. Slide conveyor through the oven chamber until
the locking bar on the drive end of the conveyor is
approximately 2" – 3" (50 – 76 mm) into the oven
chamber. Install drive chain by placing it over the drive
sprocket and placing it over the conveyor sprocket.
19. Lift conveyor just enough to allow you to pull the
conveyor toward you until the locking bar is outside of
the oven cavity. At the same time, push the conveyor
downward so that the bar locks on the outside of the
oven wall.
20. Inspect sprocket alignment and adjust if necessary.
21. Reinstall conveyor crumb pans and chain guard cover.
22. Reapply power.
Bekijk gratis de handleiding van Lincoln Impinger FASTBAKE, stel vragen en lees de antwoorden op veelvoorkomende problemen, of gebruik onze assistent om sneller informatie in de handleiding te vinden of uitleg te krijgen over specifieke functies.
Productinformatie
| Merk | Lincoln |
| Model | Impinger FASTBAKE |
| Categorie | Oven |
| Taal | Nederlands |
| Grootte | 6285 MB |
