Handleiding
Je bekijkt pagina 9 van 24
Ensure that the following conditions are met:
q
Only move the device when it is not loaded.
q
Only install the appliance with help.
u
Remove the mains cable from the package.
u
Plug the mains cable’s IEC socket completely into the
appliance plug on the back of the appliance. Ensure that
the IEC socket is tight.
u
Use a cord to lay the mains plug to a freely accessible
socket if required.
4.9 After setting up
u
Take off the protective film from the exterior of the appli‐
ance.
u
Take off the protective film from the trim panels and
drawer fronts.
u
Remove all transport safety components.
u
Clean the device. (see 9.3Cleaning the appliance)
u
Note the type (model, number), appliance designation,
appliance/serial number, purchase date and dealer’s
address.
4.10 Disposing of packaging
WARNING
Danger of suffocation due to packing material and plastic
film!
u
Do not allow children to play with packing material.
The packaging is made of recyclable materials:
-
corrugated board/cardboard
-
expanded polystyrene parts
-
polythene bags and sheets
-
polypropylene straps
-
nailed wooden frame with polyethylene panel*
u
Take the packaging material to an official collecting
point.
4.11 Swapping the door hinge side
Tool
Fig.8
WARNING
Danger of injury due to door falling out!
If the bearing parts are not screwed on tightly enough, the
door may fall out. This can result in serious injuries. In
addition, the door may not close with the result that the
appliance does not cool properly.
u
Screw on the bearing brackets/bearing pins tightly with
4Nm.
u
Check all screws and retighten them if necessary.
Fig.9
Note the direction of reading.
4.11.1 Preparation
u
Tilt the device backwards with two persons.
4.11.2 Loosen the lower bearing components
CAUTION
Risk of injury if the door tips!
u
Take good hold of the door.
u
Set down the door carefully.
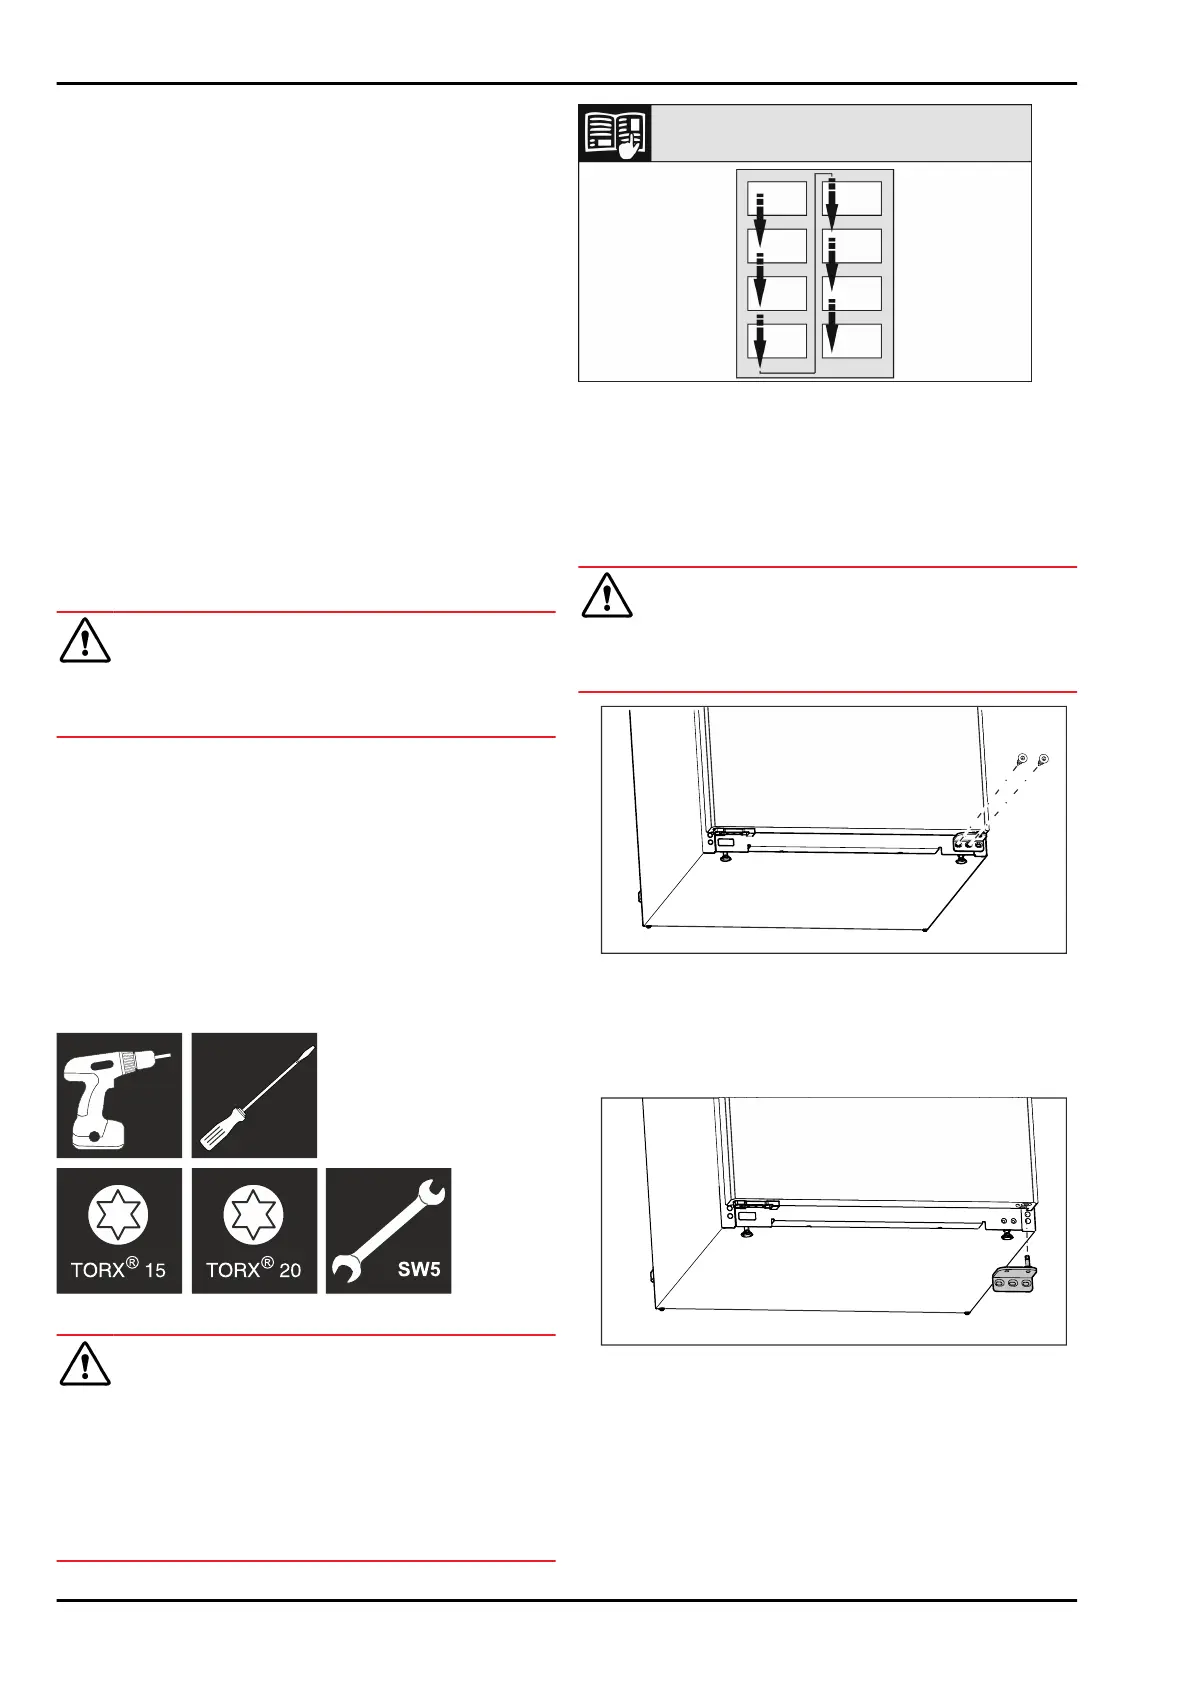
Fig. 10
u
Unscrew the middle screw on the lower swap bearing
block with a Torx 20 screwdriver. (see Fig. 10)
u
Unscrew the inner screw on the lower swap bearing
block with a Torx 20 screwdriver. (see Fig. 10)
u
Put the screws aside.
Fig.11
u
Remove the swap bearing block downwards. (see Fig.11)
u
Set the swap bearing block aside.
Installation conditions
* Depending on model and options 9
Bekijk gratis de handleiding van Liebherr TG 14Vd04, stel vragen en lees de antwoorden op veelvoorkomende problemen, of gebruik onze assistent om sneller informatie in de handleiding te vinden of uitleg te krijgen over specifieke functies.
Productinformatie
| Merk | Liebherr |
| Model | TG 14Vd04 |
| Categorie | Vriezer |
| Taal | Nederlands |
| Grootte | 3586 MB |


