Handleiding
Je bekijkt pagina 13 van 43
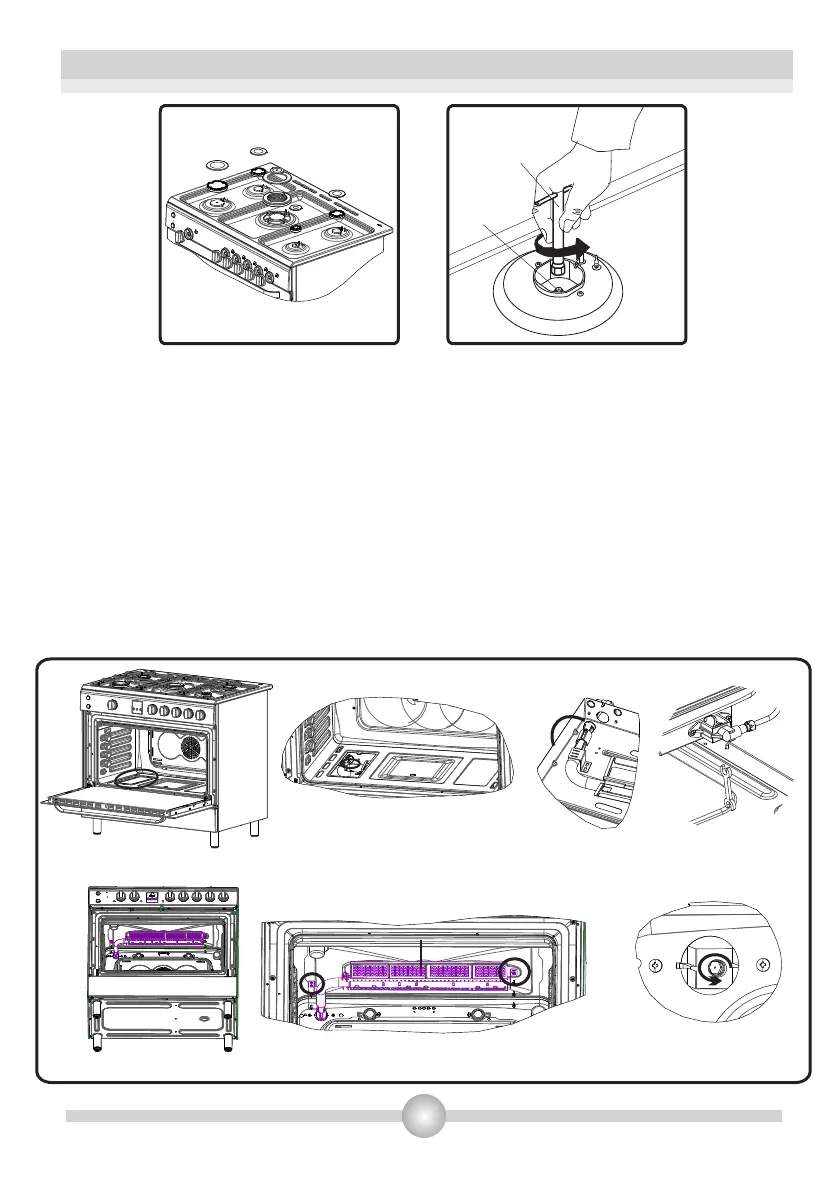
Oven/Grill Injectors:
To replace oven injector, open the oven door. Dismount the burner cover by removing the screws
(Figure 9.1) . Remove the screws which are fastened the burner to the below side of inner case
(Figure 9.2) and turn the burner carefully to yourself (Figure 9.3) . Remove the oven back panel and
The oven injector is visible and can be replace from back side with M6 spanner (Figure 9.4) .
To replace the grill injector, open the oven door and remove the screws which are fastened the grill
burner top side of inner case (Figure 9.5.). Pull the grill burner carefully to yourself. Grill injector will
be appear from the side where the burner disassemble (Figure 9.6).
Remove the injectors with a 7mm spanner and replace the injector with the ones from the spare
set, with c
orresponding diameters suitable to the type of gas that is going to be used, according to
the information chart (which is also supplied in the gas conversion kit).
After conversion is completed, it is required to check gas leakage.
2. INSTALLATION AND PREPARATIONS FOR USE
Figure 8
Injector
Spanner
Figure 7
Figure 9.1 Figure 9.2
Figure 9.3
Figure 9.5
Figure 9.4
Figure 9.6
11
Bekijk gratis de handleiding van LG GC-936S, stel vragen en lees de antwoorden op veelvoorkomende problemen, of gebruik onze assistent om sneller informatie in de handleiding te vinden of uitleg te krijgen over specifieke functies.
Productinformatie
| Merk | LG |
| Model | GC-936S |
| Categorie | Oven |
| Taal | Nederlands |
| Grootte | 4692 MB |


