Lenovo ThinkPad X1 2-in-1 Gen 9 handleiding
Handleiding
Je bekijkt pagina 66 van 98
5. Clear the Turn on fast startup check box, and then click Save changes.
To disable the built-in battery:
1. Restart your computer. When the logo screen is displayed, immediately press F1 to enter the UEFI BIOS
menu.
2. Select Config ➙ Power. The Power submenu is displayed.
3. Select Disable built-in battery and press Enter.
4. Select Yes in the Setup Confirmation window. The built-in battery is disabled and the computer turns off
automatically. Wait three to five minutes to let the computer cool.
Note: If your computer cannot enter the UEFI BIOS menu, it is recommended to disconnect the built-in
battery cable before replacing any internal parts.
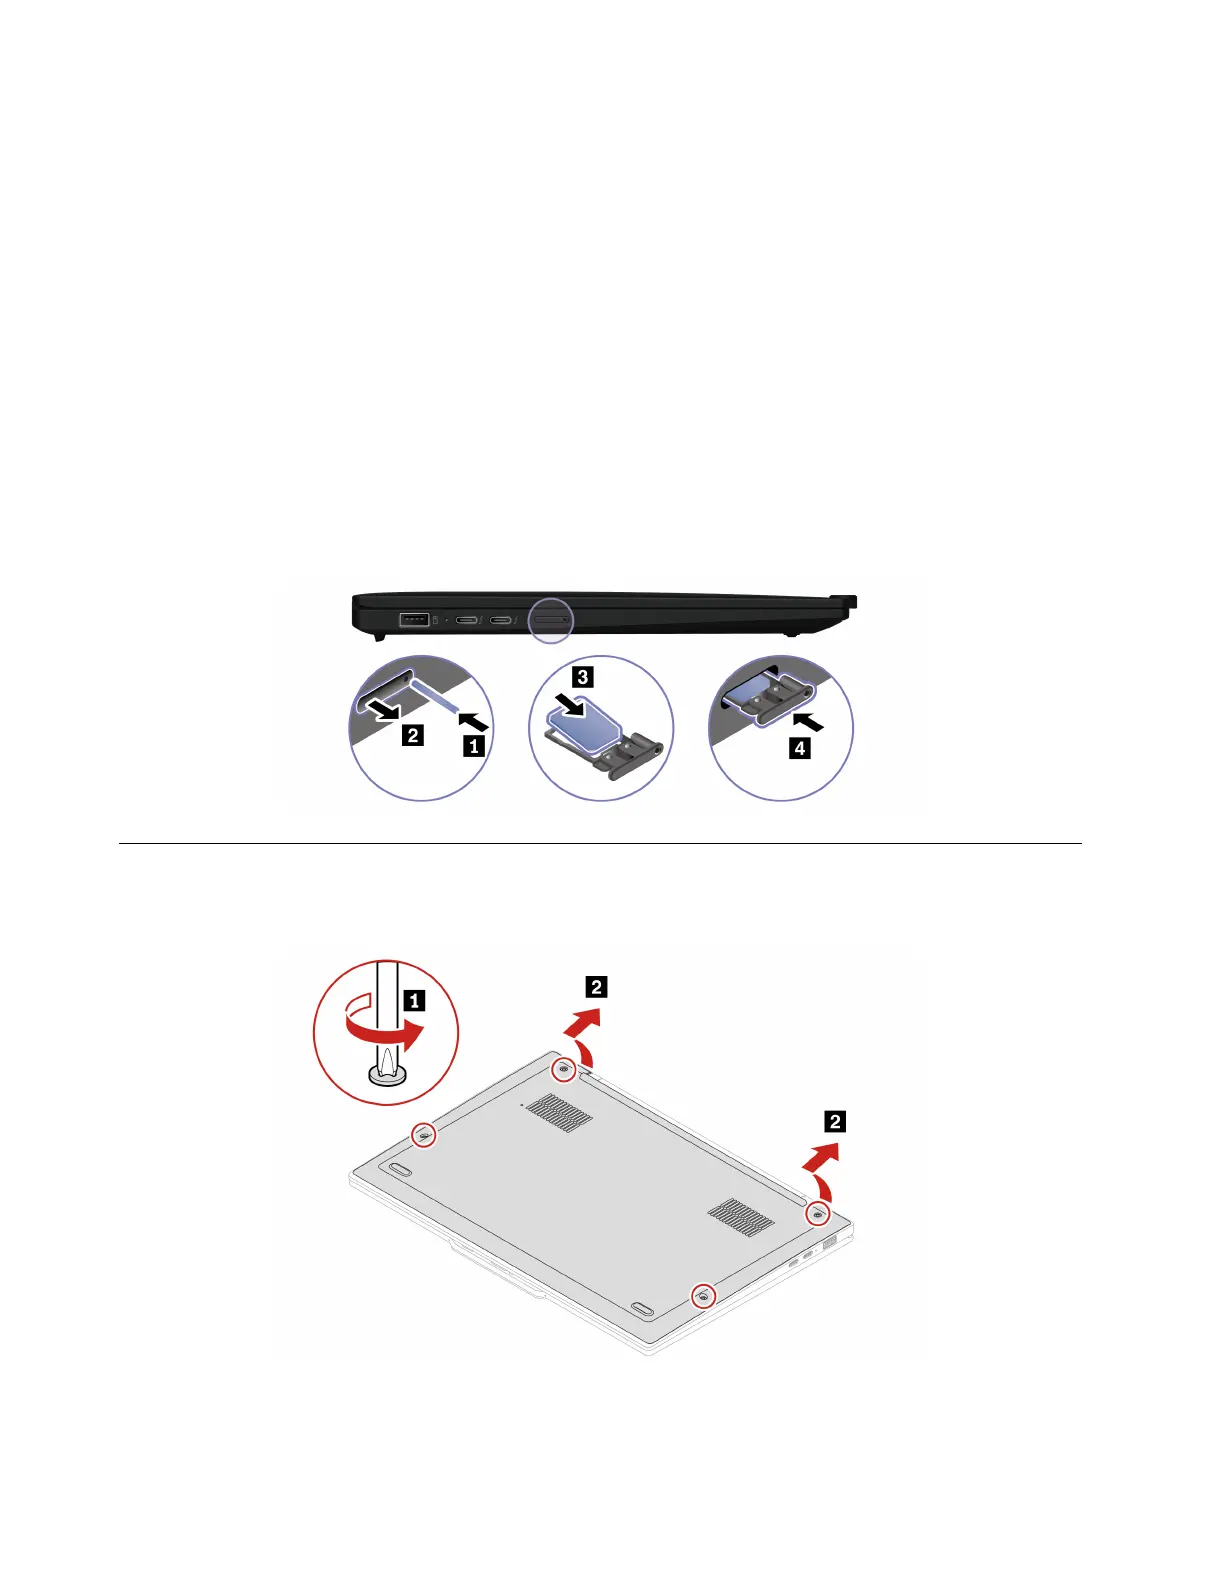
Removing the nano-SIM-card and nano-SIM-card tray
Note: If the computer you are servicing has a nano-SIM card installed, remove the card with the tray
together.
1010 Base cover assembly
Removal steps of the base cover assembly
60 ThinkPad X1 Carbon Gen 12 and ThinkPad X1 2-in-1 Gen 9 Hardware Maintenance Manual
Bekijk gratis de handleiding van Lenovo ThinkPad X1 2-in-1 Gen 9, stel vragen en lees de antwoorden op veelvoorkomende problemen, of gebruik onze assistent om sneller informatie in de handleiding te vinden of uitleg te krijgen over specifieke functies.
Productinformatie
| Merk | Lenovo |
| Model | ThinkPad X1 2-in-1 Gen 9 |
| Categorie | Niet gecategoriseerd |
| Taal | Nederlands |
| Grootte | 12424 MB |
Caratteristiche Prodotto
| Kleur van het product | Grijs |
| Gewicht | 1350 g |
| Breedte | 312.8 mm |
| Diepte | 217.65 mm |
| Hoogte | 15.49 mm |


