Kramer VIA Connect3 handleiding
Handleiding
Je bekijkt pagina 5 van 8
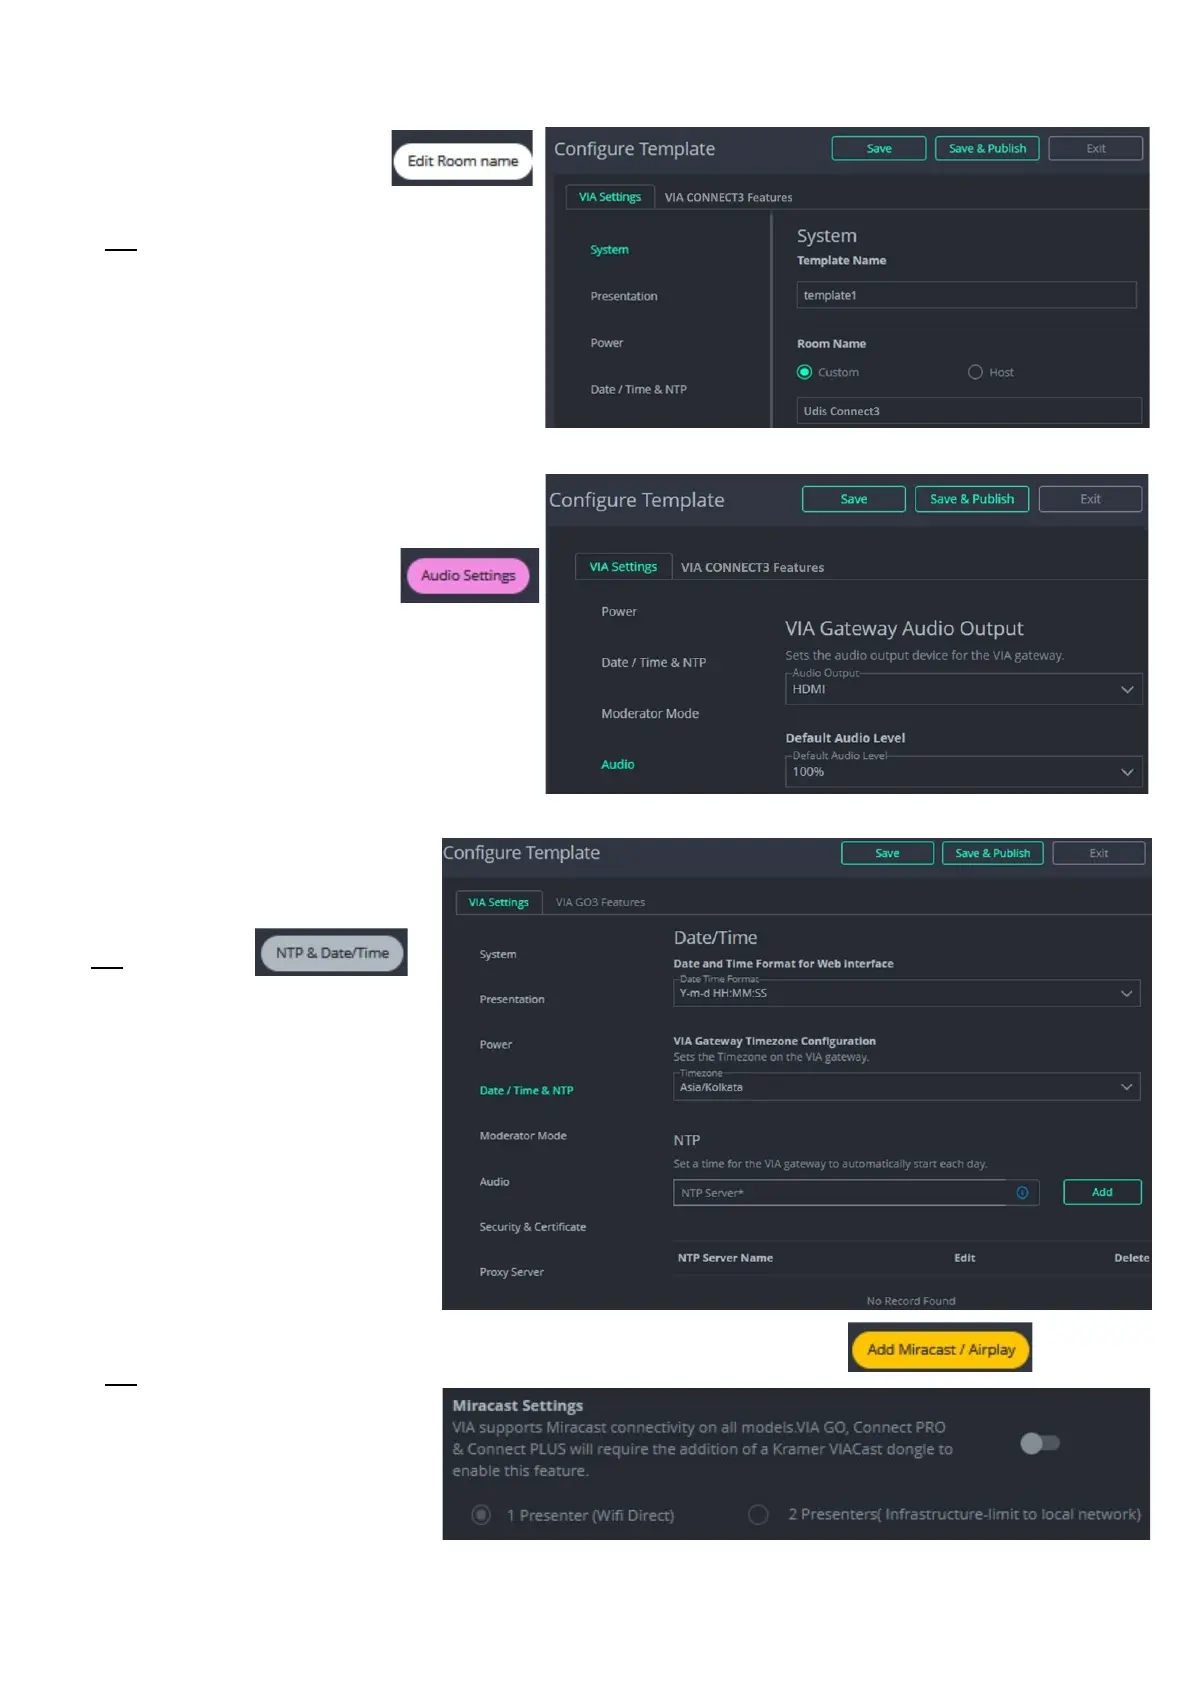
Common VIA Settings Changes
Change the Room name
1. Click “Edit Room name”
in the Dashboard’s Quick Links
OR open the VIA Settings screen and
click the Edit icon on the “Active”
template to open the default VIA
Settings > System tab.
2. By default, the room name uses the
Host name. To change the room name,
click “Custom” and enter a new name.
3. Click Save & Publish.
Set Audio Settings
1. Click “Audio Settings” in
the Dashboard’s Quick Links
OR open VIA Settings and click the Edit
icon on the “Active” template; then
select the VIA Settings > Audio tab.
2. Select the required “Audio Output”
device and click Save & Publish.
Set Date / Time & NTP
1. Click “NTP & Date/Time” in
the Dashboard’s Quick Links.
OR open the
VIA Settings
screen and click the Edit icon
next to the “Active” template;
then select the VIA Settings >
Date / Time & NTP tab.
2. Select the required date
format, time zone, enter the
NTP Server’s IP and click Save
& Publish.
Set Miracast / Airplay
1. Click on “Add Miracast / Airplay” in the Dashboard’s Quick Links
OR open the VIA Settings
screen and click the Edit icon
next to the “Active” template;
then select the VIA Settings >
Presentation tab.
2. Enable Miracast Settings by
moving the slider right.
3. Then click Save & Publish.
Bekijk gratis de handleiding van Kramer VIA Connect3, stel vragen en lees de antwoorden op veelvoorkomende problemen, of gebruik onze assistent om sneller informatie in de handleiding te vinden of uitleg te krijgen over specifieke functies.
Productinformatie
| Merk | Kramer |
| Model | VIA Connect3 |
| Categorie | Niet gecategoriseerd |
| Taal | Nederlands |
| Grootte | 3493 MB |


