Handleiding
Je bekijkt pagina 7 van 20
Kramer Electronics Ltd.
CL-6P – Installation Guide
5
Mounting the Speaker
The ceiling speaker could be installed in a suspended acoustic ceiling grid by two methods:
• By using the dedicated ceiling mounting kit that includes a C-ring and a pair of tile-mounting
rails (CSMR). The C-ring distributes the pressure applied by the dog ears and prevents
damaging the ceiling tile while the tile mounting rails distribute the load to the ceiling tile grid.
Note: The C-ring is supplied with the speaker, the ceiling mounting rails (CSMR)
should be purchased separately.
• By using a pre-cut wooden base in which the speaker is installed. In this case there is no need
for the tile mounting rails, we do recommend using the C-ring (supplied with the speaker) to
better distribute the pressure applied by the dog ears to the wooden plate.
Installation guide
• Remove the ceiling tile where you plan to install the speaker.
• Use the supplied cutout template to trace and cut the speaker hole in the ceiling tile. Ensure
the center of the cutout aligns with the center of the tile.
• Insert the speaker into the tile, ensuring the visible side of the tile is facing downward.
• Place the C-ring and mounting rails above the tile. Do not fasten the mounting rails to the C-
ring at this stage.
• Using a screwdriver, fasten the dog-ears to the C-ring. Ensure the dog-ears grip the C-ring and
do not come into direct contact with the tile, as this may damage it. Do not overtighten the
dog-ears.
• Place the tile with the speaker in its designated location in the ceiling grid. Ensure the
mounting rails properly engage the grid, then fasten them to the C-ring using the supplied
bolts.
• Pass the speaker cable through the designated hole in the baffle and through the cable
passthrough cap (either the silicone cap or the metal cap).
• Connect the speaker wires to the terminal connector. We recommend maintaining consistent
color coding—for example: red wires to positive (+) terminals and black wires to negative (–)
terminals.
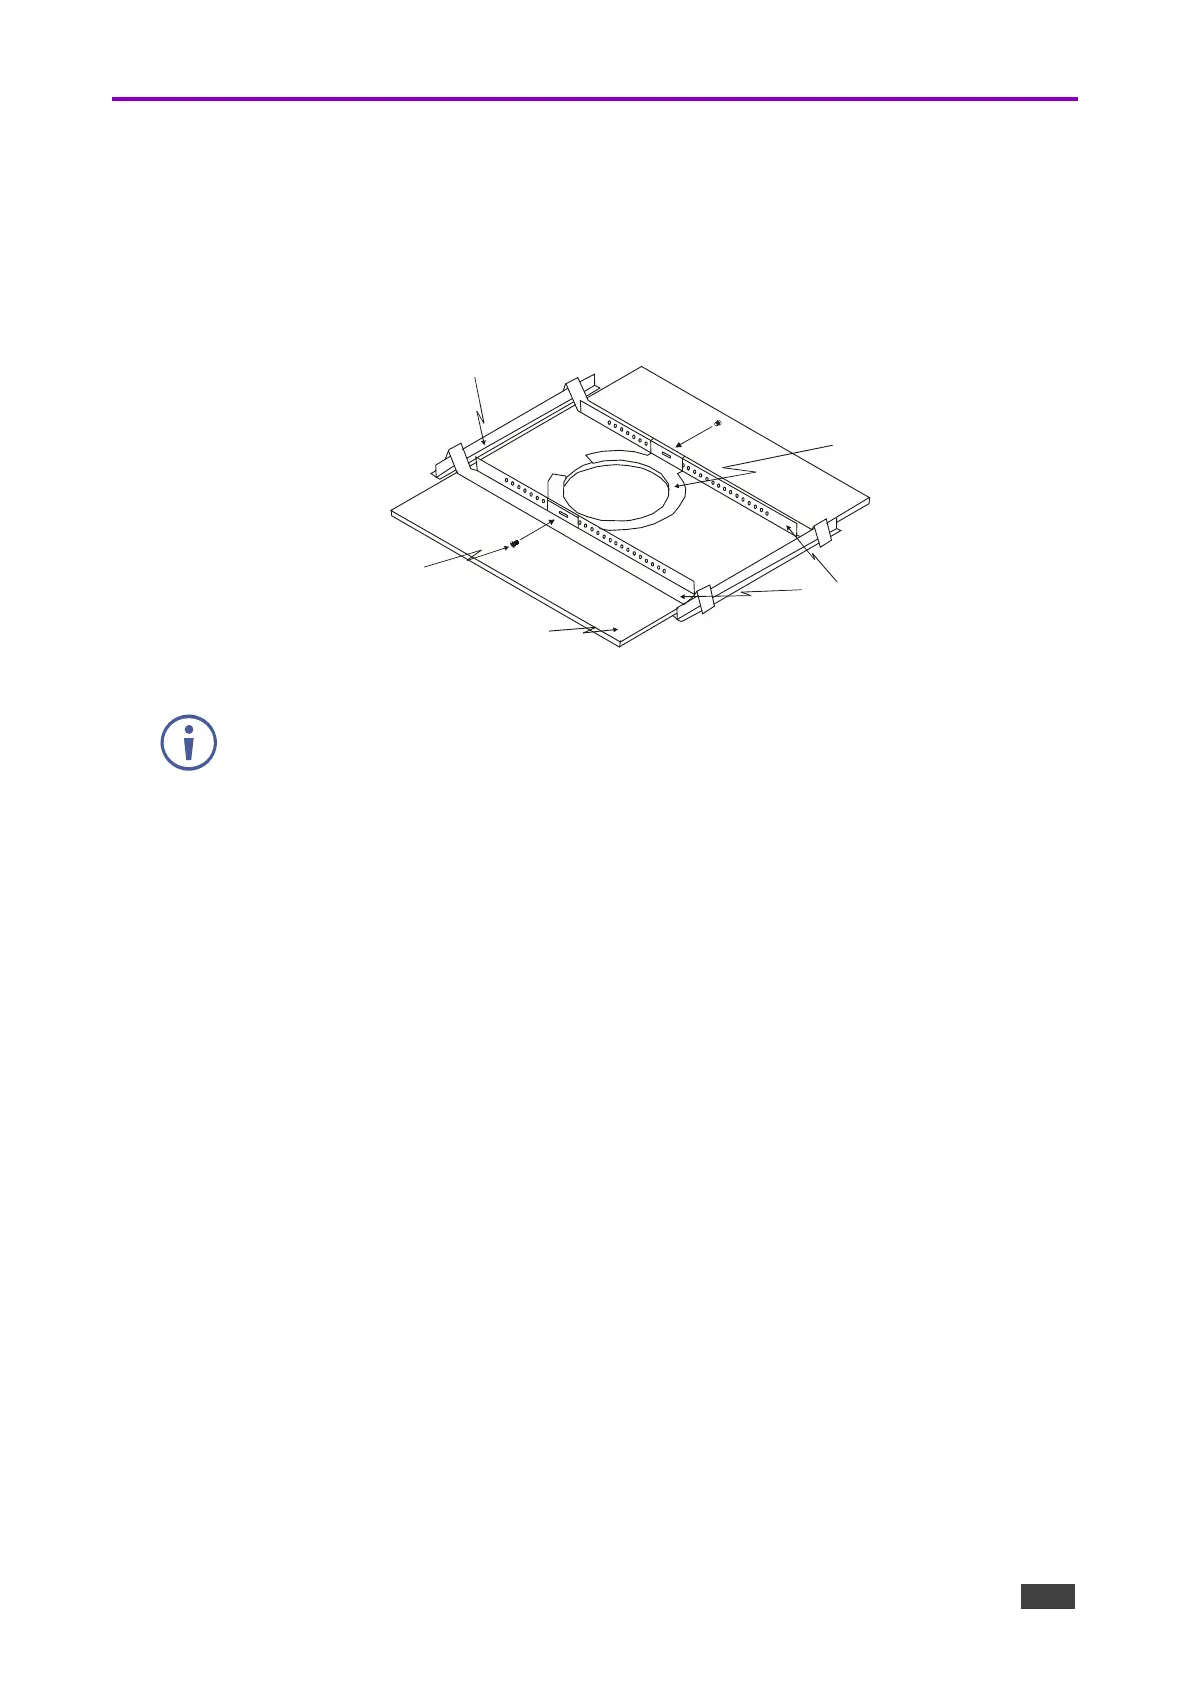
T-channel Grid
Support Ring
Screws
Ceiling Tile
Tile Rails
C-ring
Figure 2 - Mounting the CL-6P in a suspended acoustic ceiling grid
Bekijk gratis de handleiding van Kramer CL-6P, stel vragen en lees de antwoorden op veelvoorkomende problemen, of gebruik onze assistent om sneller informatie in de handleiding te vinden of uitleg te krijgen over specifieke functies.
Productinformatie
| Merk | Kramer |
| Model | CL-6P |
| Categorie | Speaker |
| Taal | Nederlands |
| Grootte | 2638 MB |


