KitchenAid KUIX515SPS handleiding
Handleiding
Je bekijkt pagina 13 van 48
13
13. Coil ice maker power cord into a 4" (10.2 cm) diameter coil.
Wrap electrical tape around the power cord in several places
to keep the cord in a coil. Locate coiled power cord between
the drain pump and side of enclosure and plug into the
receptacle of the drain pump. See “Parts Locations”
illustration in step 7.
14. Attach the drain pump power cord to ice maker unit base with
clamp and screw (removed in step 12) that was used to attach
ice maker power cord. See “Parts Locations” illustration in
step 7.
15. For standard model, place new rear panel (small one for 15"
ice maker, large one for 18") against the back of the ice maker.
For custom panel model, reuse the plastic rear panel
(removed in step 2). Route the vent tube and drain pump
discharge tube through cutouts in the rear panel.
16. Secure vent tube to back of ice maker using three clamps and
three #8-32 x 3/8" screws, supplied. See “Vent Tube”
illustration in step 10.
17. Attach 1/2" I.D. x 10 ft (3 m) drain tube to pump discharge
tube. See “Parts Locations” illustration in step 7.
NOTE: Do not connect outlet end of drain tube to a closed
pipe system to keep drain water from backing up into the ice
maker.
For standard models, skip to step 20.
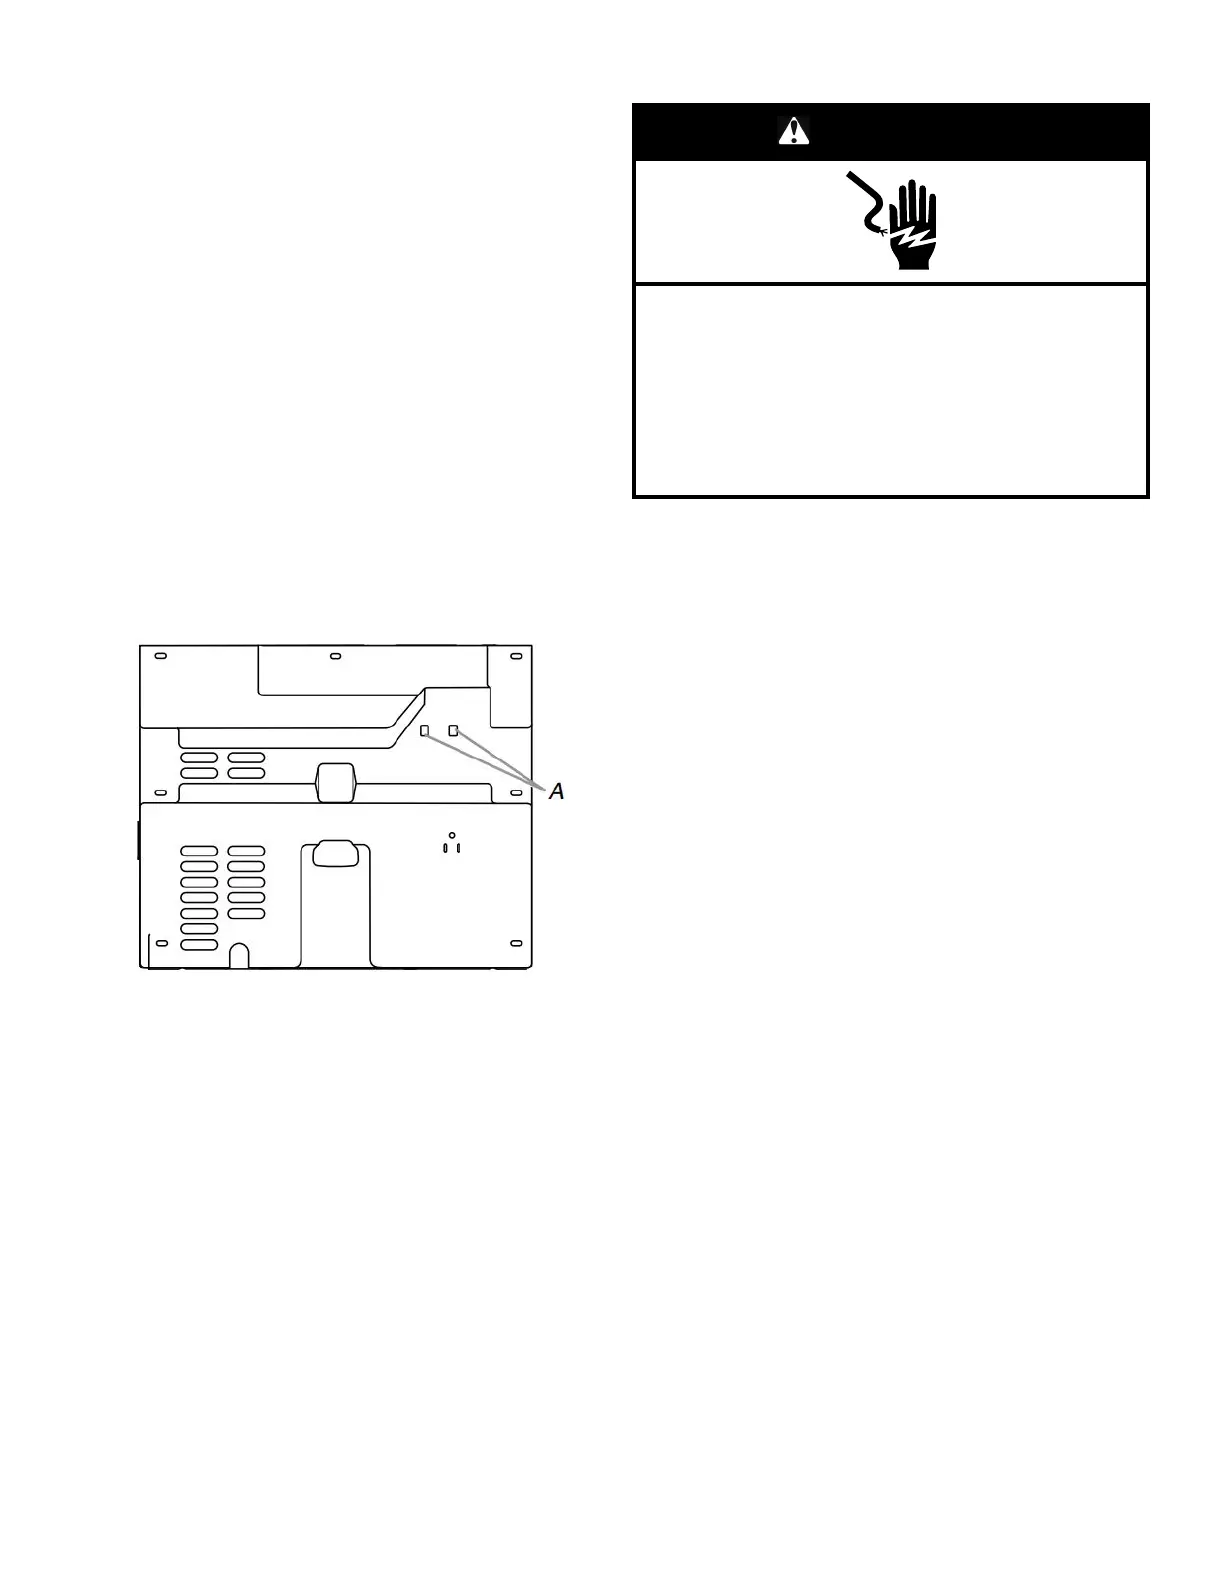
18. Install the cable tie on the rear panel using two holes provided
on the rear panel. Available on some models.
A. Holes to fix the cable tie
19. Using a cable tie, fix the drain tube to rear panel.
20. Secure rear panel with original screws. See “Rear Panel”
illustration in step 2.
21. Connect ice maker to water supply and install ice maker as
specified by the product installation instructions.
NOTE: After unit is connected to power and in its final location:
Pour 1 gallon of water into the ice storage bin; water should drain
out. If it does not, there could be a kinked drain tube. Check drain
tube routing for restrictions. Check for leaks as well.
22. Check all connections for leaks.
WARNING
Electrical Shock Hazard
Plug into a grounded 3 prong outlet.
Do not remove ground prong.
Do not use an adapter.
Do not use an extension cord.
Failure to follow these instructions can result in death,
fire, or electrical shock.
23. Plug in ice maker or reconnect power.
24. Turn on ice maker.
25. Wait for rinsing cycle, approximately 5 minutes, to be sure the
ice maker is operating properly.
Water Supply Requirements
Check that the water supply lines are insulated against freezing
conditions. Ice formations in the supply lines can increase water
pressure and damage your ice maker or home. Damage from
frozen supply lines is not covered by the warranty.
A cold water supply with water pressure of between 30 psi and
120 psi (207 kPa and 827 kPa) is required to operate the ice
maker. If you have questions about your water pressure, call a
licensed, qualified plumber.
Reverse Osmosis Water Supply
IMPORTANT:
� Do not use with water that is microbiologically unsafe or of
unknown quality without adequate disinfection before or after
the system. Systems certified for cyst reduction may be used
on disinfected waters that may contain filterable cysts.
� A reverse osmosis water filtration system is not recommended
for ice makers that have a drain pump installed.
� For gravity drain systems only.
� Connect to portable water only.
� The pressure of the water supply coming out of a reverse
osmosis system going to the water inlet valve of the ice maker
needs to be between 30 psi and 120 psi (207 kPa and
827 kPa).
If a reverse osmosis water filtration system is connected to your
cold water supply, the water pressure to the reverse osmosis
system needs to be a minimum of 40 psi to 60 psi (276 kPa to
414 kPa).
NOTE: The reverse osmosis system must provide 1 gallon
(3.8 liters) of water per hour to the ice maker for proper ice maker
operation. If a reverse osmosis system is desired, only a
whole-house-capacity reverse osmosis system, capable of
maintaining the steady water supply required by the ice maker, is
recommended. Faucet-capacity reverse osmosis systems are not
able to maintain the steady water supply required by the ice
maker.
Bekijk gratis de handleiding van KitchenAid KUIX515SPS, stel vragen en lees de antwoorden op veelvoorkomende problemen, of gebruik onze assistent om sneller informatie in de handleiding te vinden of uitleg te krijgen over specifieke functies.
Productinformatie
| Merk | KitchenAid |
| Model | KUIX515SPS |
| Categorie | Niet gecategoriseerd |
| Taal | Nederlands |
| Grootte | 10211 MB |


