Kimo PST handleiding
Handleiding
Je bekijkt pagina 9 van 11
• Set the time-delay 1 and the time-delay 2 (600 seconds maximum)
- In rising edge mode, the time-delay 1 corresponds to the time lag before the alarm goes off when the threshold has
been reached. The time-delay 2, corresponds to the time lag before the alarm stops when the measurement is lower
than the threshold minus the hysteresis.
Setting procedure: “Time 1” for the time-delay 1 is displayed then the time in second. The rst digit blinks, press
briey on the button and scroll the gures. Press on the button more than 3 seconds to validate. Repeat the process
until the last digit to set the time-delay 1 value (from 0 to 600 s) and validate. “Time 2” is displayed the time in second.
Repeat the process to set the time-delay 2.
- In falling edge mode, the time-delay 1 corresponds to the time lag before the alarm goes off when the threshold has
been reached. The time-delay 2, corresponds to the time lag before the alarm stops when the measurement is lower
than the threshold plus the hysteresis.
The setting procedure is the same as the rising edge procedure.
- In monitoring mode, the alarm of the transmitter goes off when the measurement is below the lower threshold
and higher the high threshold. The time-delay 1 corresponds to the time lag before the alarm goes off when the
measurement is below the lower threshold and higher the high threshold. The time-delay 2 corresponds to the time lag
before the alarm stops when the measurement is between the lower and higher thresholds.
The setting procedure is the same as the rising edge procedure.
Conguration via LCC-S software (optional)
The software allows to set the alarms, the thresholds, and the time-delay of the manostats.
• To access the conguration via software:
- Set the DIP switches as shown beside.
- Connect the cable of the LCC-S to the connection of the transmitter.
• Please refer to the user manual of the LCC-S to make the conguration.
The conguration of the parameters can be done either with the DIP switch or via software
(you can not combine both solutions). Switch off the sensor before settings process.
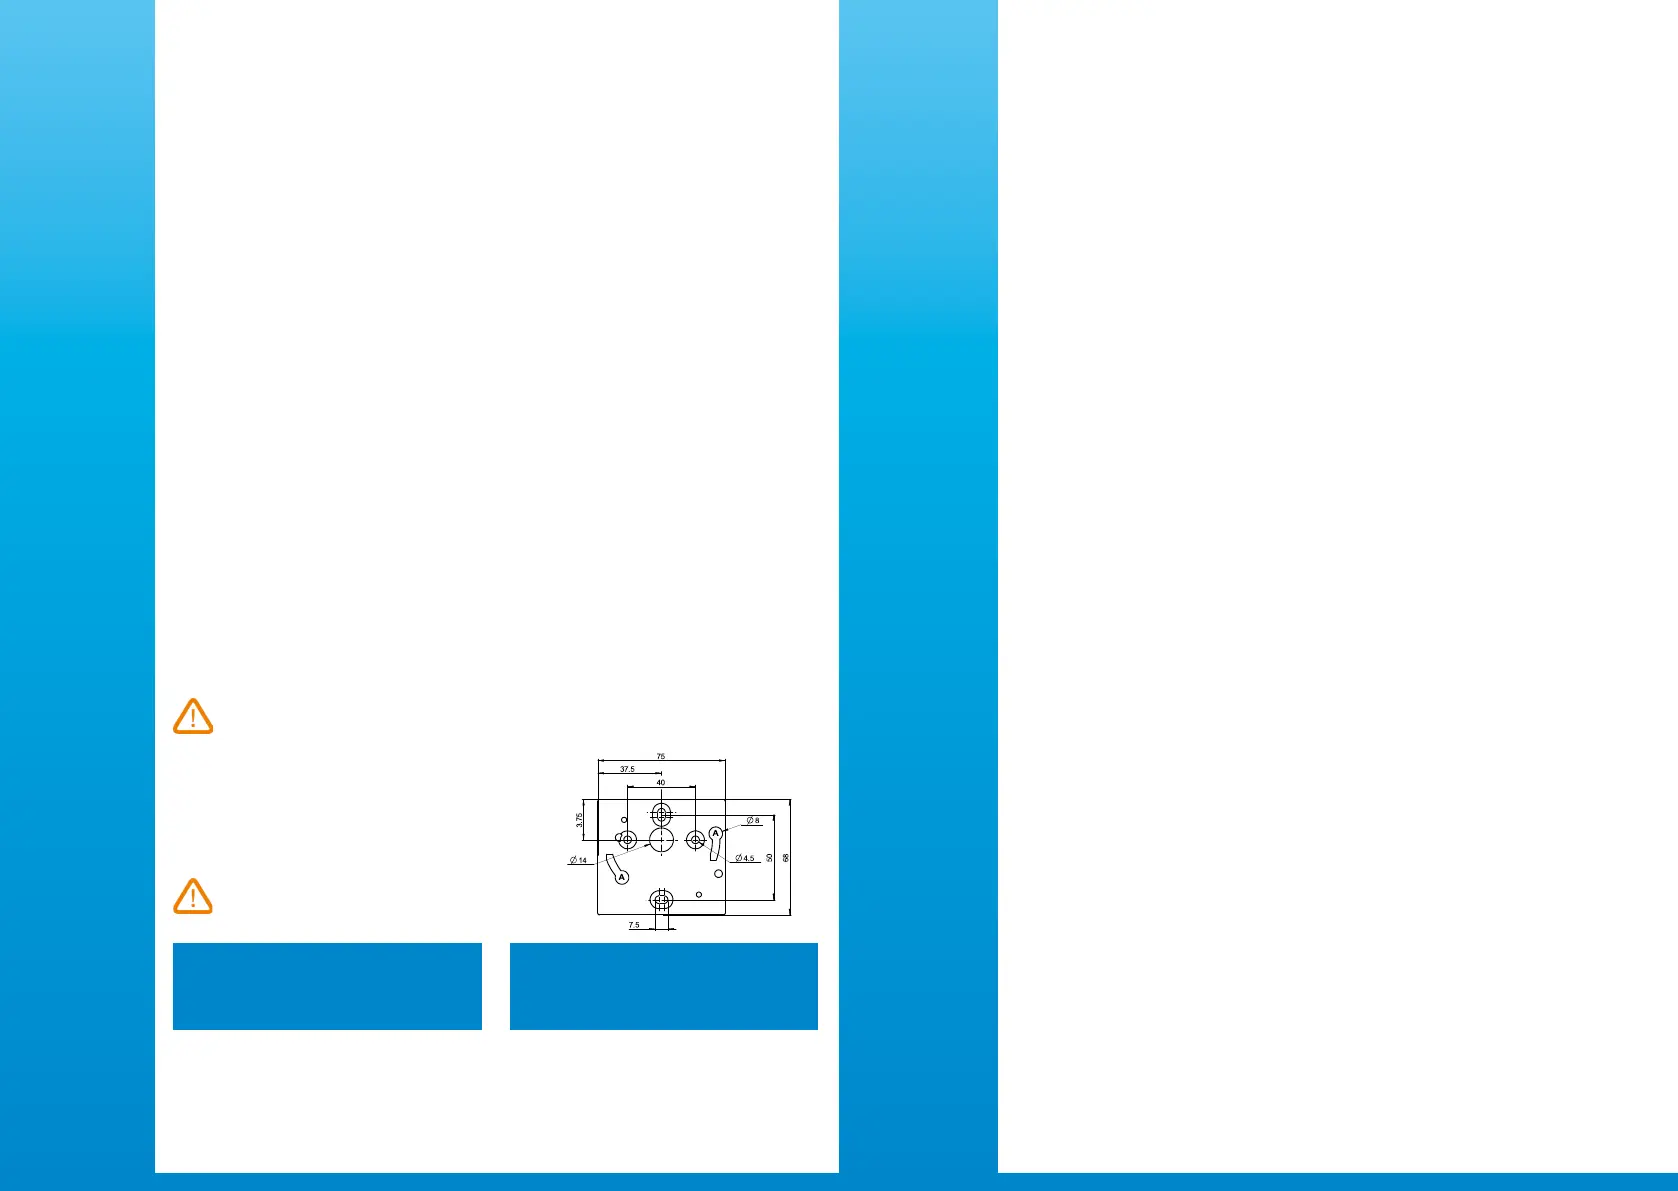
Mounting
To mount the transmitter, mount the ABS plate on the wall
(drilling: Ø 6 mm, screws and pins are supplied).
Insert the transmitter on the xing plate (see A on the drawing
beside). Rotate the housing in clockwise direction until you hear a
“click” which conrms that the transmitter is correctly installed.
2
Once the transmitter is installed and powered up,
please make an autozero to guarantee the correct
working of the transmitter in any position.
Maintenance: please avoid any aggressive solvent.
Please protect the transmitter and its probes from any
cleaning product containing formalin, that may be used for
cleaning rooms or ducts.
Precautions for use: please always use the device in
accordance with its intended use and within parameters
described in the technical features in order not to
compromise the protection ensured by the device.
Accessories
• Set the hysteresis
The hysteresis is only for the rising edge and the falling edge modes.
In rising edge mode, the hysteresis allows to the transmitter to stay in alarm when the measurement is between the
threshold and the threshold minus the hysteresis.
Ex: for a 100 Pa threshold and a 10 Pa hysteresis, the instrument will stay in alarm when the measurement will be
between 100 and 90 Pa.
In falling edge mode, the hysteresis allows to the transmitter to stay in alarm when the measurement is between the
threshold and the threshold plus the hysteresis.
Ex: for a 100 Pa threshold and a 10 Pa hysteresis, the instrument will stay in alarm when the measurement will be
between 100 and 110 Pa.
The rst digit blinks, set it pressing the button briey several times then press on the button more than 3 seconds to
set the following digit.
Once the hysteresis is set, press the button more than 3 seconds to validate and set the time-delays.
Please refer to the data sheet to get more information about available accessories.
Bekijk gratis de handleiding van Kimo PST, stel vragen en lees de antwoorden op veelvoorkomende problemen, of gebruik onze assistent om sneller informatie in de handleiding te vinden of uitleg te krijgen over specifieke functies.
Productinformatie
| Merk | Kimo |
| Model | PST |
| Categorie | Niet gecategoriseerd |
| Taal | Nederlands |
| Grootte | 2662 MB |


