Kichler True handleiding
Handleiding
Je bekijkt pagina 13 van 66
52" True | 13
FINISHING THE MOTOR INSTALLATION
CAUTION: To avoid possible electrical shock, be sure you have turned
o the power at the main circuit panel.
Step 1. Tuck all the connections neatly into the ceiling outlet box.
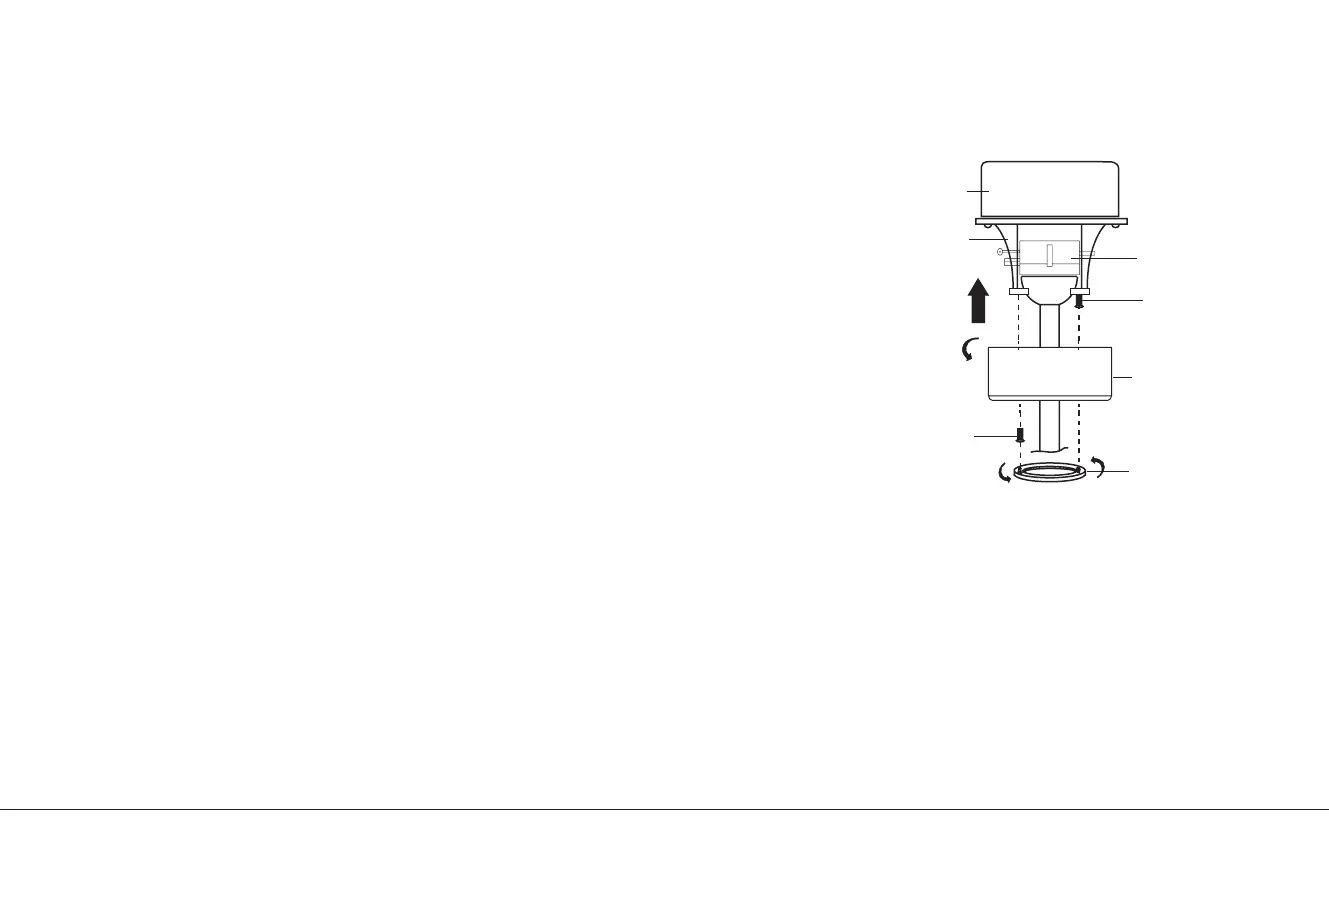
Step 2. Carefully raise the canopy up to the ceiling mounting bracket and place
one of the key hole slots in the canopy over the screw on the ceiling mounting
bracket. Rotate the canopy until the screw head locks in place at the narrow
section of the key hole. (Fig. 14)
Step 3. Align the remaining circular hole in the canopy with the remaining
hole in the ceiling mounting bracket. Reinstall the screw you removed earlier
(HANGING THE FAN, Step 2/Fig. 5) into the aligned holes. Tighten both
screws to secure. Attach the canopy trim ring to the screw heads by inserting
the screw heads into the canopy trim ring and rotating the canopy trim ring
(clockwise).
NOTE: Adjust the screws as necessary until the canopy and canopy trim ring
are snug. (Fig. 14)
WARNING: Make sure the “Check Tab” at the bottom of the ceiling
mounting bracket is properly seated in the “Registration Slot”
on the side of the hanger ball before attaching the canopy to the
ceiling mounting bracket. Failure to properly seat the “Check Tab”
could damage the electrical wires when ceiling fan blade direction is
changed while the fan is running.
Fig. 14
Outlet Box
Ceiling
Mounting
Bracket
Screw
Canopy
Canopy Trim Ring
Screw
Receiver
Bekijk gratis de handleiding van Kichler True, stel vragen en lees de antwoorden op veelvoorkomende problemen, of gebruik onze assistent om sneller informatie in de handleiding te vinden of uitleg te krijgen over specifieke functies.
Productinformatie
| Merk | Kichler |
| Model | True |
| Categorie | Ventilator |
| Taal | Nederlands |
| Grootte | 5543 MB |


