Kichler Lucian handleiding
Handleiding
Je bekijkt pagina 11 van 48
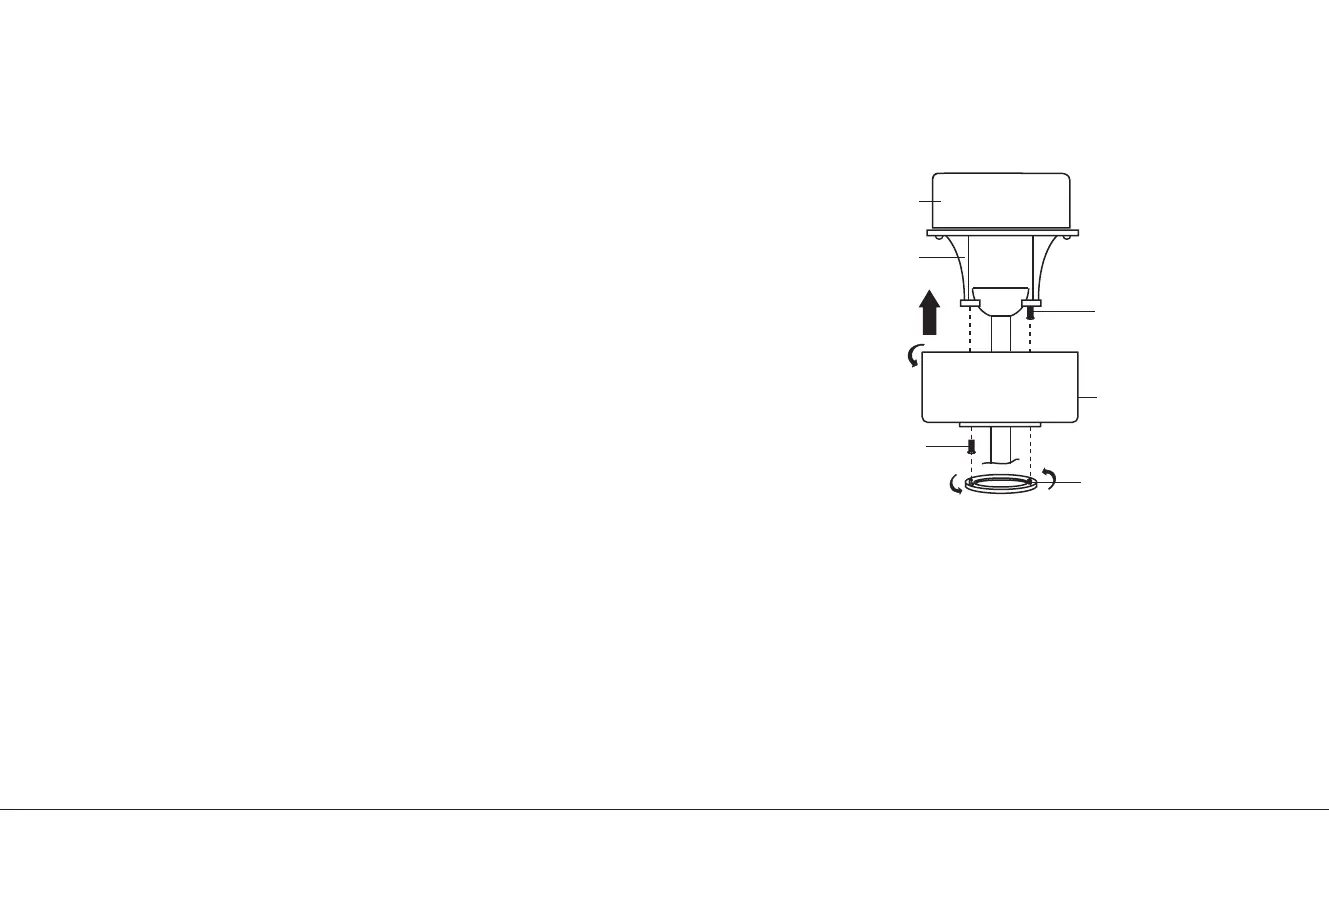
FINISHING THE INSTALLATION
Step 1. Tuck all the connections neatly into the ceiling outlet box.
Step 2. Slide the canopy up to the mounting bracket and place one of the
key hole slots over the mounting screw on the mounting bracket. Rotate
the canopy until the screw head locks in place at the narrow section of the
key hole. See figure 13.
Step 3. Align the remaining circular hole on the canopy with the remaining
hole on the Ceiling Mounting Bracket. Insert and tighten the mounting
screw you removed earlier and the mounting screw from Step 2 above.
Now, attach the canopy cover to the mounting screw heads by inserting
the screw heads into the bottom side of the canopy cover and rotating
the cover clockwise.
NOTE: Adjust the canopy screws as necessary until the canopy and
canopy cover are snug. (Fig. 13)
WARNING: Make sure the “Check Tab” at the bottom of the hanger
bracket is properly seated in the “Registration Slot” on the side of the
hanger ball before attaching the canopy to the bracket.
Fig. 13
Canopy
Screws
Screws
Ceiling
Mounting
Bracket
Canopy Cover
Outlet Box
42", 52" and 60" Lucian II | 11
Bekijk gratis de handleiding van Kichler Lucian, stel vragen en lees de antwoorden op veelvoorkomende problemen, of gebruik onze assistent om sneller informatie in de handleiding te vinden of uitleg te krijgen over specifieke functies.
Productinformatie
| Merk | Kichler |
| Model | Lucian |
| Categorie | Ventilator |
| Taal | Nederlands |
| Grootte | 3596 MB |


