Kichler Almere handleiding
Handleiding
Je bekijkt pagina 14 van 57
14 | KICHLER.COM
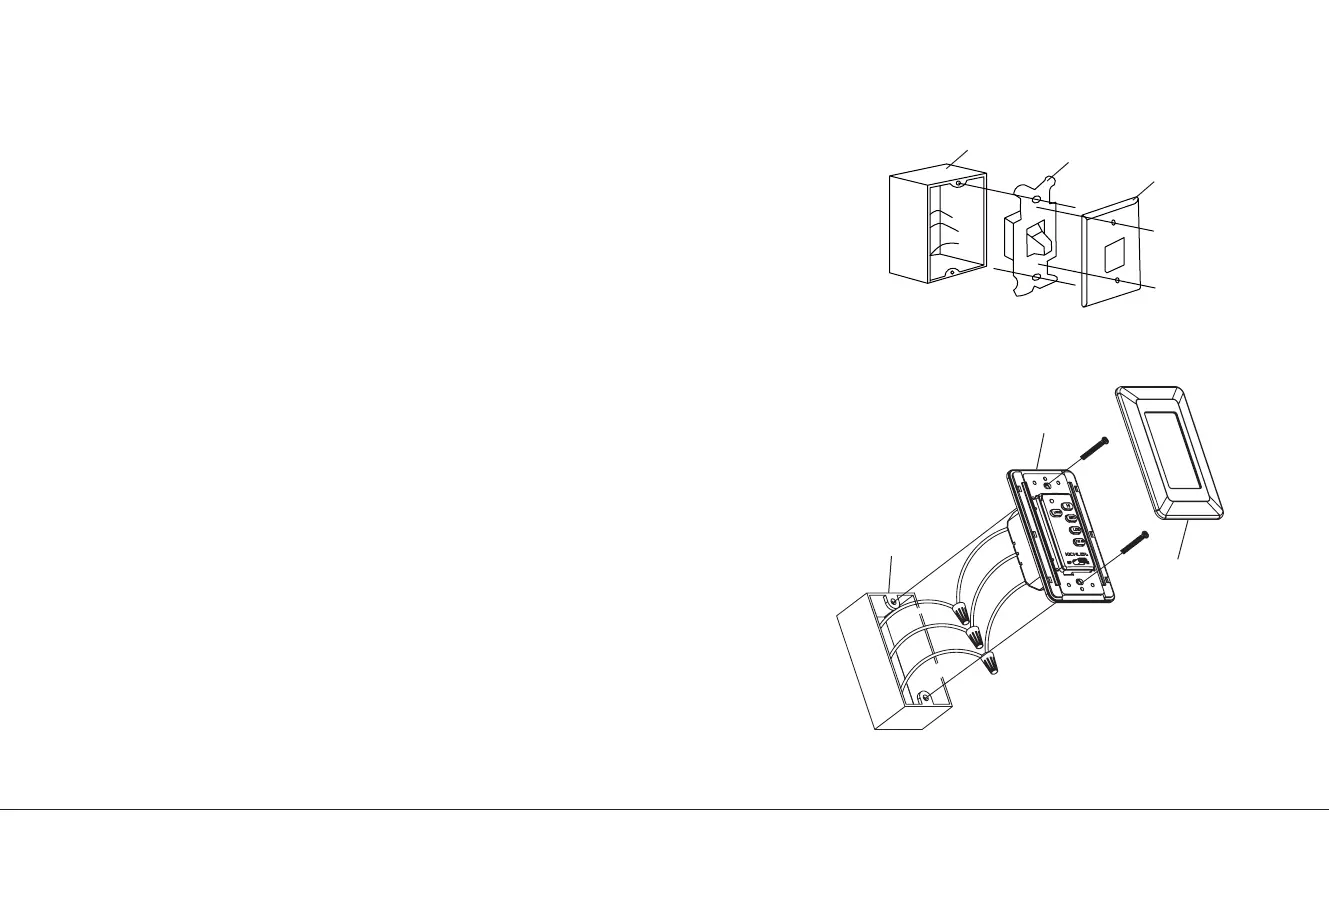
Outlet Box
Outlet Box
Wall Control
Face Plate
Switch
Wall Plate
Fig. 17
Fig. 18
INSTALLING THE WALL CONTROL
WARNING: All wiring must be in accordance with the National Electrical Code and
local electrical codes. Electrical installation should be performed by a qualified
licensed electrician.
NOTE: SWITCH INSTALLATION MUST COMPLY WITH ALL LOCAL AND NATIONAL
ELECTRIC CODE.
WARNING: Shut o main power at the circuit breaker or fuse panel before continuing.
Step 1. Remove the existing wall plate and the old switch from the wall outlet box.
Disconnect wires. (Fig. 17)
Step 2. Connect the outlet box wires to the wall control wires, using the wire connectors
provided. (Fig. 18)
*Connect the lead wire (HOT) from the outlet box to BLACK wire marked
“AC IN L” from wall control.
*Connect the lead wire (LOAD) from the outlet box to BLACK wire marked
“TO MOTOR L” from wall control.
*Connect the GROUND from the outlet box to GROUND from wall control.
Step 3. Secure the wires connectors and make sure there are no loose strands or
connections. Carefully tuck wire connections back inside outlet box and secure the
wall control to outlet box with screws provided. Snap the face plate in place on the front
of the wall control.
GROUND WIRE
FROM CEILING
TO LOAD
TO 120V SOURCE
HOT
BLACK (AC IN L)
BLACK (TO MOTOR L)
GROUND
Bekijk gratis de handleiding van Kichler Almere, stel vragen en lees de antwoorden op veelvoorkomende problemen, of gebruik onze assistent om sneller informatie in de handleiding te vinden of uitleg te krijgen over specifieke functies.
Productinformatie
| Merk | Kichler |
| Model | Almere |
| Categorie | Ventilator |
| Taal | Nederlands |
| Grootte | 4417 MB |


