Handleiding
Je bekijkt pagina 11 van 44
7
INSTALLATION INSTRUCTIONS
5
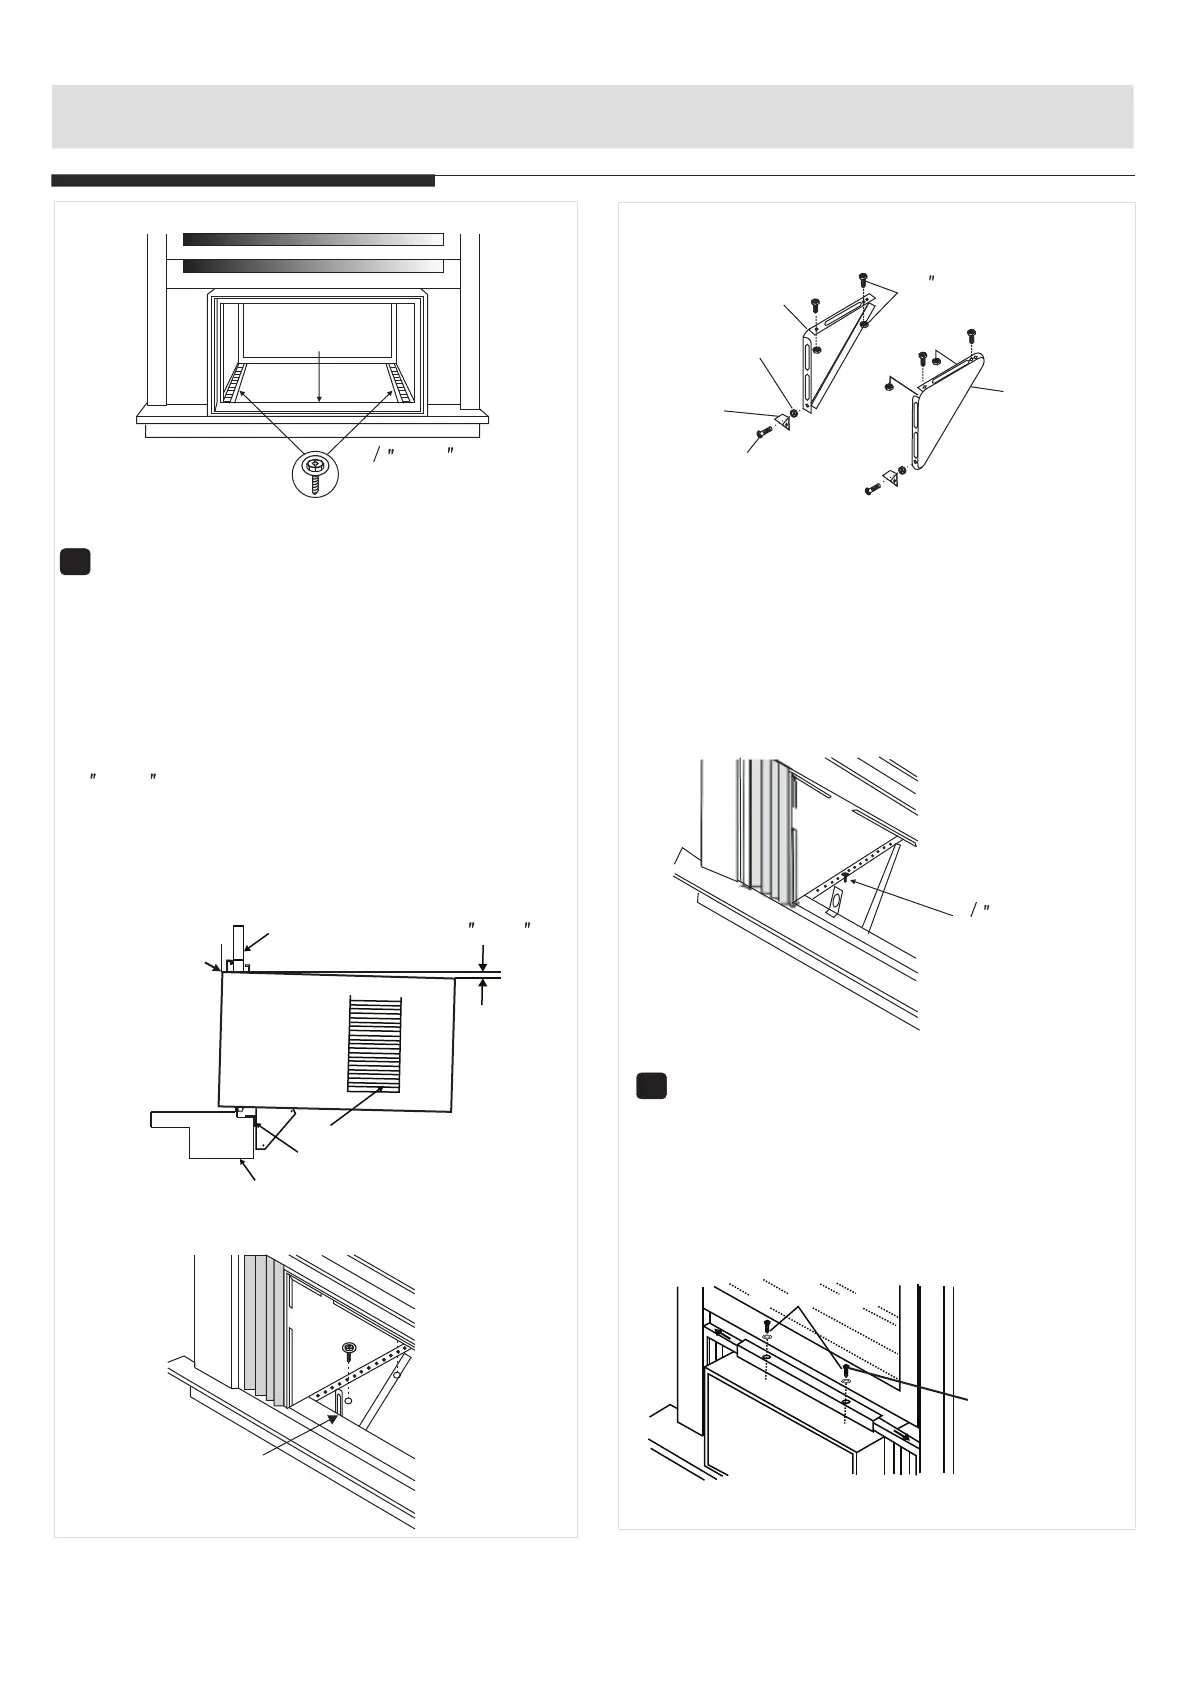
Install Support Bracket
1. Hold each support bracket flush against
outside of sill, and tight to bottom of cabinet
as shown in Fig.15A. Mark brackets at top level
of sill, and remove.
2. Assemble sill angle bracket to support
brackets at the marked position(Fig.15B).
Hand tighten, but allow for any changes later.
Bottom
Rail Seal
1 2 Long Screws
And Locknuts
Left
Right
Sill Angle
Bracket
Flat Head
Bolt
2 Each Required For
Each Support Bracket
Locknut
3 4 (or1 )Long
Hex-head Screw
/2
Fig.13
Fig.15A
Mark
Fig.15B
3. Close window behind top angle.
6
Extend Window Filler Panels
1. Carefully raise window to expose filler panel
locking screws. Loosen screws so filler panels
slide easily.
2. Extend panels to fill window opening completely.
Tighten locking screws on top(Fig.17).
3. Install support brackets(with sill angle
brackets attached) to correct hole in
bottom of cabinet as shown in Fig.16.
4. Tighten all 6 bolts securely.
1 2 Long Screws
and Locknuts
L
o
cking Sc
re
w
7/16"Locking Screw
and Washer
Fig.16
Fig.17
FIG.14
5
Side Louvers
Window Sash
Window Sill
Sill
Angle Bracket
1 5
About1 / to1 /
4 8
Measure from
the cabinet edge.
NOTE: Check that air conditioner is tilted back about
1 5 O O
1 / to 1 / (tilted about 3 t o 4 downward t o th e o utside).
4 8
After proper installation, condensate should not drain
from the overflow drain h ole d uringn ormal u se,c orrect
the slope otherwise (Fig.14).
Bekijk gratis de handleiding van Keystone KSTHW25B, stel vragen en lees de antwoorden op veelvoorkomende problemen, of gebruik onze assistent om sneller informatie in de handleiding te vinden of uitleg te krijgen over specifieke functies.
Productinformatie
| Merk | Keystone |
| Model | KSTHW25B |
| Categorie | Airco |
| Taal | Nederlands |
| Grootte | 7199 MB |


