Handleiding
Je bekijkt pagina 12 van 44
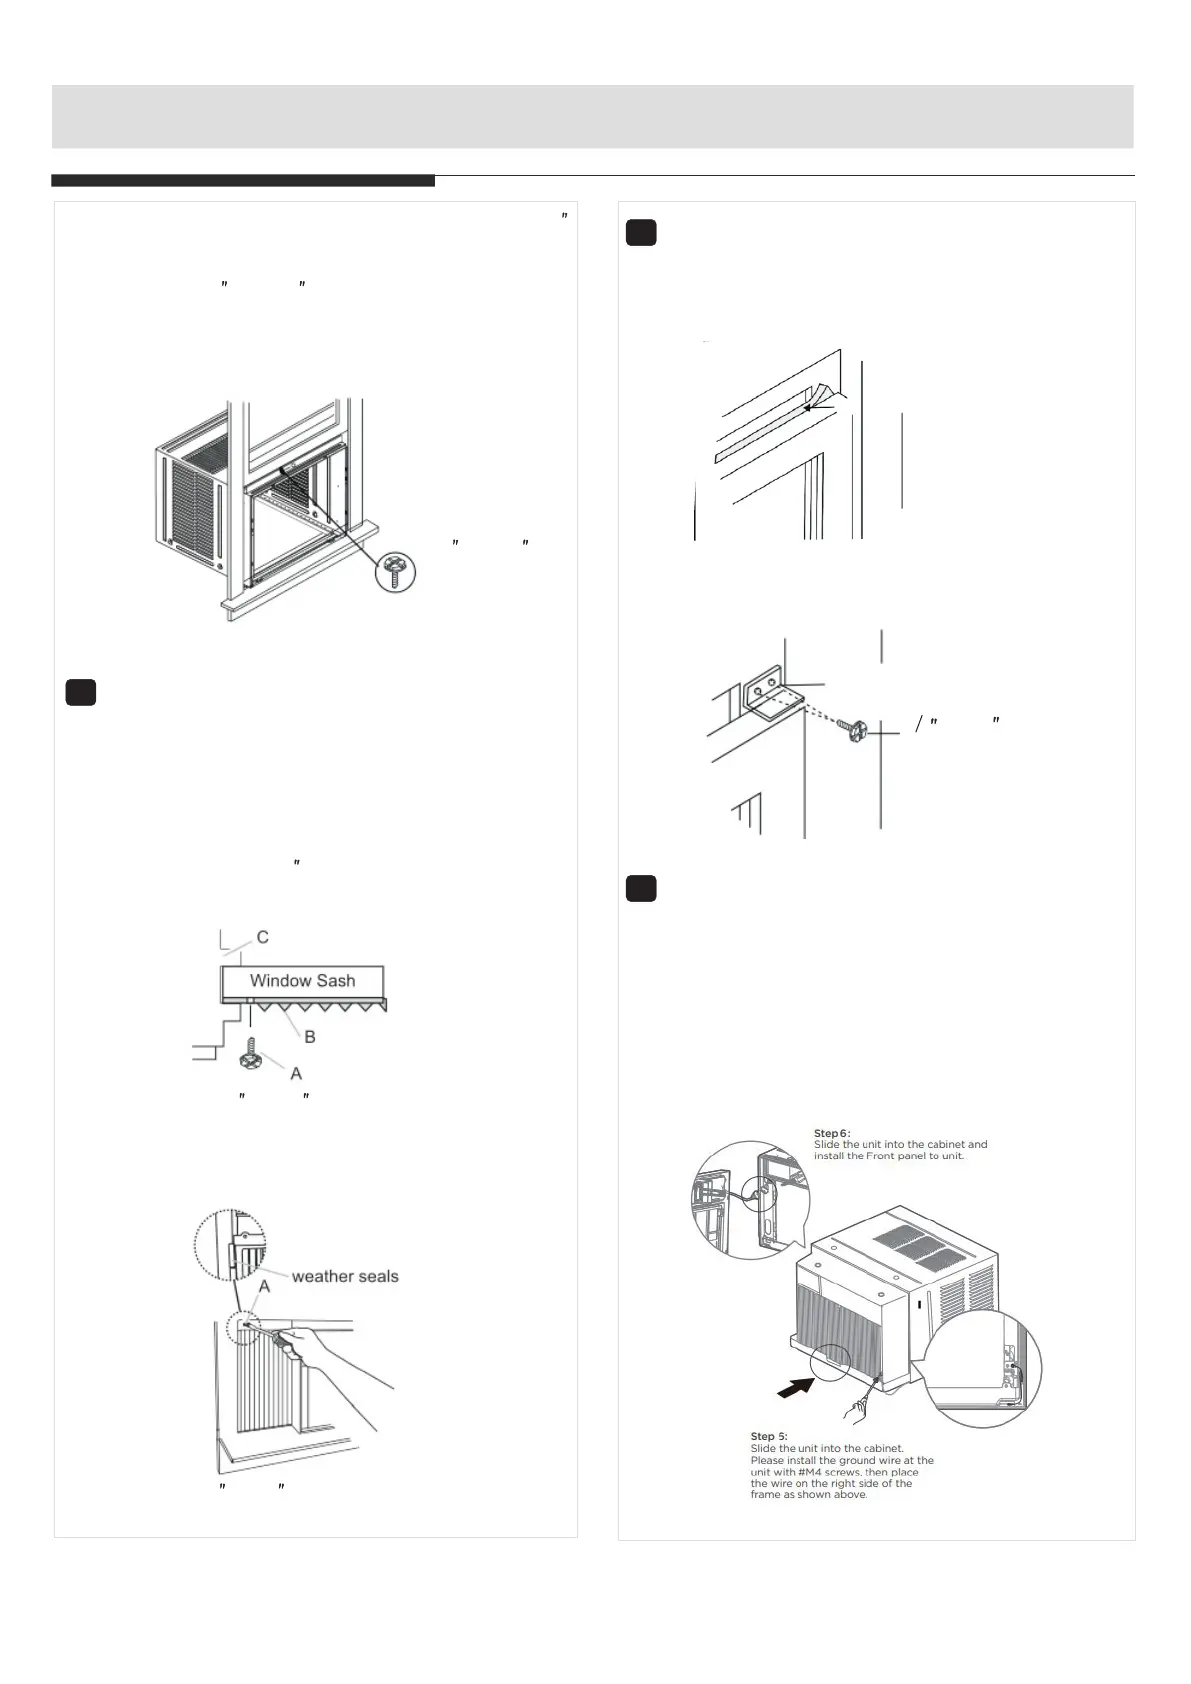
Fig.17A
8
INSTALLATION INSTRUCTIONS
4. Attach the top angle to window frame: Use a 3/32
drill bit to drill one hole through the hole in the
middle of top angle into the window frame, and
drive one 3/ 4 (or 1/ 2 ) HEX-HEAD locking screw
through hole in the middle of top angle into the
window frame as shown (Fig.17A).
7
Attach Window Filler Panels to
Window Frame
1. Extend the window filler panels out against the
window frame.
2. Use a 1/8" drill bit to drill a starter hole through the
hole in the top leg of each window filler panel and
into the window sash (Fig. 18A and Fig. 18B).
Connect with one 3/ 4 (or 1/ 2") long hex head
screw.
8
1. Trim sash seal to fit window width. Insert into
space between upper and lower sashes(Fig.18).
Window Sash Seal
Fig.18
Install Window
Safety Lock
Sash Seal and
9
Install Chassis into Cabinet
and Install Front to Unit
1. Lift air conditioner and carefully slide into
cabinet leaving 6 inches protruding.
2. DO NOT push on controls or finned coils.
3. Be sure chassis is firmly seated towards rear
of cabinet.
4. Installation of front is the reverse of removal
outlined in Section 1.
Fig.18A
A.3/ 4 (or 1/2 ) long hex head screw
B. Left-hand Window Filler
Panel Top Leg
C. Window channel
Fig.18B
A.3/ 4 (or1/2 ) long hex head screw
3/ 4 (or 1/ 2 ) long
HEX-HEAD
SCREW
Safety Lock
3 4 (or1 )Long
Hex-head Screws
/2
Fig.19
2. Attach right angle safety lock (Fig.19).
Bekijk gratis de handleiding van Keystone KSTHW18B, stel vragen en lees de antwoorden op veelvoorkomende problemen, of gebruik onze assistent om sneller informatie in de handleiding te vinden of uitleg te krijgen over specifieke functies.
Productinformatie
| Merk | Keystone |
| Model | KSTHW18B |
| Categorie | Airco |
| Taal | Nederlands |
| Grootte | 7199 MB |


