Jung TKASVAL114WW handleiding
Handleiding
Je bekijkt pagina 7 van 24
7
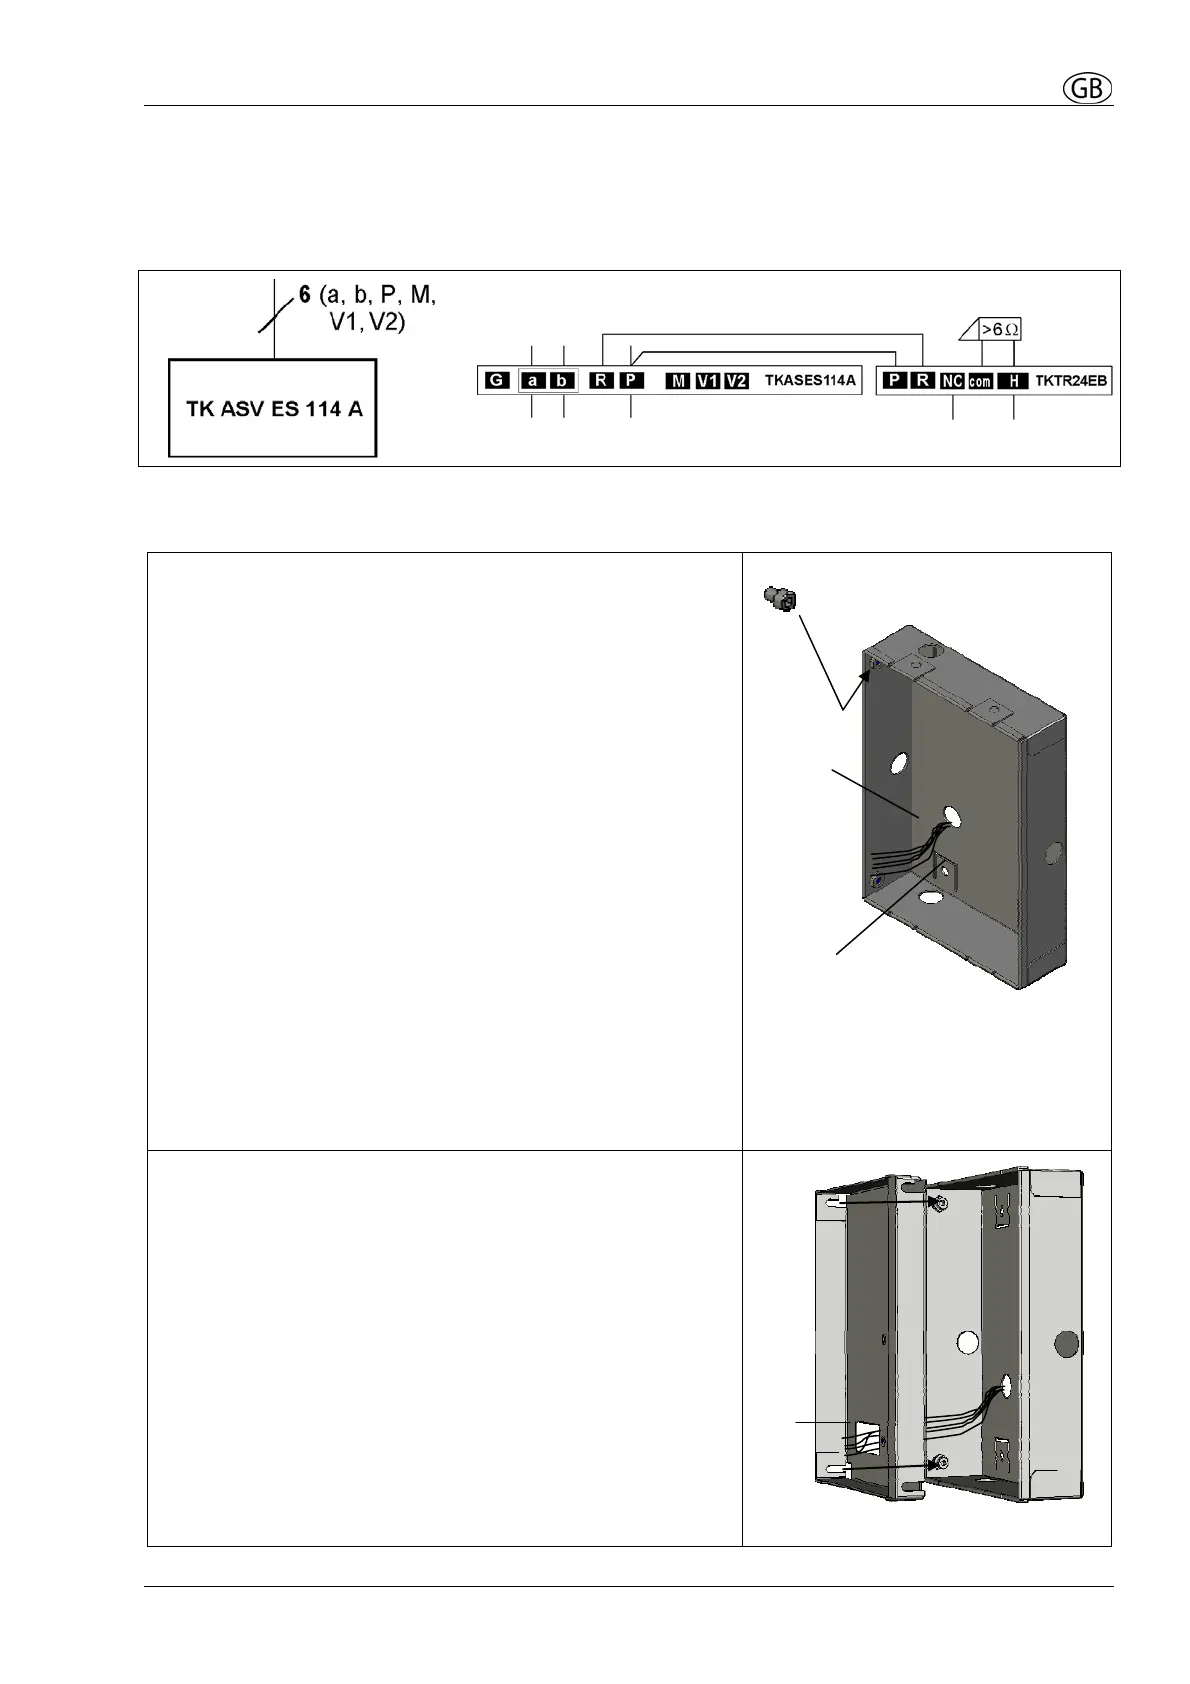
Connecting diagram Possible connection for a door release relay
Please use door release relay TK TR 24 EB.
Floating relay contact:
Max. AC 24 V, 2 A of external power supply
Installation
Flush mounted housing
• Fasten the 4 delivered short hexagon screws (1)
with a hexagon key.
• Shut the unused cable entry holes with the
delivered dummy plug.
• Put the wires through the selected cable
entry hole (2).
• Connect the flush mounted housing into the wall.
The edge of the housing has to be flush with the
wall surface to enable, that the faceplate of the
outdoor station fits flat on the wall.
Connection possibilities:
• Connect the strap (3) of the housing with screws to
the wall.
• Attach with plaster by means of using plaster
straps (4 metal sheets with holes, 4 screws and 4
nuts). These plaster straps can be connected on
the reverse side of the housing to the housing
straps (3).
Flush mounted housing
Installation frame
The wall is plastered and the housing is installed flush
with the plaster into the wall.
• Unscrew the 4 hexagon screws until they stick out
half length.
• Put the wires through the cable entry hole of the
installation frame (5).
• Put the installation frame into the housing in that
way, that the slots of the frame fit behind the screw
heads.
• Press the installation frame into the flush mounted
housing and tighten the hexagon screws.
Installation frame
1
2
3
5
Bekijk gratis de handleiding van Jung TKASVAL114WW, stel vragen en lees de antwoorden op veelvoorkomende problemen, of gebruik onze assistent om sneller informatie in de handleiding te vinden of uitleg te krijgen over specifieke functies.
Productinformatie
| Merk | Jung |
| Model | TKASVAL114WW |
| Categorie | Bewakingscamera |
| Taal | Nederlands |
| Grootte | 3069 MB |