Juki MF-3580 handleiding
Handleiding
Je bekijkt pagina 118 van 440
− 46 −
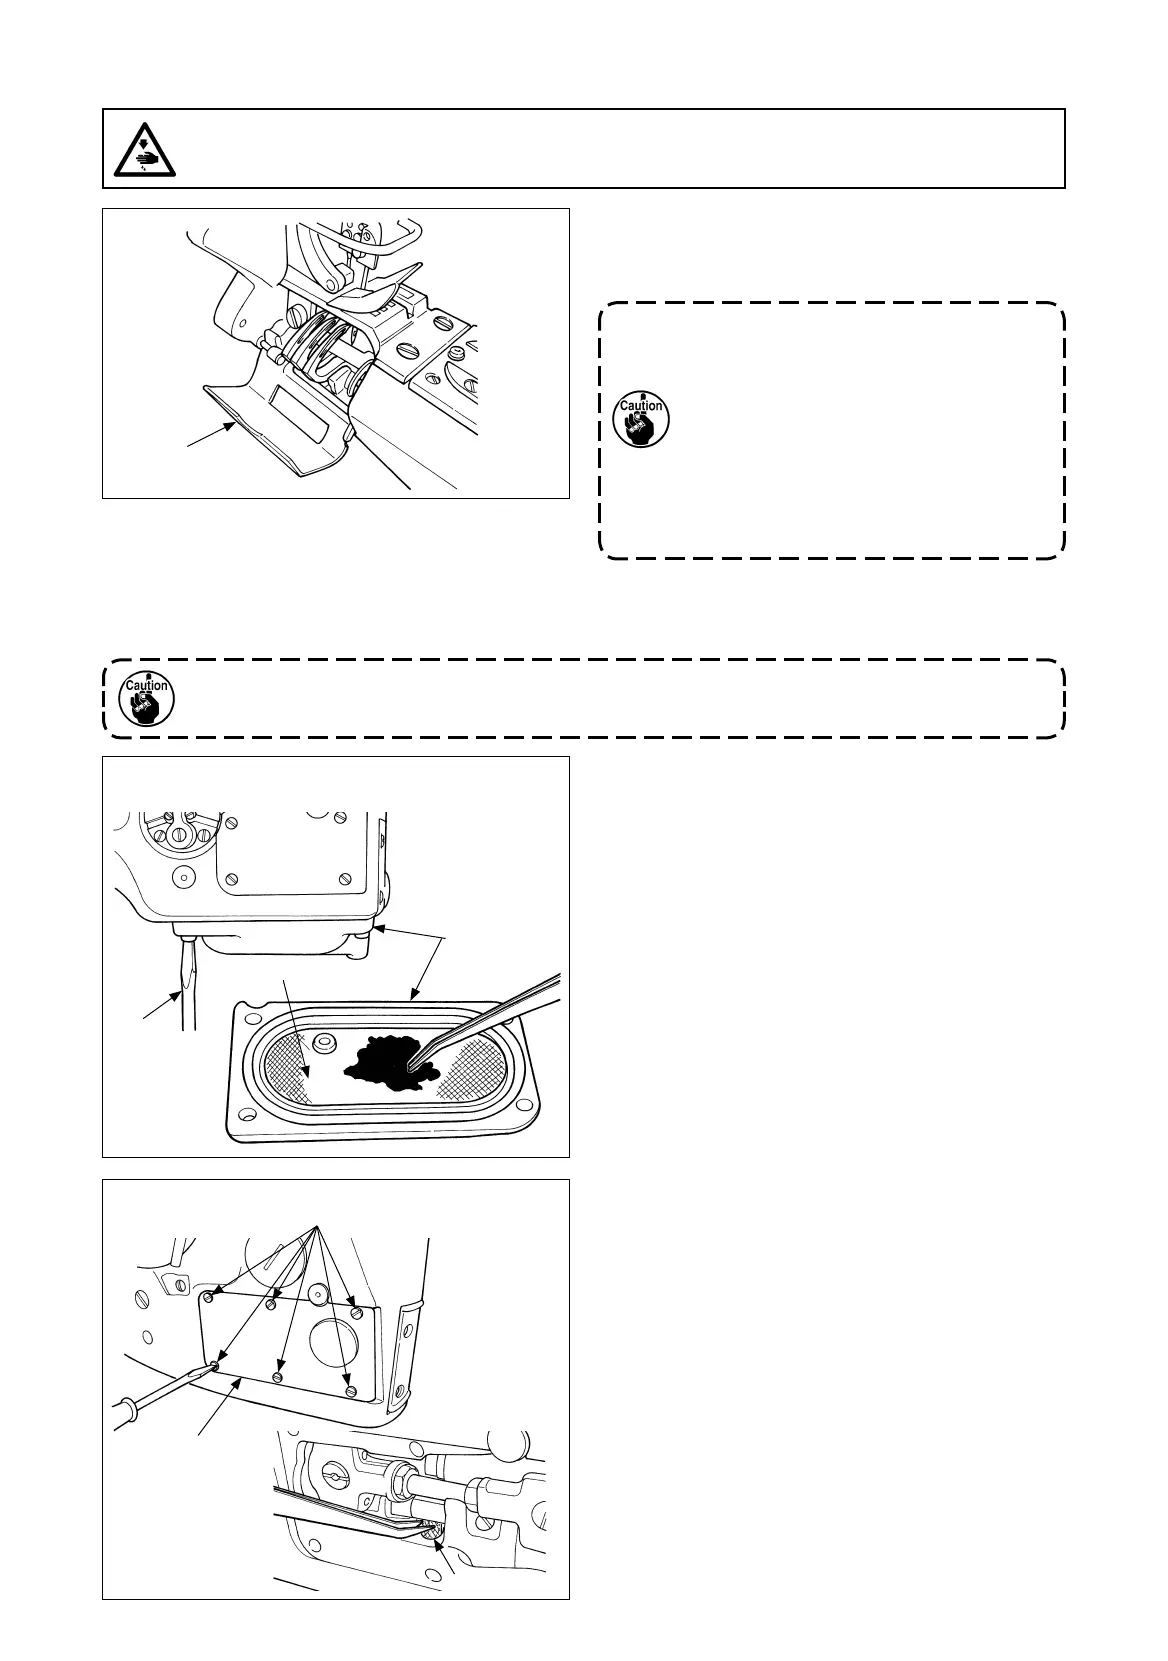
15. Cleaning the sewing machine head
WARNING :
Perform the work after turning OFF the power to prevent accidents caused by the abrupt start of the
sewing machine.
1
1) Be sure to remove cloth chips from around the looper
before they accumulate.
Open looper cover
1
. Remove cloth chips
accumulated around the looper with tweezers.
Sewing machine head with the differential feed
mechanism
If the sewing machine is kept being driven after oil splashing has stopped, the oil pipe will be clogged
with cloth chips. This eventually disables oiling. If such a trouble occurs, entire cleaning of the inside
of the pipe is required. So, be extremely careful.
If cloth chips which accumulate around the
looper are left without being removed, they are
more likely to enter inside the sewing machine.
Ingress of cloth chips into the inner section of
the sewing machine can cause the oil tank fi l-
ter to be clogged earlier than usual, leading to
faulty oiling. Such a phenomenon can eventu-
ally cause abnormal abrasion or seizure of the
sewing machine components.
So, be extremely careful not to leave cloth
chips around the looper.
2) Periodically remove cloth chips accumulated in the fi lter.
As a guide, cleaning is necessary when the amount of oil splashing against the oil circulation identifi cation window
decreases. If splash of oil is not observed, even for a second, at the time of startup of the sewing machine, be sure
to remove cloth chips from the fi lter.
3) The fi lter cleaning procedure differs by the type of
sewing machine head, i.e., the sewing machine head
provided with the differential feed mechanism and the
one without it.
Be sure to drain the oil from the machine head before
starting cleaning.
[For the sewing machine head with the differential
feed mechanism]
Remove four screws with screwdriver
2
. Remove oil
tank
3
.
Remove cloth chips from the top of fi lter
4
. At this
time, as fi lter
4
is detachable, remove cloth chips
also from inside oil tank
3
. After the completion of
cleaning, re-tighten the four screws to secure the
fi lter.
[For the sewing machine head without the
differential feed mechanism]
Remove cylinder side cover
5
. Remove six
setscrews
6
.
Then, fi lter
7
can be observed inside the sewing
machine. Remove cloth chips which have adhered
on the fi lter with tweezers. After the completion of
cleaning, re-secure cylinder side cover
5
.
※ This procedure applies to the sewing machine
mounted with part
4
(No. 40067058 (+40067056))
or part
7
(No. 40098071 (+EA9500B0000)). Those
parts can be mounted on the sewing machine which
is not provided with them.
Sewing machine head without the differential feed
mechanism
3
4
2
6
5
7
Bekijk gratis de handleiding van Juki MF-3580, stel vragen en lees de antwoorden op veelvoorkomende problemen, of gebruik onze assistent om sneller informatie in de handleiding te vinden of uitleg te krijgen over specifieke functies.
Productinformatie
| Merk | Juki |
| Model | MF-3580 |
| Categorie | Naaimachine |
| Taal | Nederlands |
| Grootte | 79694 MB |


