Handleiding
Je bekijkt pagina 21 van 25
21
ELECTRICAL CONNECTION
• Electrical wiring must be done by a Qualified Electrician in accordance with all applicable codes
and standards. Turn off electrical power at service entrance before wiring.
• If the supply cord is damaged, it must be replaced by the manufacturer, its service agent or
qualified electrician in order to avoid a hazard.
• Do not use the plug and an extension cord other than the ones initially supplied with the hood.
INSTALLATION
• Before beginning installation, to better handle the hood, we
advise removing the aluminum filter.
• Before fixing, the outlet exhaust duct for air evacuation to the
outside must be installed. Use an outlet exhaust duct with:
- Minimum indispensable length; -Minimum possible bends
(maximum angle of bend: 90°); certified material (according
to local, building & fire regulations); and as smooth as
possible inside. It is also advisable to avoid any drastic
changes in duct cross-section (recommended diameter:
125mm).
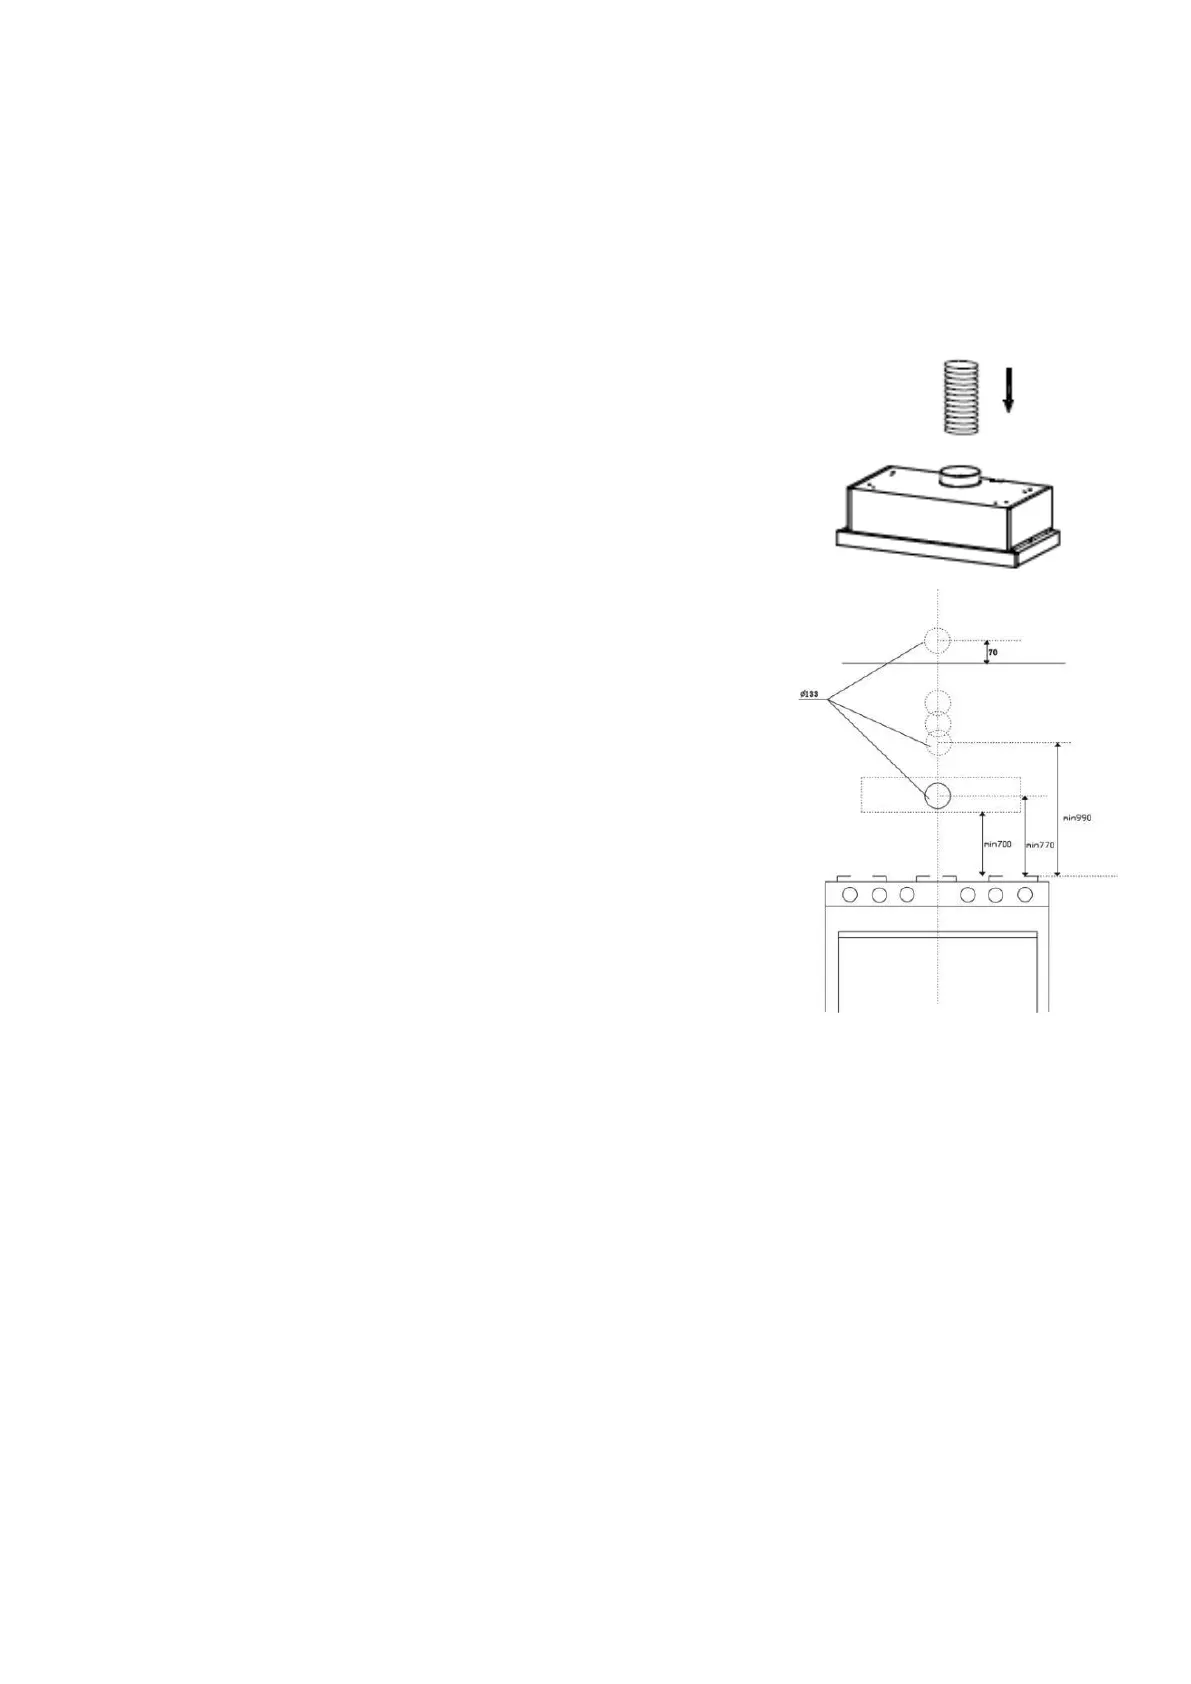
- Drill the hole in the wall for the air outlet (133mm diameter)
referring to drawings here on the right where the
measurements for the various possibilities are indicated.
- Decide on the position of the hole for the air outlet: The hole
must be in the ceiling, according to your requirements, but
must be in vertical line with your hood. Bear in mind that the
hood can expel air through the top air outlet only.
FITTING UNDER WALL UNIT
1. Before fixing the hood to the ceiling, drill a hole of 130mm diameter and four 4-5 diameter holes
in the ceiling.
2. In any case, check the position of the power outlet considers where the power cable will run,
since a hole might have to be made in the wall unit to accommodate it.
3. Drill two holes for φ10x45mm exploded plastic tube, then install two ST5x45 screw into the wall,
respecting the distance indicated, then hang up the hood.
4. Use 4 pcs 4.2x30mm screws, and 4 pcs washer to fix the top of hood.
5. Install the exhaust pipe and wrap with the tape on the connection.
6. Pull out the front panel and take out the aluminum filter, to install the carbon filter as instruction
indicated, then put back the filters and close the front panel.
7. Make the electrical connection.
Bekijk gratis de handleiding van Jocel JEGA007971, stel vragen en lees de antwoorden op veelvoorkomende problemen, of gebruik onze assistent om sneller informatie in de handleiding te vinden of uitleg te krijgen over specifieke functies.
Productinformatie
| Merk | Jocel |
| Model | JEGA007971 |
| Categorie | Afzuigkap |
| Taal | Nederlands |
| Grootte | 3093 MB |