Intergas Xtend Split handleiding
Handleiding
Je bekijkt pagina 39 van 88
39
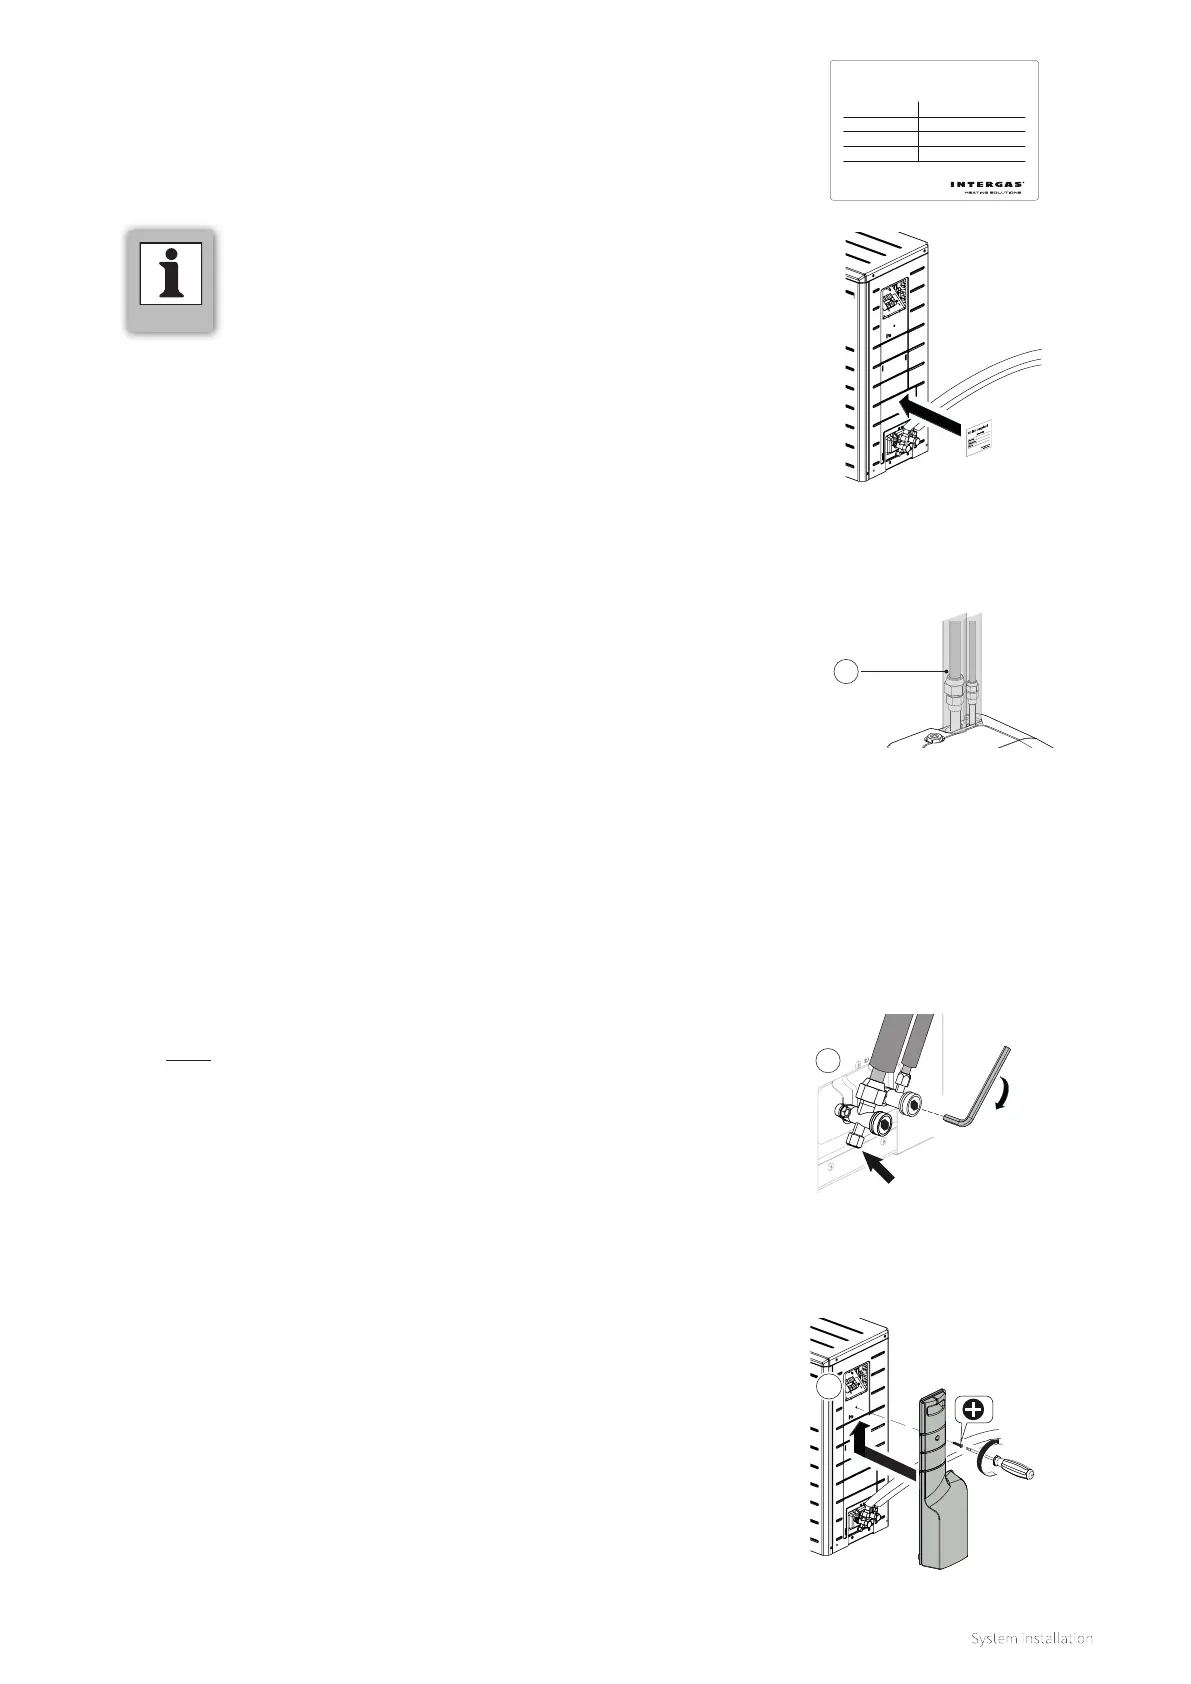
6. Using a ball point pen complete the included field charge label.
7. Attach the field charge label to the side panel of the outdoor
unit as shown in the figure. This ensures the label is accessible
for any attending engineers as per the F-Gas regulations.
R32 Field charge label
Factory charge
Additional charge
Total charge
R32 weight (kg)
NOTES
► The field charge label should only be
completed and attached if refrigerant has
been added.
8.6.8 Emptying the meter set
The pump draining function (pumping out refrigerant, see §11.2.3.)
can be used to empty the meter set. The following steps describe
how the pump draining function works with regard to emptying
the meter set within the outdoor unit, assuming that the liquid and
gas lines have been connected from the outdoor to indoor unit and
commissioned correctly.
When doing this, ensure that you are connected to the Wi-Fi control
screen, §10.2.1.
1. Close the service valve on the liquid line using a 5mm Allen key
by turning it clockwise (A).
Please note: the gas line service valve must remains open to
carry out the draining function task.
2. Connect a meter set to the gas line service valve using a
Schrader core removal tool, having removed the core prior.
3. Turn on the pump draining function using the control screen
within the app.
► Via the service menu:
► Click on ‘Tools’
► Click on ‘Pump out refrigerant’
► Select ‘Start’
The system will now create a vacuum and move the refrigerant
back into the outdoor unit.
4. Check the meter set to ensure the pressure is dropping at a
pressure of 0 bar, all the refrigerant will have moved back into
the outdoor unit.
5. Select ‘Stop’ on the Wi-Fi control screen.
6. Close the service valve on the gas line using a 5mm Allen key by
turning it clockwise.
7. Replace the 19mm lockshield cap, tighten to 14-18 Nm torque.
8. Replace the Schrader core using the core removal tool and
remove the meter ser replacing the 14mm sealing cap (A).
9. When completed replace the 19mm lockshield caps and the
side panel on the outdoor unit (B).
8.6.7 Insulating the refrigerant lines
1. Fold or push the included insulation material (A) around
each refrigerant line above the indoor unit. The lines must be
insulated separately
2. Secure the insulation material using insulation tape.
A
A
Connect the meter set to the gas line service valve
connection having removed the Schrader core
prior.
B
Bekijk gratis de handleiding van Intergas Xtend Split, stel vragen en lees de antwoorden op veelvoorkomende problemen, of gebruik onze assistent om sneller informatie in de handleiding te vinden of uitleg te krijgen over specifieke functies.
Productinformatie
| Merk | Intergas |
| Model | Xtend Split |
| Categorie | Niet gecategoriseerd |
| Taal | Nederlands |
| Grootte | 11570 MB |


