Handleiding
Je bekijkt pagina 36 van 40
EN / 36
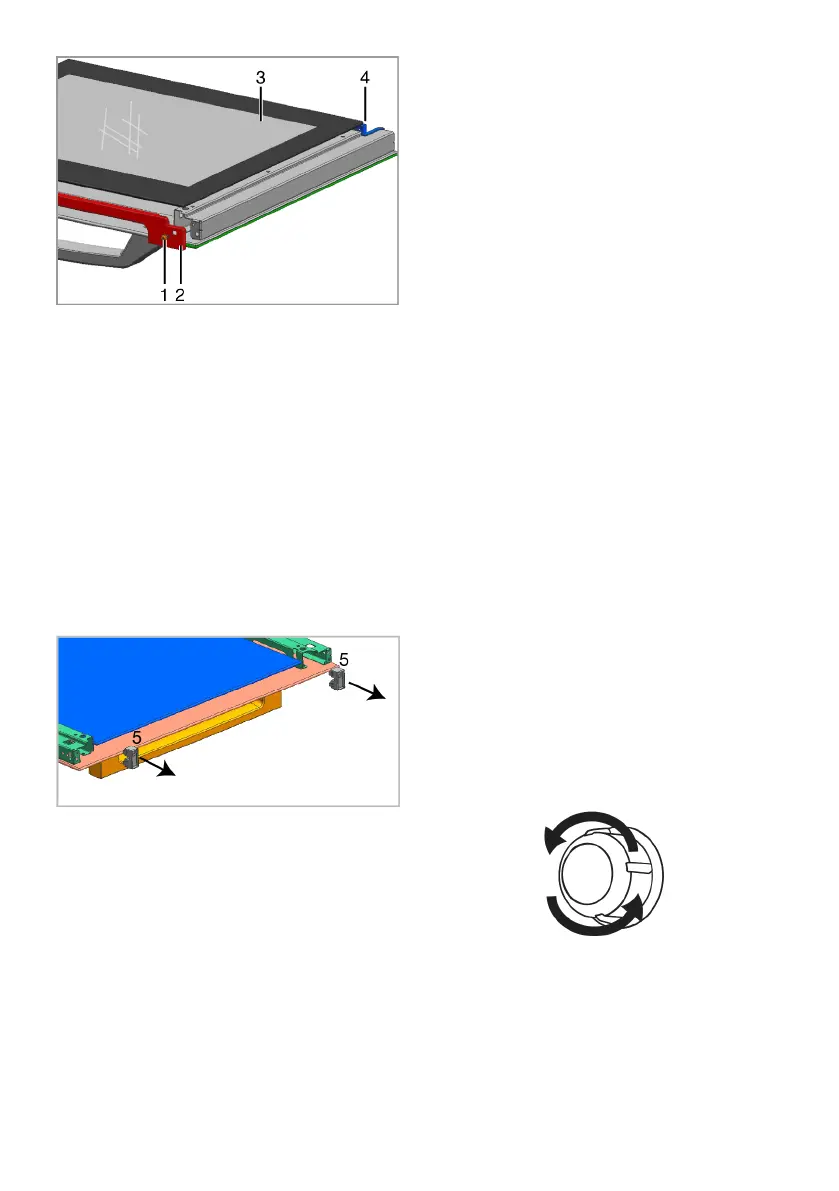
1 Screw
2 Profile
3 Inner glass pane
4 Plastic slot
2. Take out the screw(1) with a screw-
driver.
3. Take out the profile (2) than hold up to
inner glass (3).
4. If your product is equipped with an inner
glass panel; Pull the glass holder con-
necting elements in the middle as illus-
trated in the figure to free them from the
glass panels.
5 Glass holder connecting element*
* It varies depending on the product model. It
may not be available on your product.
5. Then group the door again, put the glass
pane (3) to the plastic slots (4) and
group the profile.
9.9 Cleaning the Oven Lamp
In the event that the glass door of the oven
lamp in the cooking area becomes dirty;
clean using dishwashing detergent, warm
water and a soft cloth or sponge and dry
with a dry cloth. In case of oven lamp fail-
ure, you can replace the oven lamp by fol-
lowing the sections that follow.
Replacing the oven lamp
General information
• To avoid the risk of electric shock before
replacing the oven lamp, disconnect the
product and wait for the oven to cool. Hot
surfaces may cause burns!
• This oven is powered by an incandescent
lamp with less than 40 W, less than 60
mm in height, less than 30 mm in dia-
meter, or a halogen lamp with G9 sockets
with less than 60 W power. Lamps are
suitable for operation at temperatures
above 300 °C. Oven lamps are available
from Authorised Services or licensed
technicians. This product contains a G
energy class lamp.
• The position of the lamp may differ from
that is shown in the figure.
• The lamp used in this product is not suit-
able for use in the lighting of home
rooms. The purpose of this lamp is to
help the user see food products.
• The lamps used in this product must
withstand extreme physical conditions
such as temperatures above 50 °C.
If your oven has a round lamp,
1. Disconnect the product from the electri-
city.
2. Remove the glass cover by turning it
counter clockwise.
3. If your oven lamp is type (A) shown in
the figure below, rotate the oven lamp
as shown in the figure and replace it
with a new one. If it is type (B) model,
pull it out as shown in the figure and re-
place it with a new one.
Bekijk gratis de handleiding van Indesit IDE6VMB, stel vragen en lees de antwoorden op veelvoorkomende problemen, of gebruik onze assistent om sneller informatie in de handleiding te vinden of uitleg te krijgen over specifieke functies.
Productinformatie
| Merk | Indesit |
| Model | IDE6VMB |
| Categorie | Fornuis |
| Taal | Nederlands |
| Grootte | 3858 MB |


