Icom BC-121NA handleiding
Handleiding
Je bekijkt pagina 5 van 16
1
DESKTOP CHARGER ADAPTERS
1
New2001
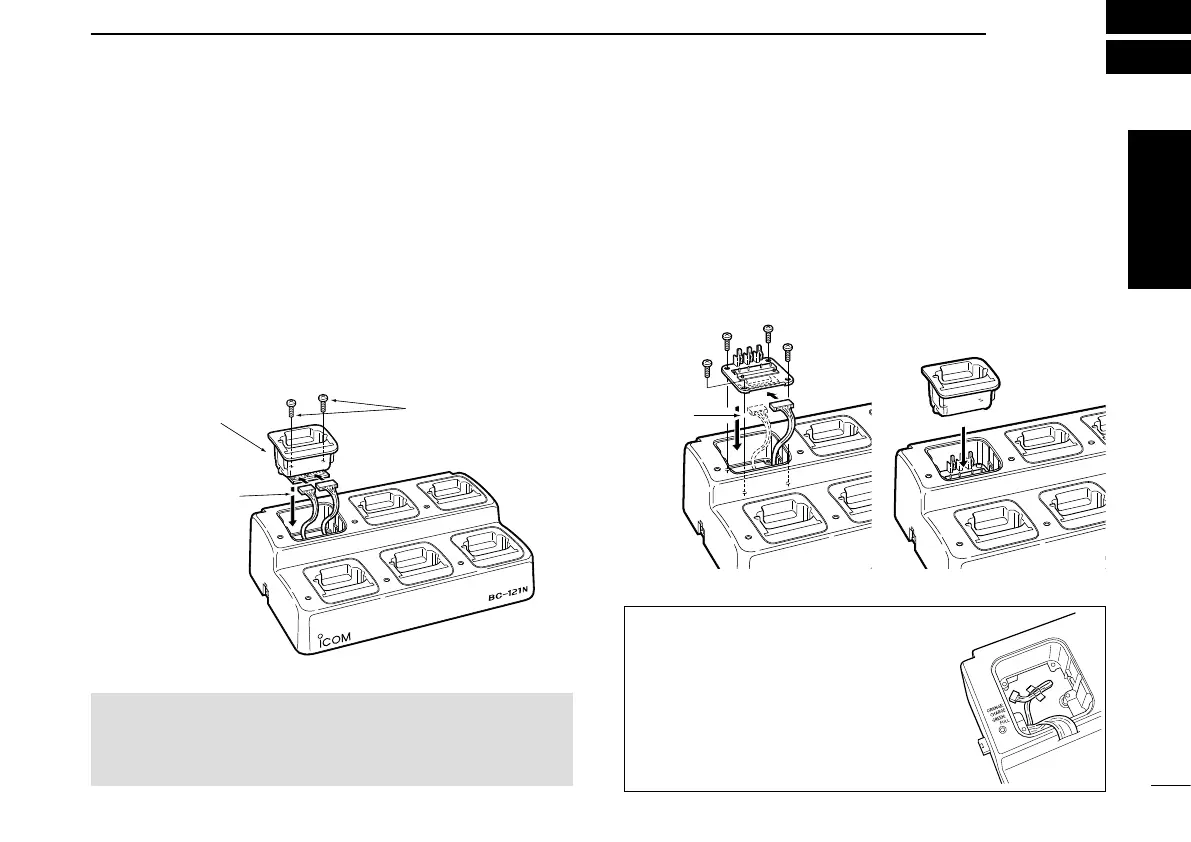
Install six appropriate desktop charger adapters into the
spaces of the charger. Several adapters are available as
described in the table as listed in page 2 to accommodate
various Icom handheld transceivers.
D For the PCB types
Connect the plugs of an appropriate desktop charger
adapter and the BC-121N, and then install the adapter with
the screws supplied with the adapter.
Installing the PCB type adapter
TIP: About the 3-pin connector
When you replace the desktop charger
adapter from a PCB type adapter to
a non-PCB type adapter, x the 3-pin
connecter to the bottom of the charger
with adhesive tape, to prevent catching
or touching the 3-pin connector’s
terminals with the adapter’s leads.
MULTI-CHARGER
Not used
NOTE: Some of the PCB type desktop charger adapters
do not need to be connected with the 3-pin connector.
The connection is required only for the adapter that is
compatible with charging a Li-ion battery pack.
Installing the AD-75/AD-88
MULTI-CHARGER
D For types requiring the AD-75/AD-88
Install the optional AD-75 or AD-88 into the BC-121N with
the 4 screws supplied with the AD-75/AD-88, and then
attach a desktop charger adapter to the BC-121N. See the
transceiver’s instruction manual for a specied desktop
charger adapter.
MULTI-CHARGER
Screws supplied with
the charger adapter
Desktop
charger adapter
See to NOTE below
Installing the non-PCB
type adapter
ENGLISH
Bekijk gratis de handleiding van Icom BC-121NA, stel vragen en lees de antwoorden op veelvoorkomende problemen, of gebruik onze assistent om sneller informatie in de handleiding te vinden of uitleg te krijgen over specifieke functies.
Productinformatie
| Merk | Icom |
| Model | BC-121NA |
| Categorie | Niet gecategoriseerd |
| Taal | Nederlands |
| Grootte | 1984 MB |


