Ibiza Sound E-BEEDREAM100 handleiding
Handleiding
Je bekijkt pagina 5 van 28
MANUAL - E-BEEDREAM100
5
www.ibiza-light.com
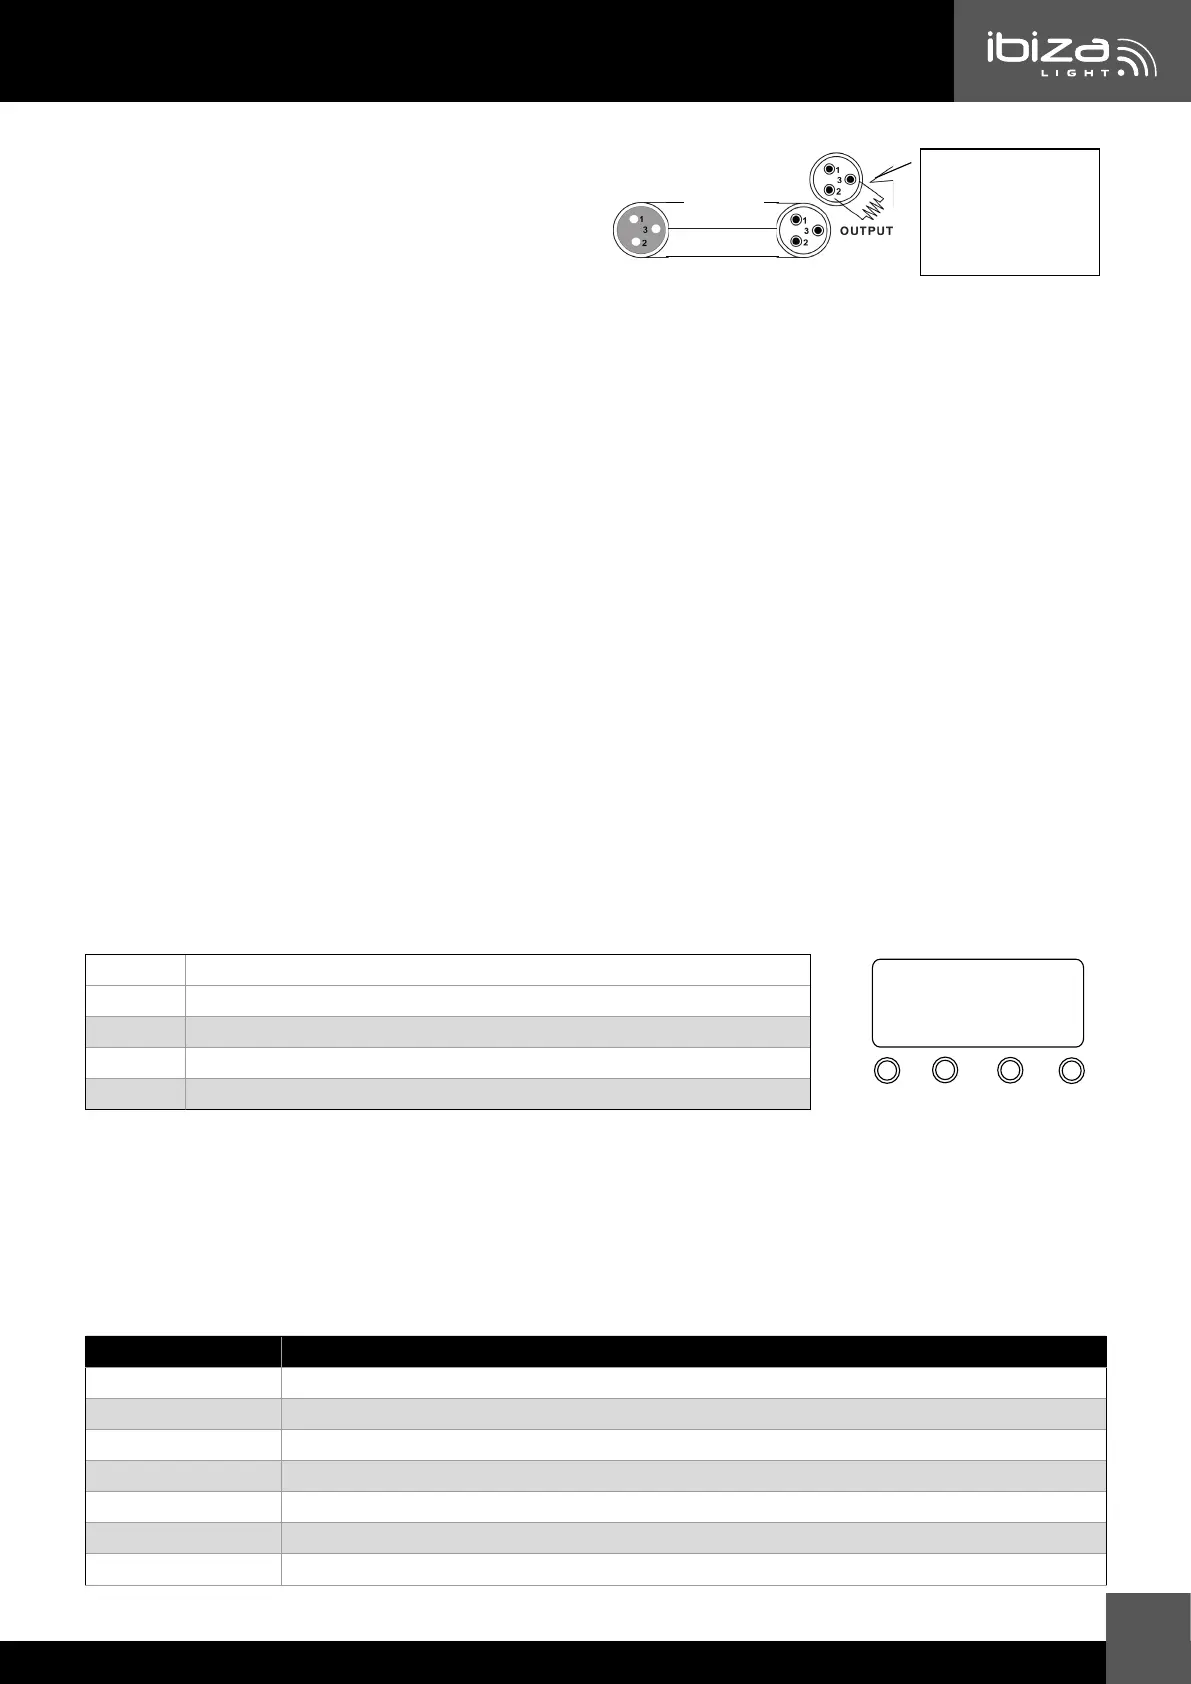
DMX CONNECTOR CONFIGURATION
INPUT
COMMON
DMX +
DMX-
Resistance 120 ohm
1/ 4w between pin 2
(DMX-) and pin 3
(DMX+) of the last
fixture.
Termination reduces signal errors. To avoid signal
transmission problems and interference, it is always
advisable to connect a DMX signal terminator.
CAUTION
Do not allow contact between the common and the xture’s chassis ground. Grounding the common can cause
a ground loop, and your xture may perform erratically. Test cables with an ohm meter to check correct polarity
and to make sure the pins are not grounded or shorted to the shield or each other.
SETTING UP A DMX SERIAL DATA LINK
1. Connect the (male) 3 pin connector side of the DMX cable to the output (female) 3 pin connector of the con-
troller.
2. Connect the end of the cable coming from the controller which will have a (female) 3 pin connector to the
input connector of the next xture consisting of a (male) 3 pin connector.
3. Then, proceed to connect from the output as stated above to the input of the following xture and so on.
MASTER/SLAVE FIXTURE LINKING
1. Connect the (male) 3 pin connector side of the DMX cable to the output (female) 3 pin connector of the rst
xture.
2. Connect the end of the cable coming from the rst xture which will have a (female) 3 pin connector to the
input connector of the next xture consisting of a (male) 3 pin connector. Then, proceed to connect from the
output as stated above to the input of the following xture and so on
Often, the set up for Master-Slave and Stand-alone operation requires that the rst xture in the chain be initial-
ized for this purpose via either settings in the control panel or DIP-switches. Secondarily, the xtures that follow
may also require a slave setting. Please consult the ‘’ Operating Instructions» section in this manual for com-
plete instructions for this type of setup and conguration.
OPERATING INSTRUCTIONS
NAVIGATION THROUGH THE CONTROL PANEL
Access control panel functions using the four panel buttons located directly underneath the LCD Display..
Button Function
MENU Used to access the menu or to return to a previous menu option
UP Scrolls through menu options in ascending order
DOWN Scrolls through menu options in descending order
ENTER Used to select and store the current menu or option within a menu
When a menu function is selected, the display will show immediately the rst available option for the selected
menu function. To select a menu item, press <ENTER>.
MENU MAP
Press the <MODE> button repeatedly until you reach the desired menu function. Use the <UP> and <DOWN>
buttons to navigate the menu options. Press the <ENTER> button to select the menu function currently dis-
played or to enable a menu option. To return to the previous option or menu without changing the value, press
the <MODE> button. After a few seconds, the LED Display will back during operation until another button is
pressed.
DISPLAY EXPLANATION
Addr A001-A512: DMX Address 001-512
CHnd 17CH: DMX Channel
SLnd DMX/Auto/Sound: Running Mode
Pan YES, NO: Pan Reverse
Tilt YES, NO: Tilt Reverse
SEne 0-100: Sound sensitivity
LED Backlight ON, OFF
UP
DOWN
MENU ENTER
8.8.8.8.
Bekijk gratis de handleiding van Ibiza Sound E-BEEDREAM100, stel vragen en lees de antwoorden op veelvoorkomende problemen, of gebruik onze assistent om sneller informatie in de handleiding te vinden of uitleg te krijgen over specifieke functies.
Productinformatie
| Merk | Ibiza Sound |
| Model | E-BEEDREAM100 |
| Categorie | Verlichting |
| Taal | Nederlands |
| Grootte | 3800 MB |


