Handleiding
Je bekijkt pagina 75 van 139
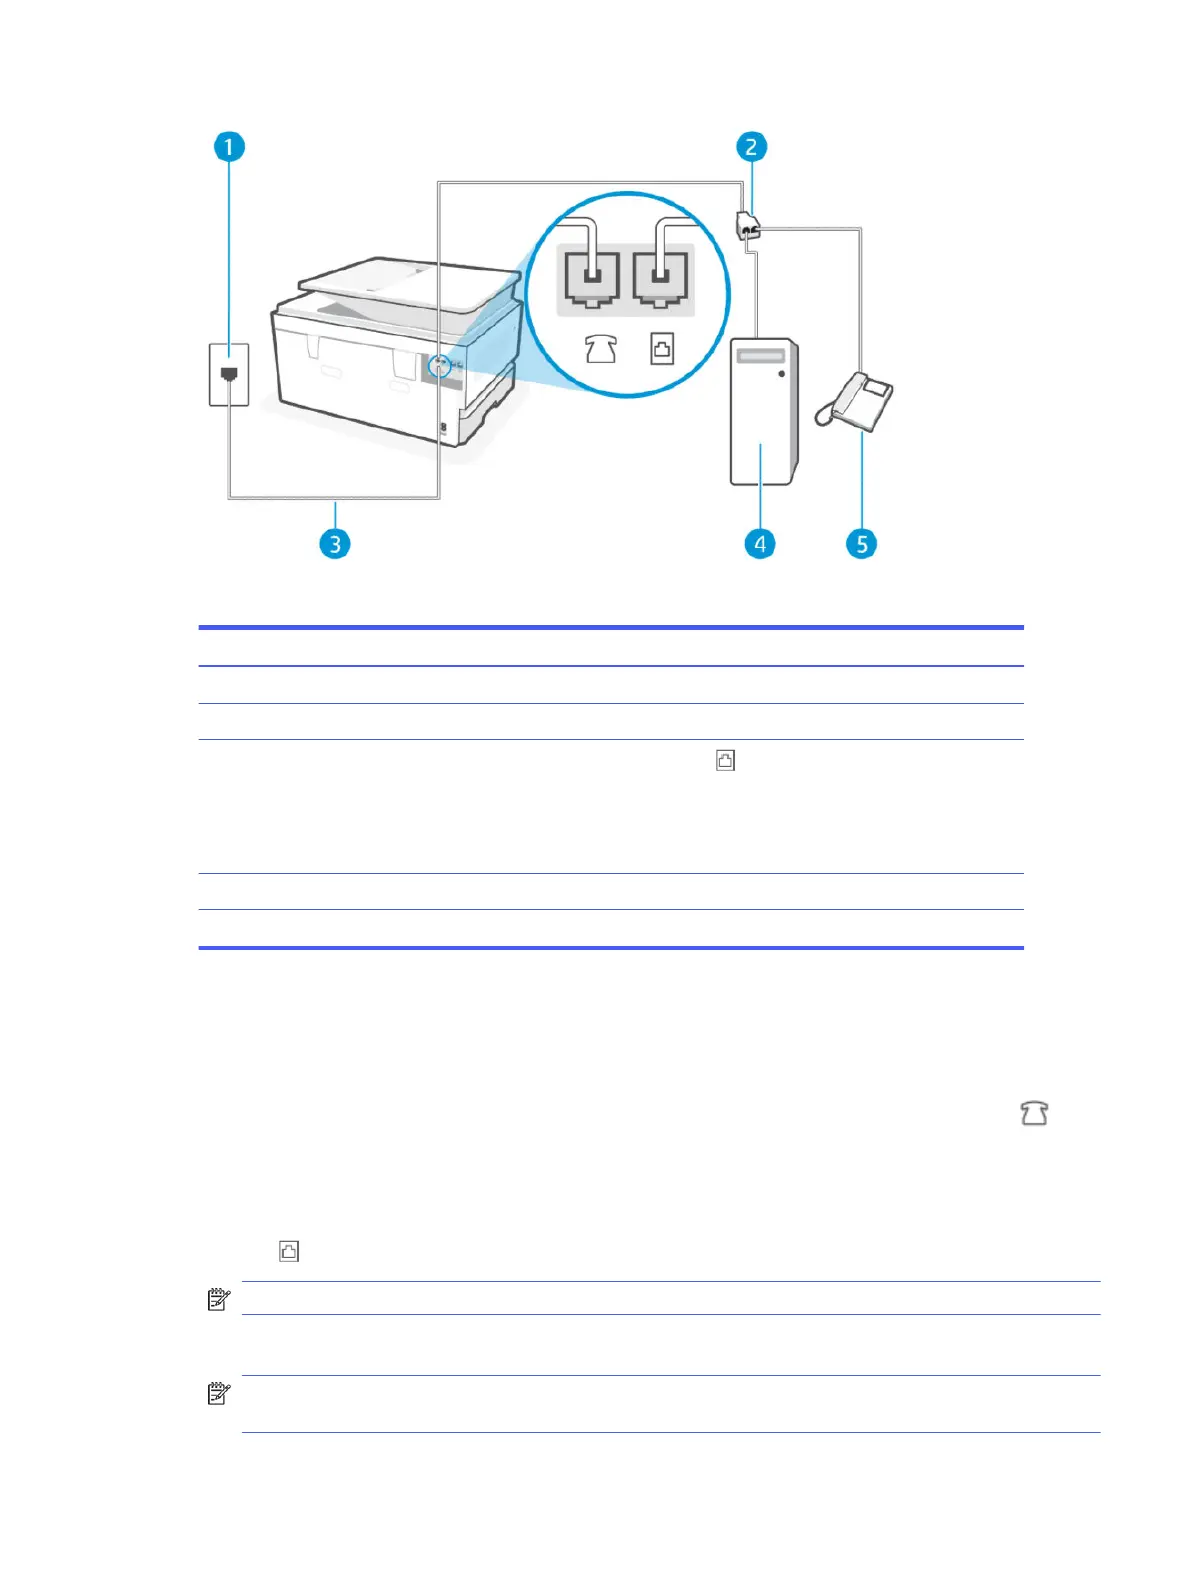
Table 7-11 Rear view of printer
Feature Description
1 Telephone wall jack.
2 Parallel splitter.
3
Use a minimum 26 AWG phone cord to connect to the port on the printer.
CAUTION: To reduce the risk of re, use only No. 26 AWG or larger (For example, 24 AWG) UL Listed
or CSA Certied Telecommunications Line Cord.
You might need to connect the phone cord to your country/region adapter.
4 Computer with modem.
5 Telephone.
Set up the printer on the same phone line as a computer with two phone ports
Follow these steps to set up the printer on the same phone line as a computer with two phone ports.
1. Find the phone cord that connects from the back of your computer (your computer dial-up modem) to a
telephone wall jack. Disconnect the cord from the telephone wall jack and plug it into the Fax port on
the back of the printer.
2. Connect a phone to the "OUT" port on the back of your computer dial-up modem.
3. Connect one end of the phone cord to your telephone wall jack, then connect the other end to the Fax
port on the back of the printer.
NOTE: You might need to connect the phone cord to your country/region adapter.
4. If your modem software is set to receive faxes to your computer automatically, turn o that setting.
NOTE: If you do not turn o the automatic fax reception setting in your modem software, the printer
cannot receive faxes.
Set up the printer on the same phone line as a computer with two phone ports
67
Bekijk gratis de handleiding van HP OfficeJet Pro 9125e, stel vragen en lees de antwoorden op veelvoorkomende problemen, of gebruik onze assistent om sneller informatie in de handleiding te vinden of uitleg te krijgen over specifieke functies.
Productinformatie
| Merk | HP |
| Model | OfficeJet Pro 9125e |
| Categorie | Printer |
| Taal | Nederlands |
| Grootte | 18739 MB |


