Handleiding
Je bekijkt pagina 65 van 162
To set up the printer with a separate fax line
1. Connect one end of the phone cord to your telephone wall jack, then connect the other end to the port
labeled 1-LINE on the back of the printer.
NOTE: You might need to connect the phone cord to your country/region adapter.
2. Turn on the Auto Answer setting.
3. (Optional) Change the Rings to Answer setting to the lowest setting (two rings).
4. Run a fax test.
When the phone rings, the printer answers automatically after the number of rings you set in the Rings to
Answer setting. The printer begins emitting fax reception tones to the sending fax machine and receives the
fax.
Case B: Set up the printer with DSL
If you have a DSL service through your telephone company, and do not connect any equipment to the printer,
use the instructions in this section to connect a DSL lter between the telephone wall jack and the printer.
The DSL lter removes the digital signal that can interfere with the printer, so the printer can communicate
correctly with the phone line. (DSL might be called ADSL in your country/region.)
NOTE: If you have a DSL line and you do not connect the DSL lter, you cannot send and receive faxes with
the printer.
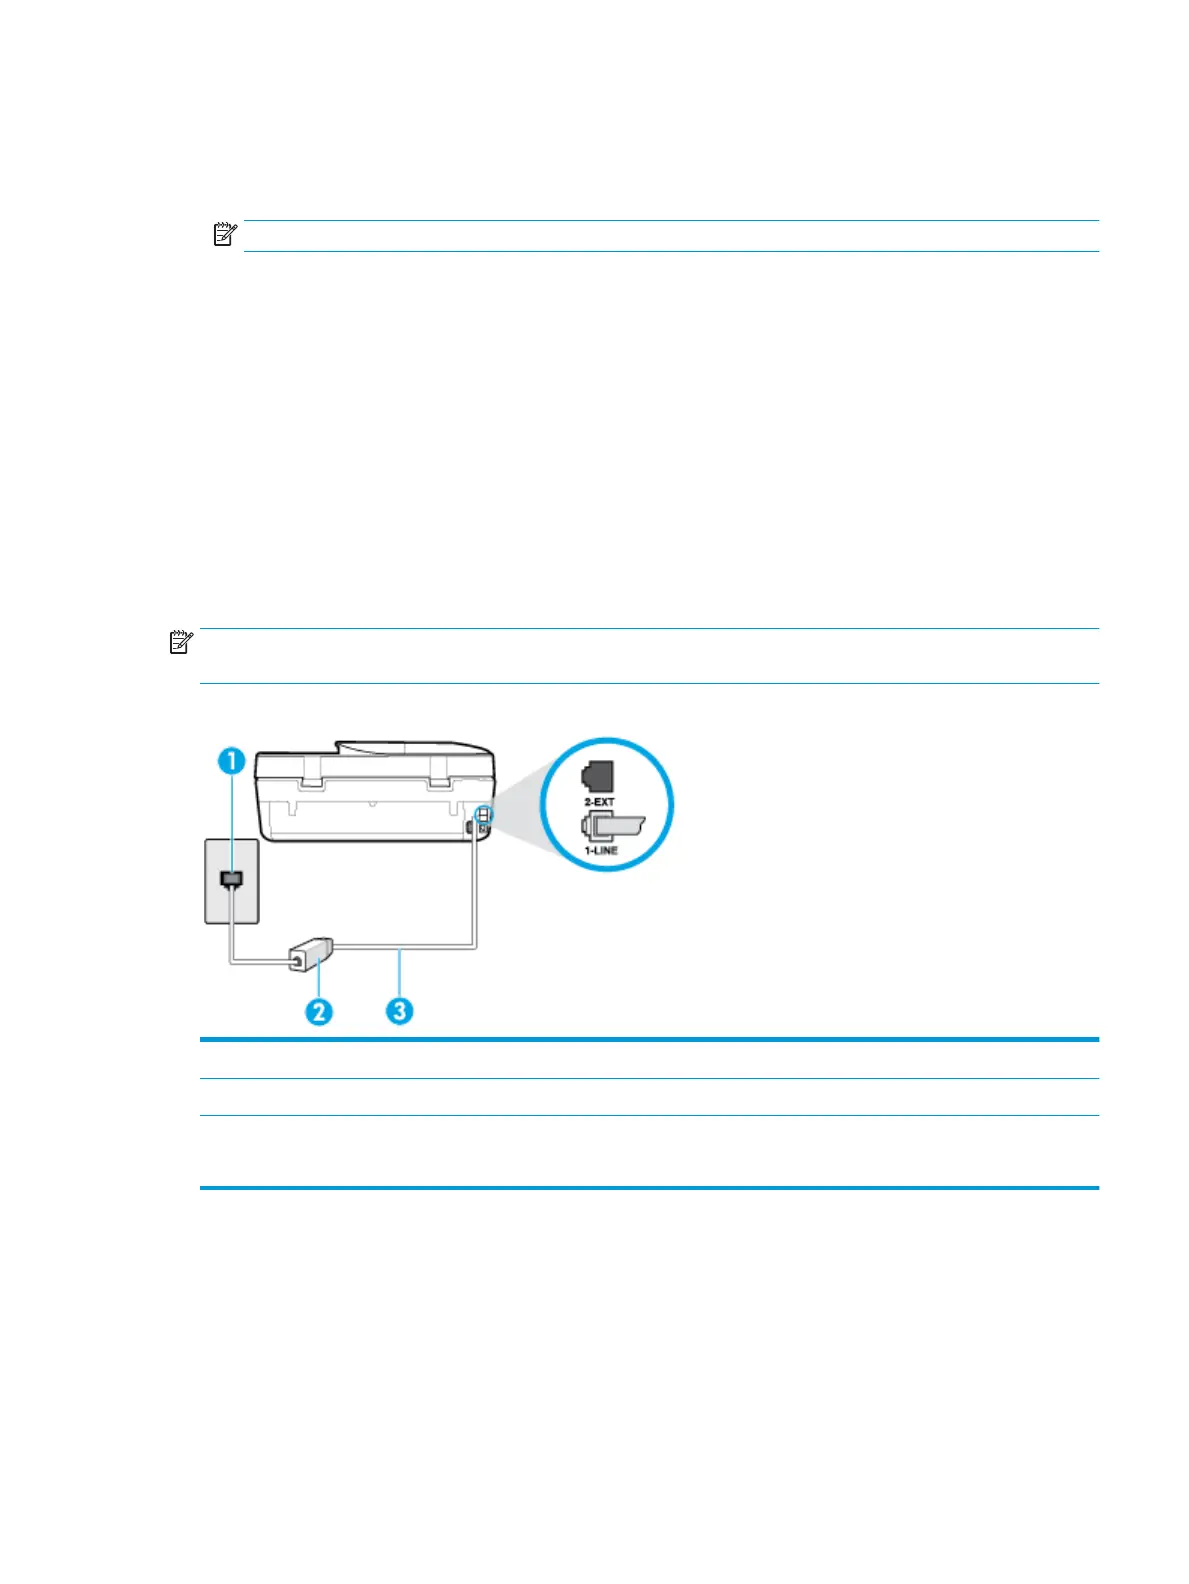
Figure 5-2 Back view of the printer
1 Telephone wall jack.
2 DSL (or ADSL) lter and cord supplied by your DSL provider.
3 Connect the phone cord to the port labelled 1-LINE on the back of the printer.
You might need to connect the phone cord to your country/region adapter.
ENWW Additional fax setup 59
Bekijk gratis de handleiding van HP OfficeJet 5230, stel vragen en lees de antwoorden op veelvoorkomende problemen, of gebruik onze assistent om sneller informatie in de handleiding te vinden of uitleg te krijgen over specifieke functies.
Productinformatie
| Merk | HP |
| Model | OfficeJet 5230 |
| Categorie | Printer |
| Taal | Nederlands |
| Grootte | 19700 MB |


