Handleiding
Je bekijkt pagina 31 van 52
EN / 31
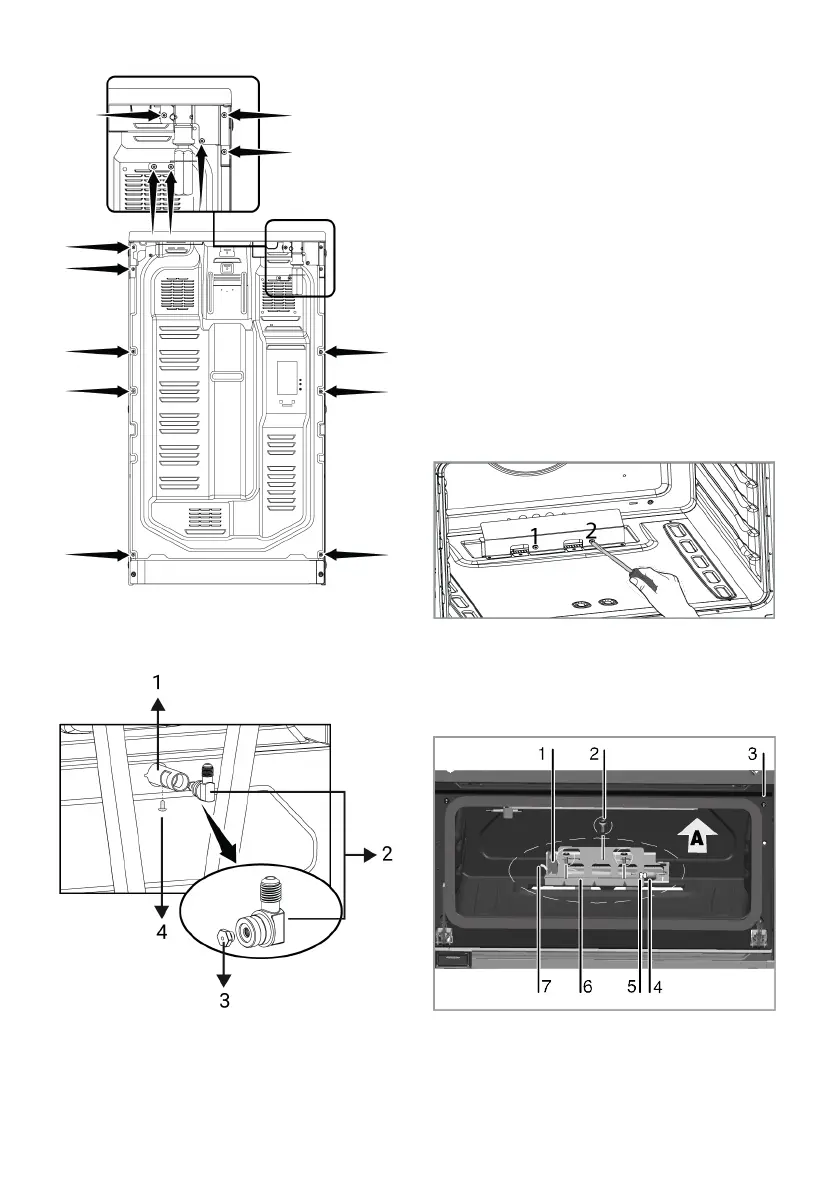
1. After removing the rear wall, you can ac-
cess the grill burner pipe and grill in-
jector holder.
1 Grill burner
2 Injector holder
3 Injector
4 Screw
2. Remove the securing screw of the grill
injector holder.
3. Remove the injector and replace with a
suitable injector, see injector table.
4. After replacing the injector, check for
leaks.
5. Install the injector holder to the grill
burner pipe.
6. Secure the injector holder with a screw.
7. Assemble the rear wall and gas shut-off
valve holder.
Exchange of injector for the oven burners
For cooking sections with drop down oven
doors, it is recommended to remove the
drop down oven door to allow ergonomic
removal of the oven gas injector.
To replace the lower oven injector, first re-
move the burner protection sheet by remov-
ing the 2 screws seen in the figure above.
(This plate is not present in the upper cook-
ing section.)
1 Oven burner
2 Screw (3 pieces)
3 Cut-off valve*
4 Injector holder
5 Injector
Bekijk gratis de handleiding van Hotpoint HTG5GCW, stel vragen en lees de antwoorden op veelvoorkomende problemen, of gebruik onze assistent om sneller informatie in de handleiding te vinden of uitleg te krijgen over specifieke functies.
Productinformatie
| Merk | Hotpoint |
| Model | HTG5GCW |
| Categorie | Fornuis |
| Taal | Nederlands |
| Grootte | 5490 MB |


