Hotpoint DIH 10D1 IX handleiding
Handleiding
Je bekijkt pagina 22 van 40
EN / 22
correct installation. The manufacturer
cannot be held responsible for any dam-
ages that may arise due to operations by
unauthorized persons.
• The electric cable must not be crushed,
folded, jammed or touch hot parts of the
product. If the electric cable is damaged,
it must be replaced by a qualified electri-
cian. Otherwise there is an electric shock,
short circuit or fire hazard!
• Power cable plug must be within easy
reach after installation (do not route it
above the hob). Do not use extension or
multi sockets in power connection.
• and must use the appropriate socket out-
let/line and plug for oven. In case of the
product's power limits are out of current
carrying capability of plug and socket
outlet/line, the product must be connec-
ted through fixed electrical installation
directly without using plug and socket
outlet/line.
• If the product will be connected directly
to the supply power: If it is not possible
to disconnect all poles in the supply
power, a disconnection unit with at least
3 mm contact clearance (fuses, line
safety switches, contactors) must be
connected and all the poles of this dis-
connection unit must be adjacent to (not
above) the product in accordance with
IEE directives. Failure to obey this in-
struction may cause operational prob-
lems and invalidate the product warranty.
• Additional protection by a residual cur-
rent circuit breaker is recommended.
If the product is produced with cable and
without plug:
Connect the cord of product to supply
power as identified below:
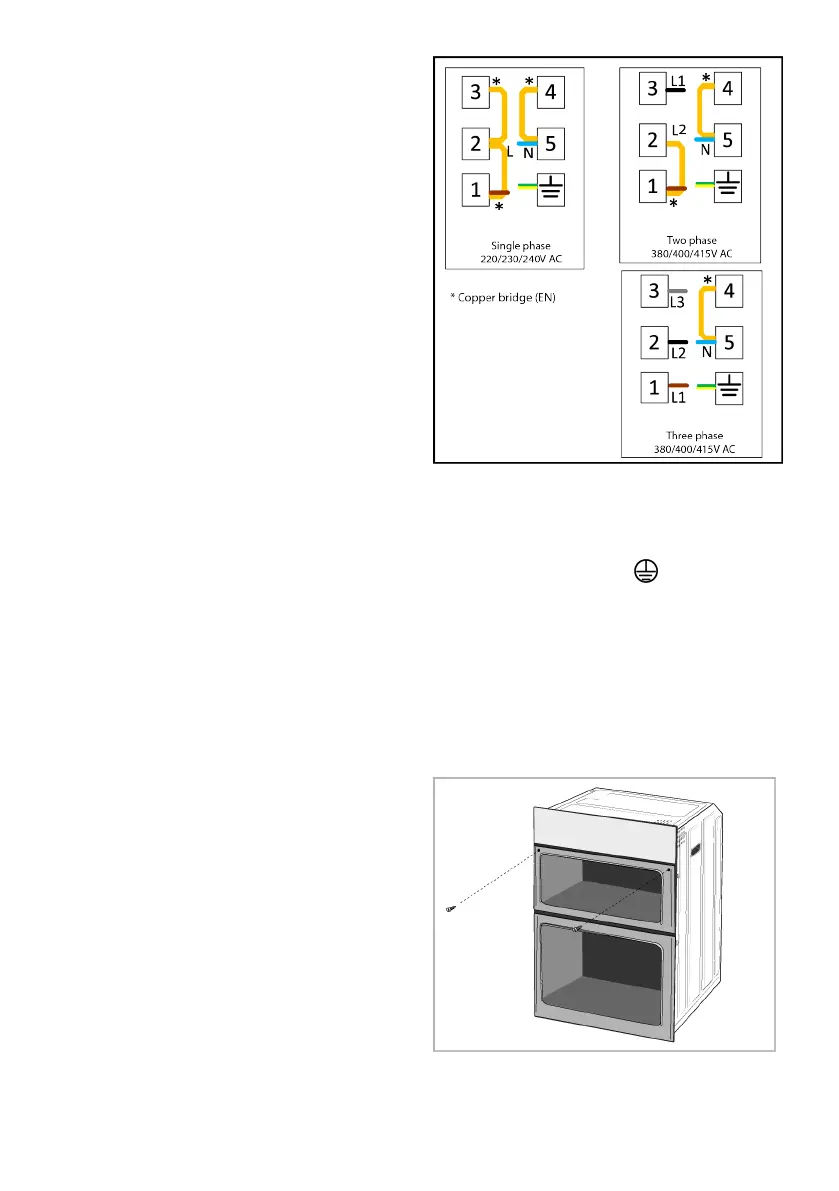
Make the terminal block connection of your
product according to the connection/phase
information on the product type label.
If your supply cord type is 3-conductor type,
for 1-phase connection:
- Brown/Black = L (Phase)
- Blue = N (Neutral)
- Green/Yellow wire = (E) (Earthing)
4.3 Placing the product
1. Paying attention that the power cord is
not pinched or broken, slide the oven in-
side the cabinet hole, align and secure
it.
2. Secure the oven with the 2 screws as
shown in the figure.
Bekijk gratis de handleiding van Hotpoint DIH 10D1 IX, stel vragen en lees de antwoorden op veelvoorkomende problemen, of gebruik onze assistent om sneller informatie in de handleiding te vinden of uitleg te krijgen over specifieke functies.
Productinformatie
| Merk | Hotpoint |
| Model | DIH 10D1 IX |
| Categorie | Niet gecategoriseerd |
| Taal | Nederlands |
| Grootte | 3955 MB |


