Handleiding
Je bekijkt pagina 30 van 56
Settings Overview
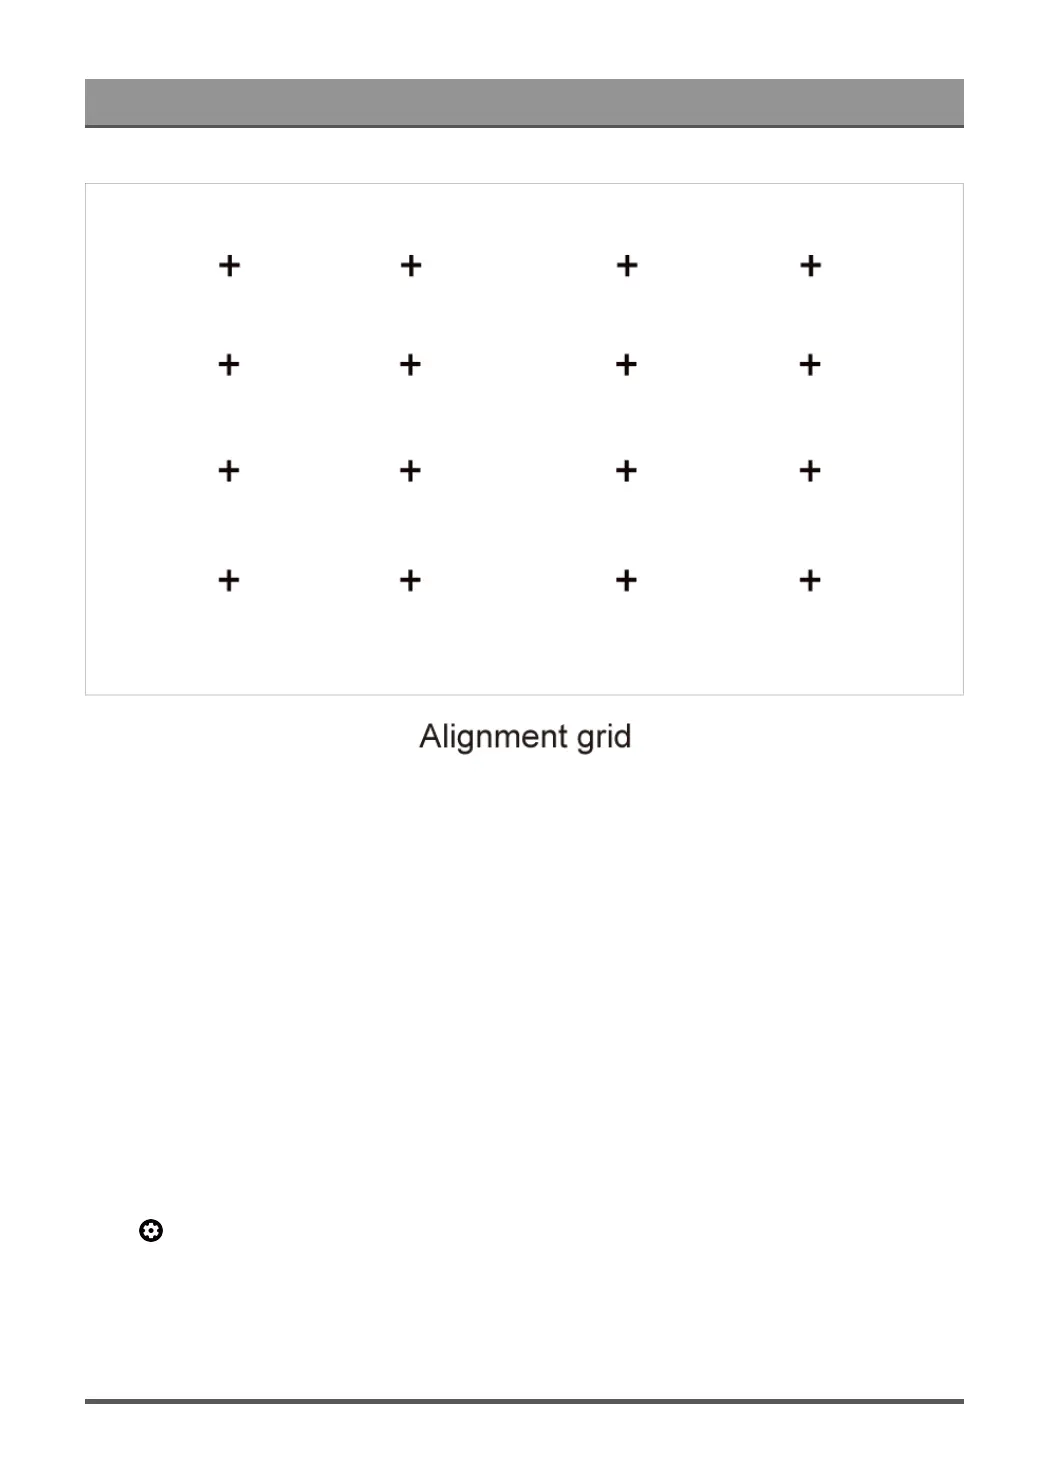
4. Click "+" on your mobile device to take a photo of the entire screen and image. For best results, stand
about 10 feet away from the screen and use landscape mode.
5. Click "Upload" on your mobile device to complete the automatic geometric correction.
Note:
• Please ensure you are standing in front of the screen to take the photo, no deviation of more than 25° from
the center of the screen.
• Please ensure the whole screen is fully visible on the photo, including the Frame of the display.
• Please ensure all the 16 points of the grid on the screen are all in focus when taking the photo.
• Please ensure the screen image must take up at least 60% of the overall photo size for correct geometric
correction.
Geometric Correction
Select points and move it to fit the projected image into the screen.
Note:
Geometric Correction is only applicable in some models/countries/regions.
Press button on your remote to select Settings > Display & Sound > Laser Screen > Geometric
Correction.
29
Bekijk gratis de handleiding van Hisense PL1, stel vragen en lees de antwoorden op veelvoorkomende problemen, of gebruik onze assistent om sneller informatie in de handleiding te vinden of uitleg te krijgen over specifieke functies.
Productinformatie
| Merk | Hisense |
| Model | PL1 |
| Categorie | Televisie |
| Taal | Nederlands |
| Grootte | 4024 MB |


