Hikoki R18DA handleiding
Handleiding
Je bekijkt pagina 10 van 60
English
10
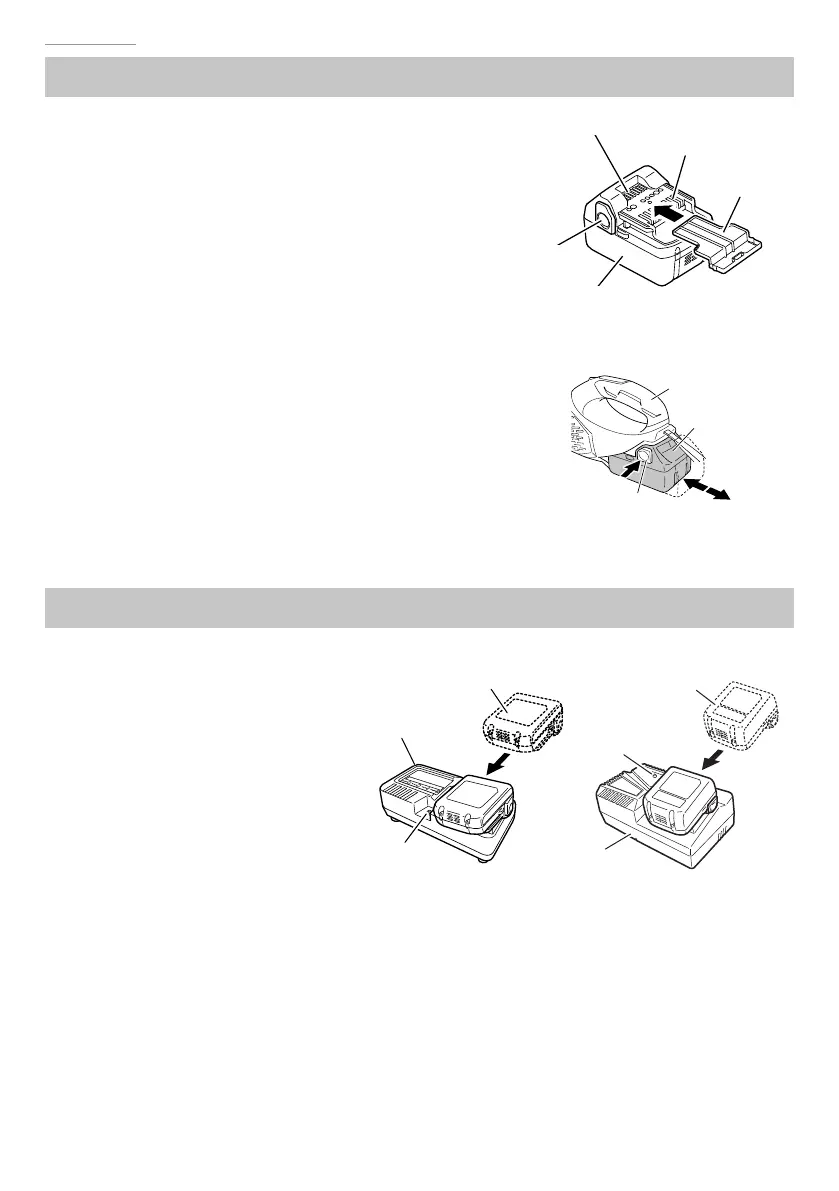
BATTERY REMOVAL / INSTALLATION
1. Battery removal
Hold the handle tightly and push the battery latches to
remove the battery (see Fig. 3, 4).
CAUTION
Never short-circuit the battery.
2. Battery installation
Insert the battery while observing its polarities
(see Fig. 4).
CHARGING
Before using the power tool, charge the battery as follows.
1. Connect the charger’s power cord
to the receptacle.
When connecting the plug of the
charger to a receptacle, the pilot
lamp will blink in red (At 1- second
intervals).
2. Insert the battery into the charger.
Firmly insert the battery into the
charger as shown in Fig. 5.
3. Charging
When inserting a battery in the
charger, charging will commence
and the pilot lamp will light
continuously in red.
When the battery becomes fully recharged, the pilot lamp will blink in red. (At 1-second
intervals) (See Table 2)
●
Pilot lamp indication
The indications of the pilot lamp will be as shown in Table 2, according to the condition of
the charger or the battery.
Battery cover
Fig. 3
Battery
Latch
Ventilation holes
Terminals
Handle
Latch
Battery
Pull out
Insert
Push
Fig. 4
Fig. 5
Battery
Charger
Pilot lamp
UC18YFSL
Battery
Charger
Pilot lamp
UC18YKSL
000BookR18DAChS.indb10000BookR18DAChS.indb10 2018/04/279:42:022018/04/279:42:02
Bekijk gratis de handleiding van Hikoki R18DA, stel vragen en lees de antwoorden op veelvoorkomende problemen, of gebruik onze assistent om sneller informatie in de handleiding te vinden of uitleg te krijgen over specifieke functies.
Productinformatie
| Merk | Hikoki |
| Model | R18DA |
| Categorie | Niet gecategoriseerd |
| Taal | Nederlands |
| Grootte | 10895 MB |

