Helix AMPLIFY 201 DIRECT handleiding
Handleiding
Je bekijkt pagina 16 van 24
16
Hardware conguration
Congure the HELIX AMPLIFY 201 DIRECT as
follows
Caution: Carrying out the following steps will
require special tools and technical knowledge. In
order to avoid connection mistakes and / or dam-
age, ask your dealer for assistance if you have any
questions and follow all instructions in this manual
(see page 13). It is recommended that this unit will
be installed by an authorized HELIX dealer.
For better access to the connectors and control
units, we recommend to remove the amplier’s
cover panels, as shown on page 15, g. 1.
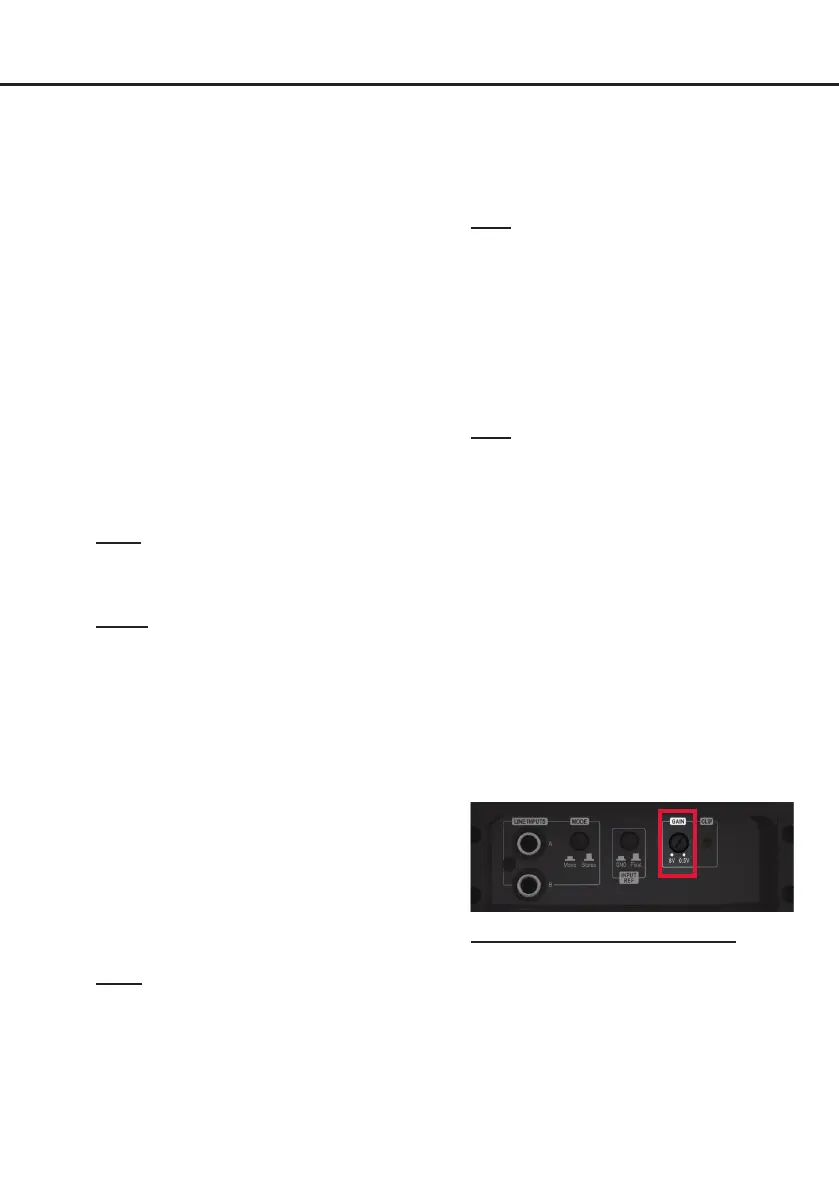
1. Adjusting the input mode
Use the input mode pushbutton (page 14,
point 2) to adjust the AMPLIFY 201 DIRECT
amplier to the number of input channels
used.
The available input modes are as follows:
Mono: In mono operation only input channel A
needs to be connected e.g. the signal source
only provides a mono signal for subwoofer ap-
plications.
Stereo: Select this switch setting if both input
channels (A and B) are used. In this mode an
optimized sum signal is generated by the in-
put signals of the channels A and B.
2. Connecting the pre-amplier inputs
These two lowlevel line inputs can be con-
nected to signal sources such as DSPs or
DSP ampliers using appropriate cables. It is
possible to optimally adapt the input sensitiv-
ity to the signal source using the Gain control
(page 14, point 4).
3. Connection to power supply & remote
Make sure to disconnect the battery before
installing the AMPLIFY 201 DIRECT.
Ensure correct polarity.
+12 V: Connector for the positive cable.
Connect the +12 V power cable to the positive
terminal of the battery. The positive wire from
the battery to the ampliers power terminal
needs to have an inline fuse at a distance of
no more than 12 inches (30 cm) from the bat-
tery. The value of the fuse is calculated from
the maximum total current input of the whole
car audio system (201 DIRECT = max. 80 A
RMS at 12 V RMS power supply). If your
power wires are short (less than 1 m / 40”)
then a wire gauge of 10 mm² / AWG 8 will be
sucient. In all other cases we strongly rec-
ommend gauges of 16 - 25 mm² / AWG 6 – 4!
GND: Connector for the ground cable. The
ground wire should be connected to a com-
mon ground reference point (this is located
where the negative terminal of the battery is
grounded to the metal body of the vehicle) or
to a prepared metal location on the vehicle
chassis, i.e., an area cleaned of all paint resi-
dues. The cable should have the same gauge
as the +12 V wire. Inadequate grounding
causes audible interference and malfunctions.
REM:
The remote input is used to switch on and
o the amplier. It is mandatory to connect this
input to the remote output of the preconnected
device (DSP or DSP amplier) that provides
the input signal to the AMPLIFY 201 DIRECT.
We do not recommend controlling the remote
input via the ignition switch to avoid pop noise
during turn on / o.
4. Adjustment of the input sensitivity
ATTENTION: It is mandatory to properly
adapt the input sensitivity of the AMPLIFY
201 DIRECT to the signal source to achieve
the best possible signal quality and avoid
damage to the amplier.
The input sensitivity can be optimally adapt-
ed to the signal source using the gain control
(page 14, point 4).
The gain control range is 0.5 - 8 Volts
This control is not a volume control; it´s solely
for adjusting the amplier´s gain. Input sensi-
tivity is factory set to 8 Volts.
If the signal source provides a lower output
voltage, the input sensitivity can be smoothly
increased via the Gain control.
Bekijk gratis de handleiding van Helix AMPLIFY 201 DIRECT, stel vragen en lees de antwoorden op veelvoorkomende problemen, of gebruik onze assistent om sneller informatie in de handleiding te vinden of uitleg te krijgen over specifieke functies.
Productinformatie
| Merk | Helix |
| Model | AMPLIFY 201 DIRECT |
| Categorie | Niet gecategoriseerd |
| Taal | Nederlands |
| Grootte | 2483 MB |


