Handleiding
Je bekijkt pagina 49 van 64
Start-up
Page EN-17
8. Screw the two screws tightly back onto
the cover. To do this, use a cross-head
screwdriver. Secure the two screw cov-
ers.
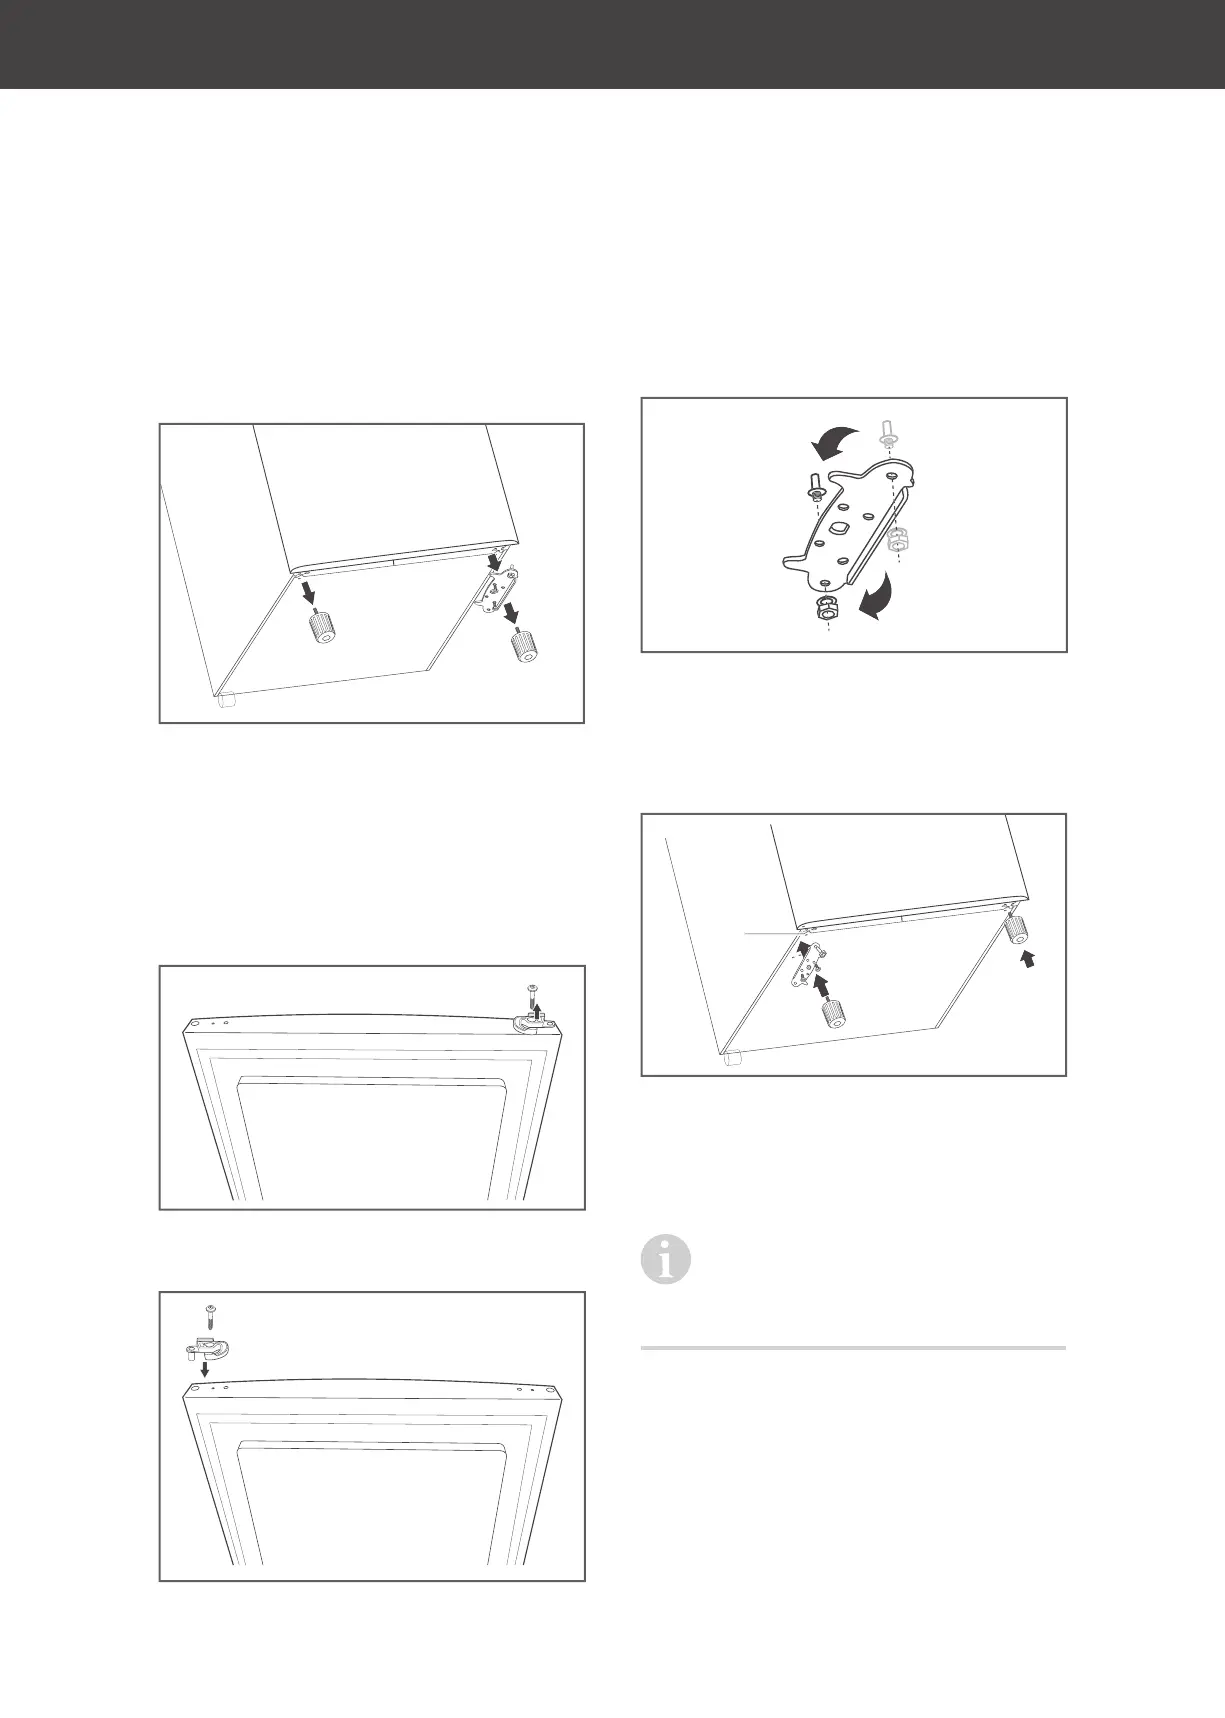
9. Tip the freezer backwards (maximum
45°) so that you can also move the lower
door hinge.
10. Unscrew the two front screw feet (3).
11. Unscrew the lower hinge plate. To do
this, use an 8 mm spanner or a cross-
head screwdriver.
12. Remove the door.
13. Remove the plastic insert from the un-
derside of the door.
14. Insert the loose plastic insert supplied
into the new hinge stop side and firmly
screw in.
15. Turn the lower hinge plate. Loosen the
hinge bolts with a 10 mm spanner. Loos-
en the nuts and reinsert the nuts and the
hinge bolts from the other side. Move the
screw (4) to the opposite side.
16. Replace the door.
17. Screw the hinge plate tightly back onto
the opposite side. Make sure that the
hinge pin is in the hinge bushing of the
door.
Use the screwdriver to tighten the
screws by just 2 to 3 turns, and then
use the 8 mm spanner to tighten them
fully.
The door will now function properly again.
18. Screw both screw feet securely back
onto the freezer.
19. Carefully stand the freezer upright.
(4)
Bekijk gratis de handleiding van Hanseatic HGS8555BW, stel vragen en lees de antwoorden op veelvoorkomende problemen, of gebruik onze assistent om sneller informatie in de handleiding te vinden of uitleg te krijgen over specifieke functies.
Productinformatie
| Merk | Hanseatic |
| Model | HGS8555BW |
| Categorie | Vriezer |
| Taal | Nederlands |
| Grootte | 6660 MB |


