Hager ESR1332004 handleiding
Handleiding
Je bekijkt pagina 39 van 308
37
Technical changes reserved
electraplan.UK
electraplan.UK
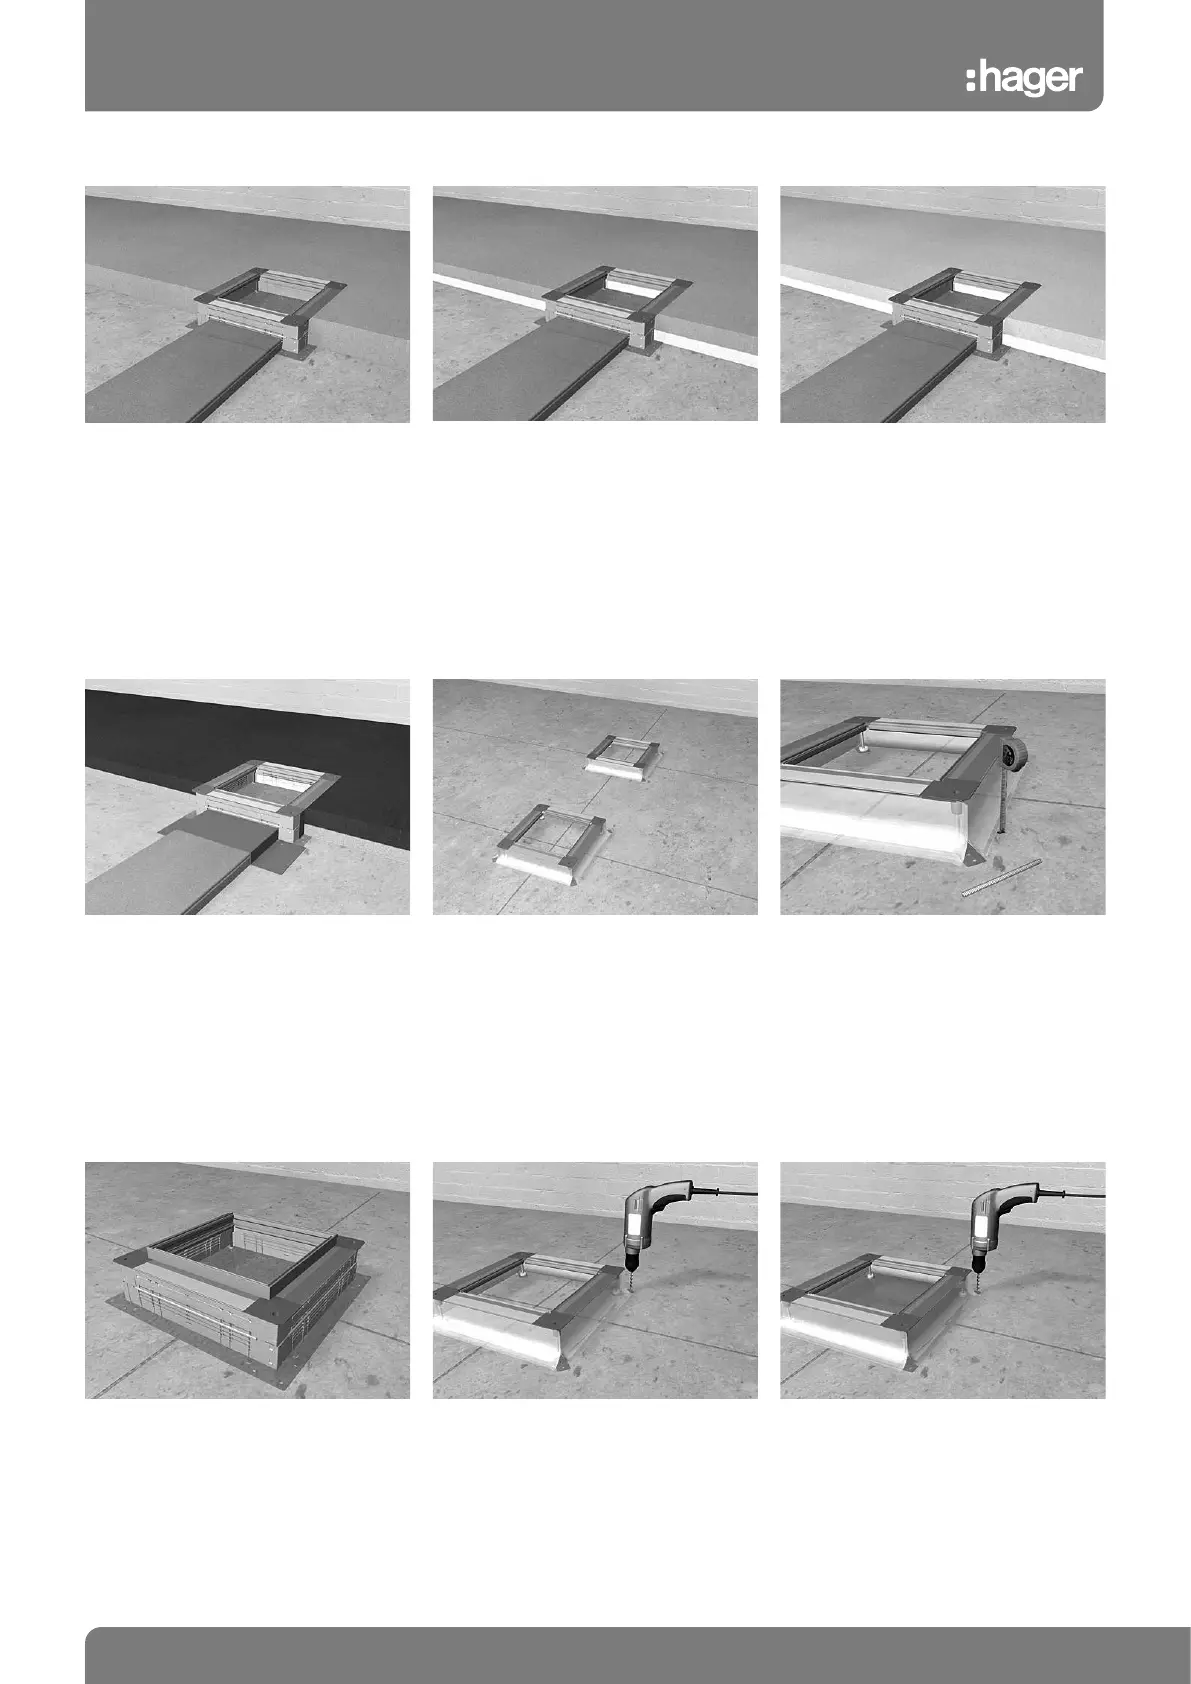
Installation instructions, universal junction boxes
Installation in monolithic screed
Cement screed is directly applied onto the
slab and the galvanised underfloor trunking.
Installation in floating floor screed Installation in floating screed
Cement screed is applied onto an insulating
layer. The underfloor trunking is integrated in
this insulation layer.
The installation of trunking and universal
junction boxes is similar to the installation in
cement screed. In addition, the system must
be protected against the ingress of floating
screed during installation.
Installation in hot screed (UDS3 only)
When casting hot screed or mastic asphalt
temperatures of approx. 280 °C may occur.
This requires trunking and universal junction
boxes to be covered and insulated with bi-
tuminous corrugated board. Due to the high
temperatures, lines must not be installed
before the hot screed has completely cooled
down.
Position the universal junction boxes
according to the lay-out.
Check the levelling area
Locate the universal junction boxes on the
slab and secure them according to the lay-
out. The flexible screed casing must be on
the outside.
Check the levelling area on the slab. The
studs of universal junction box UDB or UDH
can be replaced, if required. Turn them
counterclockwise to separate them from the
soundproofing mounts. Do not pull the studs
out or drive them in.
Screed height above 120 mm with UDS3
For screed heights of more than 120 mm
the height of universal junction box UDS3
can be increased by 35 mm using levelling
frame UDAR335. Place levelling frame onto
the frame of the underfloor box and secure it
with four screws.
Attach universal junction box UDH Attach junction box UDB or UDS3
If universal junction box UDH is used, dowel
all four brackets to the slab. Each bracket
is pre-drilled with 1 x 6 mm and 1 x 7 mm
holes.
For universal junction box UDB or UDS3, the
bottom plate must be secured to the slab
at all four corners. Holes of 6.5 mm are pro-
vided in each corner.
Bekijk gratis de handleiding van Hager ESR1332004, stel vragen en lees de antwoorden op veelvoorkomende problemen, of gebruik onze assistent om sneller informatie in de handleiding te vinden of uitleg te krijgen over specifieke functies.
Productinformatie
| Merk | Hager |
| Model | ESR1332004 |
| Categorie | Niet gecategoriseerd |
| Taal | Nederlands |
| Grootte | 89708 MB |
Caratteristiche Prodotto
| Kleur van het product | Oranje |
| Breedte | 45 mm |
| Diepte | 40 mm |
| Duurzaamheidscertificaten | RoHS |
| Aantal | 20 |


