Handleiding
Je bekijkt pagina 17 van 34
- 13 -
Note:
Drain water for another style:
1.
2.
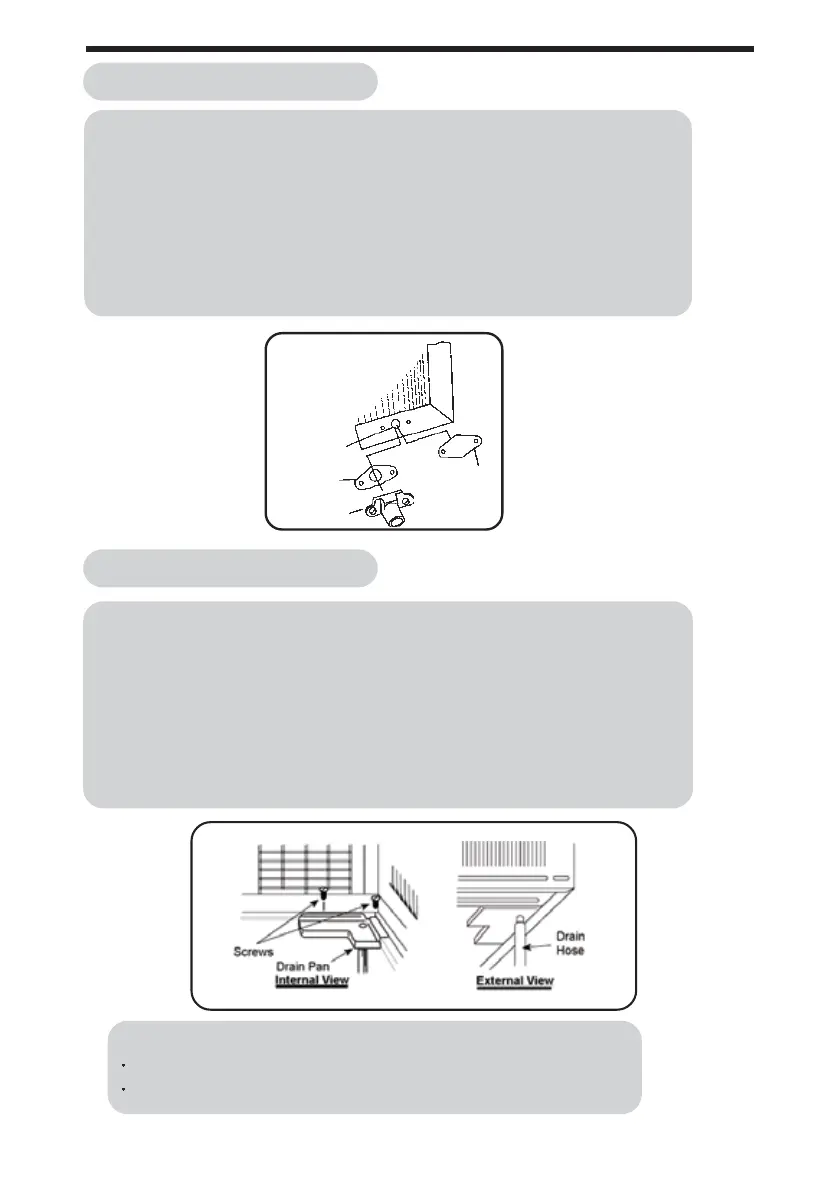
Slide out the chassis from the cabinet.
Drain pan and drain hose must be installed before using reverse cycle models.
Drain hose or tubing can be purchased locally to satisfy your particular needs.
3.
Remove the rubber plug from the body base plate.
4.
Install the drain pan to the corner of the cabinet with 2 screws.
5.
Drain water for one style:
To get the maximum cooling efficiency, the air conditioner is designed to splash the condensation water on the
condenser coil.
Connect the drain hose to the outlet on the drain pan bottom.
Slide the chassis into its original place in the cabinet.
2.
3. Connect the drain hose to the outlet.
Drainage outlet
Washer
Install
Drainage joint
Remove cover from the drainage outlet, and then connect drainage joint to it with screw.
Cover
Remove
Note:
Drain hose or tubing can be purchased locally
to satisfy your particular needs.
To get the maximum cooling efficiency, the air conditioner is designed to splash the condensate on the
condenser coil.
If the splashing sound
annoys you, you can provide an outside drain by using the following procedure,
which may however cause a small loss of performance.
1. There is a drainage outlet at the back of the unit.
So if you want to increase the performance,you can install t
he rubber plug to the body base plate by using
the 1, 2, 5 steps of the following procedure in summer. In winter or the splashing sound annoys you, you
must remove the rubber plug and install an outside drain according to the following procedure:
Bekijk gratis de handleiding van Gree GWA12MZ, stel vragen en lees de antwoorden op veelvoorkomende problemen, of gebruik onze assistent om sneller informatie in de handleiding te vinden of uitleg te krijgen over specifieke functies.
Productinformatie
| Merk | Gree |
| Model | GWA12MZ |
| Categorie | Airco |
| Taal | Nederlands |
| Grootte | 2717 MB |


