Gladiator GAWA8HMHKG handleiding
Handleiding
Je bekijkt pagina 6 van 42
6
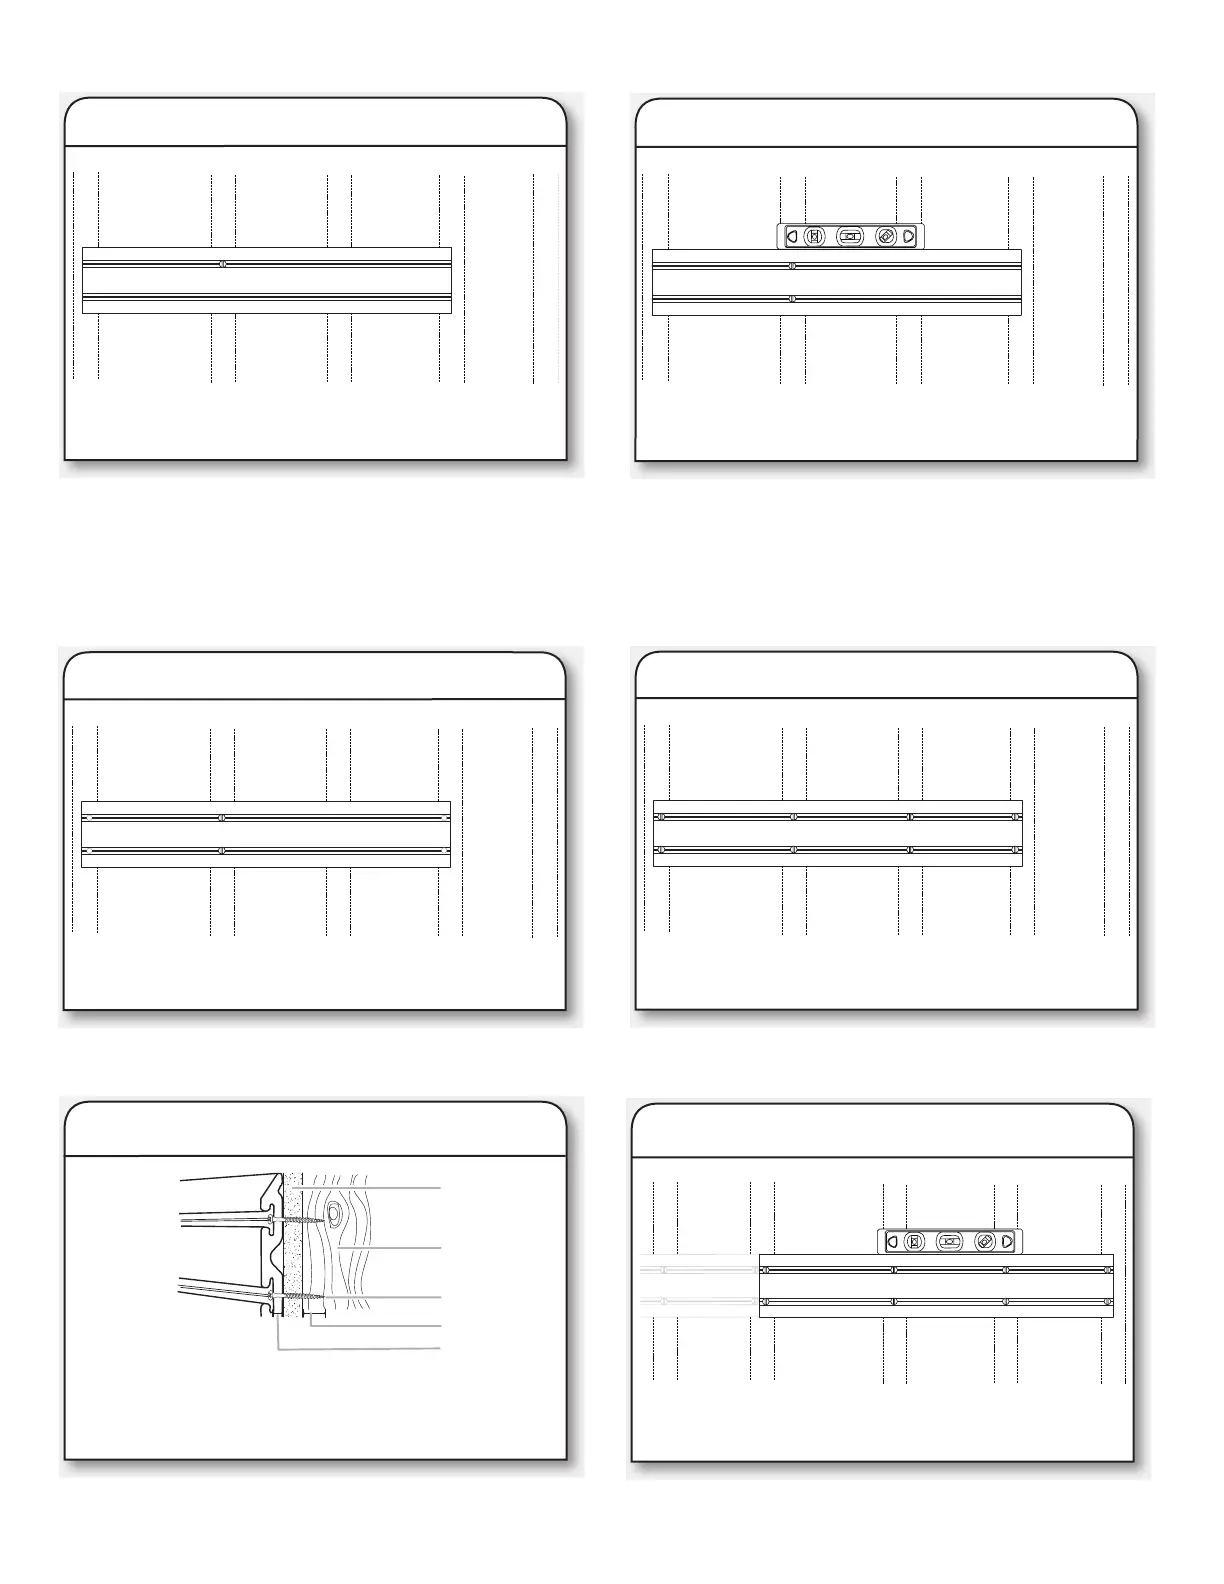
Mounting the Channels
■ Holding the channel up in the desired location, drive a screw
through the top slot groove and into the center of the stud
nearest to the middle of the channel until it is ush with the
surface.
NOTE: If installing GearTrack
®
Channels on masonry block or
poured concrete, you may put construction adhesive on the
GearTrack
®
Channel before attaching it to the wall for extra
hold.
■ If splitting occurs, you may nd it necessary to predrill and
countersink the screw holes near channel ends with a
1/8" (3 mm) drill bit.
■ Make sure all screws are installed and ush with the channel.
■ Check that the GearTrack
®
Channel is level, and then drive a
second screw through the bottom slot groove and into the
center of the same stud as in the previous step.
■ Drive a screw in every slot at every stud location.
■ Repeat this process for the next desired application area.
1. Drive First Screw
3. Predrill Holes
5. Inspect Screw Installation
A
B
C
D
E
A
B
C
D
E
A. Drywall
B. Wooden stud
C. Flat-head screw in
every slot at every stud
D. 1" (2.54 cm) min. to 1¼"
(3.17 cm) max. if near
wiring
E. 1/4" (6.3 mm)
2. Level the Channel
BUBBLE LEVEL
4. Drive Remaining Screws
6. Repeat for Additional Channels
BUBBLE LEVEL
Bekijk gratis de handleiding van Gladiator GAWA8HMHKG, stel vragen en lees de antwoorden op veelvoorkomende problemen, of gebruik onze assistent om sneller informatie in de handleiding te vinden of uitleg te krijgen over specifieke functies.
Productinformatie
| Merk | Gladiator |
| Model | GAWA8HMHKG |
| Categorie | Niet gecategoriseerd |
| Taal | Nederlands |
| Grootte | 5609 MB |


