Gladiator GAWA18SKRH handleiding
Handleiding
Je bekijkt pagina 8 van 42
8
Install the GearWall
®
Panels
Plan your Installation
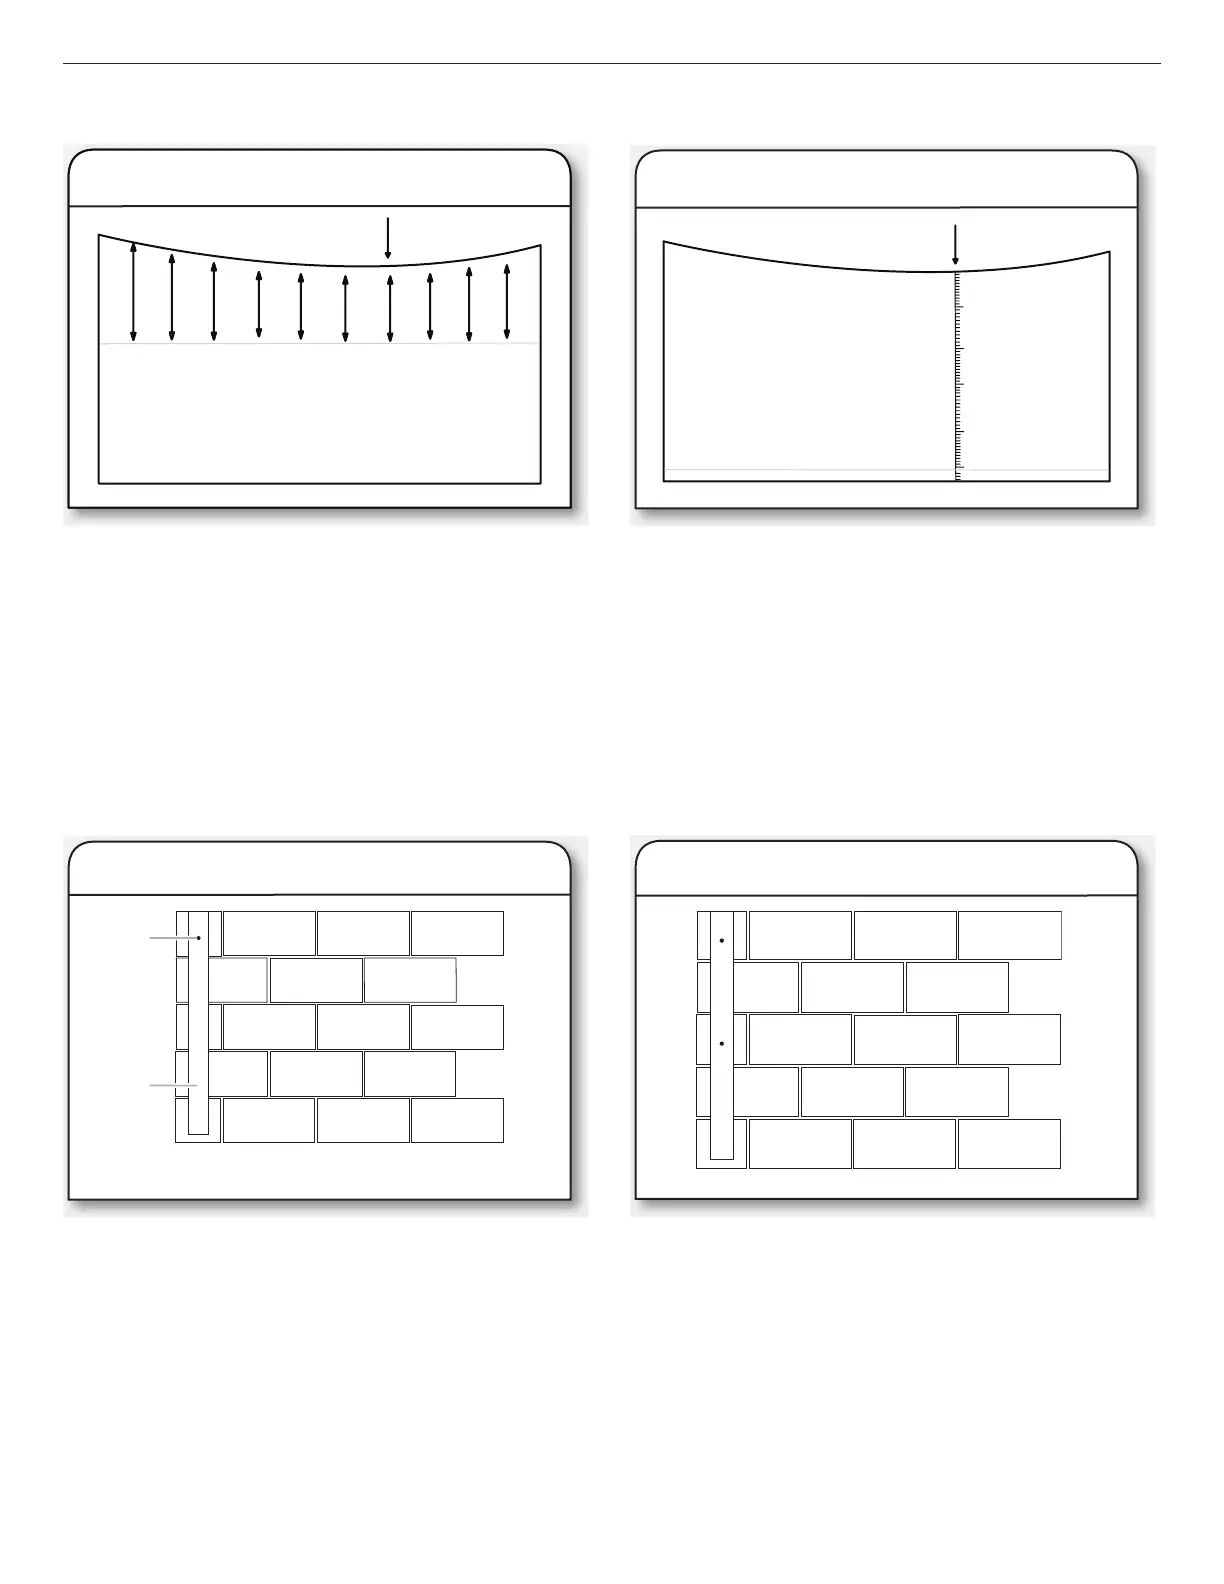
■ Snap a level chalk line at a convenient height on the wall(s).
Measure from the chalk line to the ceiling and determine the
lowest point of the ceiling along the wall.
Prepare the Wall
Masonry Block / Poured Concrete Wall
■ Starting from the lowest point of the ceiling, measure down to
the oor. Round the measurement down to the nearest foot
and mark. Snap a level chalk line 1/4" (6.3 mm) below the
mark. Repeat step for remaining walls.
NOTE: For partial wall installation, simply snap a level chalk
line at the desired height of the bottom of the wall.
■ Before you can install the panels on poured concrete or masonry block walls, you must install 2" (5.08 cm) x 4" (10.16 cm) wooden
studs to the wall with the 4" (10.16 cm) side against the wall. The wooden studs must be installed over the entire area to be covered
by the GearWall
®
panels. This provides a level surface on which to mount the panels.
■ Install the rst stud at the starting edge of the desired coverage
area to act as a guide. Drill a hole through the stud and into the
wall surface. Follow masonry screw manufacturer’s instructions
for proper installation. For best results use a hammer drill and
masonry bit.
NOTE: For extra hold, you may choose to put construction
adhesive on the stud before attaching it to the wall.
■ Secure the stud to the wall by placing 1/4" (6.3 mm) x
2¾" (6.9 cm) masonry screws every 18" (45.72 cm).
2. Mark Bottom of Wall
1. Measure Ceiling Sag
1. Mount First Stud
B
A
A. Masonry screws
B. Wooden stud
2. Secure First Stud
Bekijk gratis de handleiding van Gladiator GAWA18SKRH, stel vragen en lees de antwoorden op veelvoorkomende problemen, of gebruik onze assistent om sneller informatie in de handleiding te vinden of uitleg te krijgen over specifieke functies.
Productinformatie
| Merk | Gladiator |
| Model | GAWA18SKRH |
| Categorie | Niet gecategoriseerd |
| Taal | Nederlands |
| Grootte | 5609 MB |


