Giles GHM-6C handleiding
Handleiding
Je bekijkt pagina 35 van 57
25
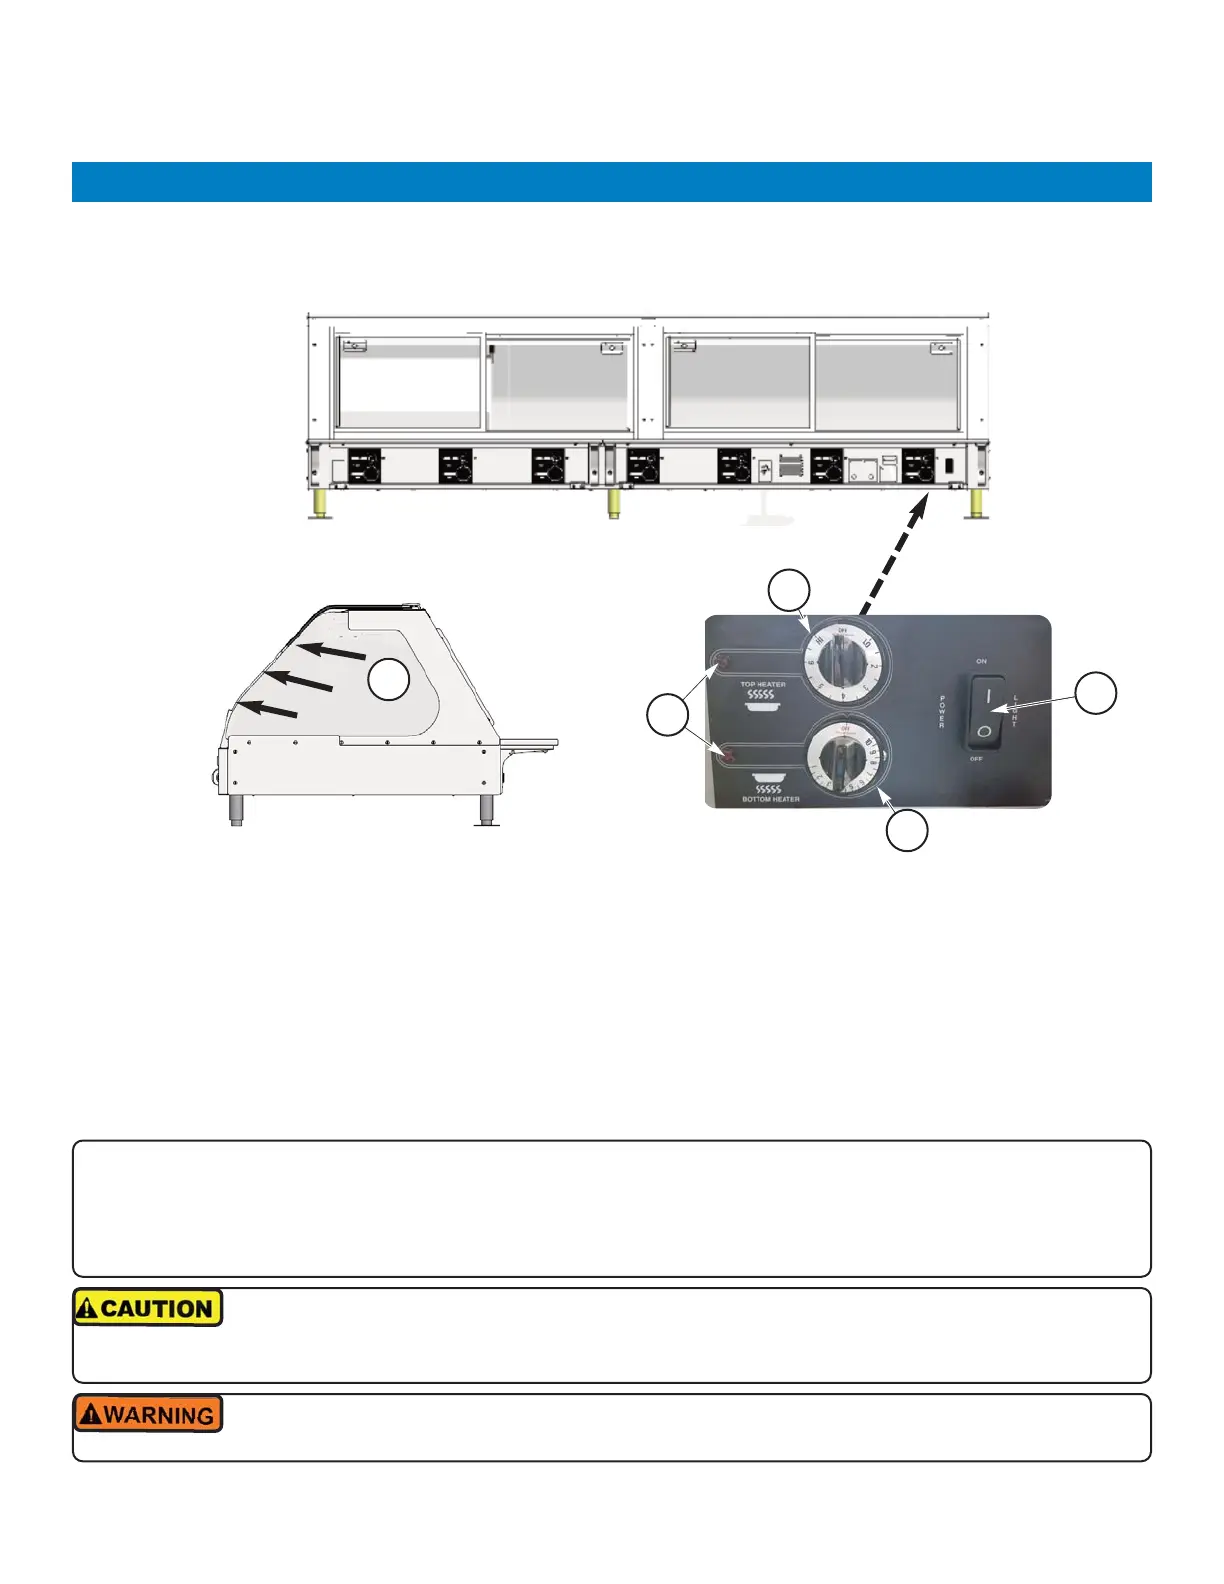
1. Bs sure the front glass is fully closed & sliding doors are closed.
2. Place main POWER switch
① in the [ON] position.
3. Turn all TOP HEATER control knobs
② counterclockwise to [HI] & set all BOTTOM HEATER controls ③ to the [10]
setting ... red indicator lights
④ should turn ON. Allow unit to preheat for approximately 15 minutes.
4. When the bottom heater indicator lights turn off, proceed to the next step (top heater indicators will remain ON).
Parts of the unit become very HOT! Temperatures inside the unit can exceed 150°F (65.6°C). Exer
cise caution when placing full pans into warmer, removing empty pans, cleaning or servicing ... al
ways wear thermal hand protection.
There is a separate control panel for each “pan well” ... GHM4 = 3, GHM5 = 4, GHM6 = 5, GHM8 = 7. Main power/light
switch is located on the righthand panel.
Avoid touching the ceramic top heaters. The surface of these heater will become extremely HOT &
skin contact may result in serious burns.
4.02 Setting & Adjusting Warmer Temperature
4
1
3
2
5
IMPORTANT!
While Warmer is in operation, be certain that Side Glasses ⑤ on each end are pulled forward & fit flush against the
Front Curved Glass cover. Pushing the glass panels fully in to a backstop will leave a significant gap between the
front cover & side glasses. A gap results in excessive heat loss, making it is very diffucult for the Warmer to maintain
acceptable temperature levels.
FLUSH FIT
Operation
Heated Merchandiser
GHM-LED Series
Bekijk gratis de handleiding van Giles GHM-6C, stel vragen en lees de antwoorden op veelvoorkomende problemen, of gebruik onze assistent om sneller informatie in de handleiding te vinden of uitleg te krijgen over specifieke functies.
Productinformatie
| Merk | Giles |
| Model | GHM-6C |
| Categorie | Niet gecategoriseerd |
| Taal | Nederlands |
| Grootte | 11742 MB |

