Gigabyte TRX50 AERO D handleiding
Handleiding
Je bekijkt pagina 25 van 44
M2C_CPU/M2B_CPU/M2A_CPU:
Follow the steps below to correctly install an M.2 SSD in the M.2 connector.
Step 1:
Turn the M.2 EZ-Latch Click clip clockwise and remove the motherboard heatsink. Locate the proper
mounting hole for the M.2 SSD to be installed and secure the M.2 EZ-Latch Plus clip in the hole rst.
Step 2:
Remove the protective lm from the thermal pad (only the M2C_CPU/M2B_CPU connector has the thermal
pad) on the M.2 connector. Insert the M.2 SSD into the M.2 connector at an angle.
Step 3:
Press down on the front end of the M.2 SSD and make sure the M.2 SSD is secured by the clip. Remove
the protective lm from the bottom of the motherboard heatsink, and nally, turn the M.2 EZ-Latch Click
clip clockwise and then install the heatsink back in place.
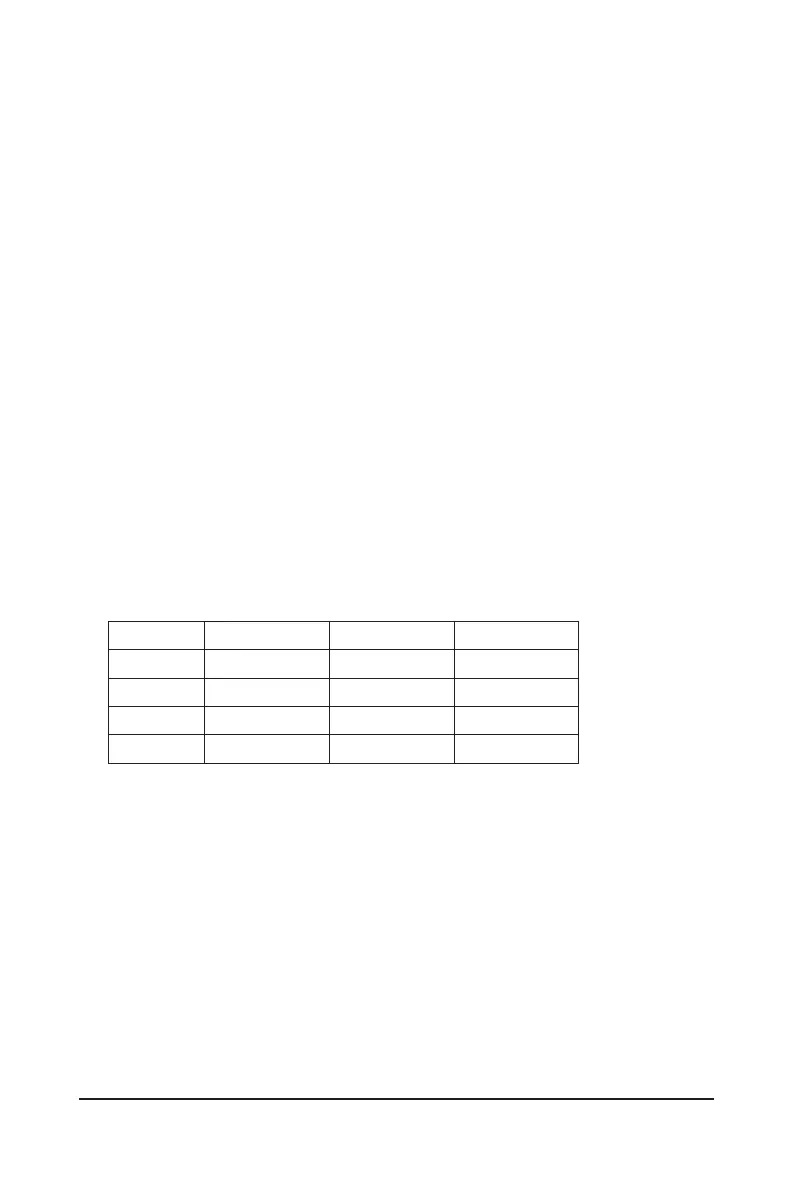
* Types of M.2 SSDs supported by each M.2 connector:
M.2 PCIe p25-x4 SSD M.2 PCIe p25-x2 SSD M.2 SATA SSD
M2C_CPU
a a
r
M2B_CPU
a a
r
M2A_CPU
a a
r
M2D_CPU
a a
r
M2D_CPU:
Follow the steps below to correctly install an M.2 SSD in the M.2 connector.
Step 1:
Turn the M.2 EZ-Latch Click clip clockwise and remove the motherboard heatsink.
Step 2:
Insert the M.2 SSD into the M.2 connector at an angle. Press down on the front end of the M.2 SSD and
make sure the M.2 SSD is secured by the clip.
Step 3:
Remove the protective lm from the bottom of the motherboard heatsink, and nally, turn the M.2 EZ-Latch
Click clip clockwise and then install the heatsink back in place.
- 25 -
Bekijk gratis de handleiding van Gigabyte TRX50 AERO D, stel vragen en lees de antwoorden op veelvoorkomende problemen, of gebruik onze assistent om sneller informatie in de handleiding te vinden of uitleg te krijgen over specifieke functies.
Productinformatie
| Merk | Gigabyte |
| Model | TRX50 AERO D |
| Categorie | Niet gecategoriseerd |
| Taal | Nederlands |
| Grootte | 4560 MB |
Caratteristiche Prodotto
| Kleur van het product | Zwart |
| Breedte | 305 mm |
| Diepte | 264 mm |
| Hoogte | 35 mm |
| Gewicht verpakking | 3040 g |


