Gigabyte TRX50 AERO D handleiding
Handleiding
Je bekijkt pagina 12 van 44
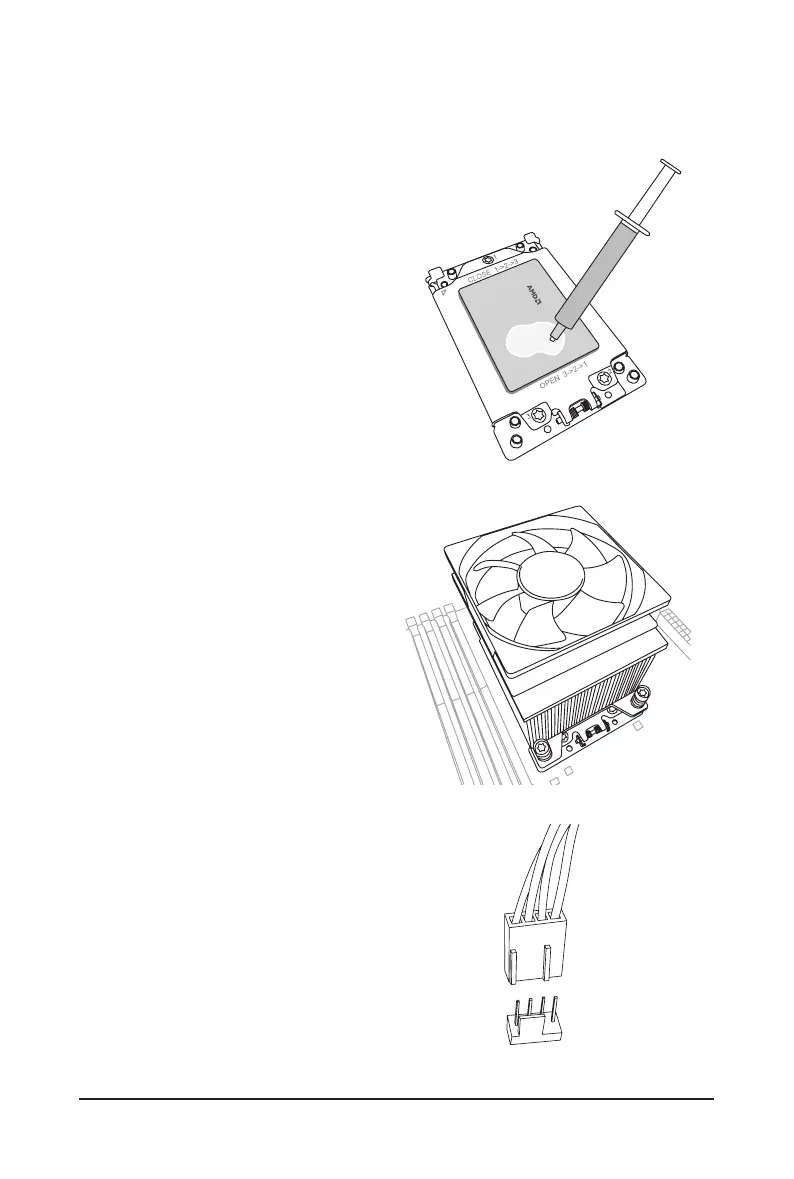
C. Installing the CPU Cooler
Be sure to install the CPU cooler after installing the CPU. (Actual installation process may differ depending the
CPU cooler to be used. Refer to the user's manual for your CPU cooler.)
CLOSE 1->2->3
OPEN 3->2->1
Place the cooler atop the CPU, aligning the
four mounting screws with the mounting holes
around the CPU socket. (Note that the spacing
between the upper two screws is not the same as
that between the lower two screws; please make
sure to align the screws correctly.)
Tighten the screws in a diagonal sequence. Begin
tightening a screw with a few turns and repeat
with the screw diagonally opposite the one you
just tightened. Then do the same to the other pair.
Next, fully tighten the four screws.
u
Apply an even and thin layer of thermal grease
on the surface of the installed CPU.
w
Finally, attach the power connector of the CPU
cooler to the CPU fan header (CPU_FAN) on
the motherboard.
CPU_FAN
v
- 12 -
Bekijk gratis de handleiding van Gigabyte TRX50 AERO D, stel vragen en lees de antwoorden op veelvoorkomende problemen, of gebruik onze assistent om sneller informatie in de handleiding te vinden of uitleg te krijgen over specifieke functies.
Productinformatie
| Merk | Gigabyte |
| Model | TRX50 AERO D |
| Categorie | Niet gecategoriseerd |
| Taal | Nederlands |
| Grootte | 4560 MB |
Caratteristiche Prodotto
| Kleur van het product | Zwart |
| Breedte | 305 mm |
| Diepte | 264 mm |
| Hoogte | 35 mm |
| Gewicht verpakking | 3040 g |


