Furuno PG-500 handleiding
Handleiding
Je bekijkt pagina 13 van 32
2. MAINTENANCE & TROUBLESHOOTING
6
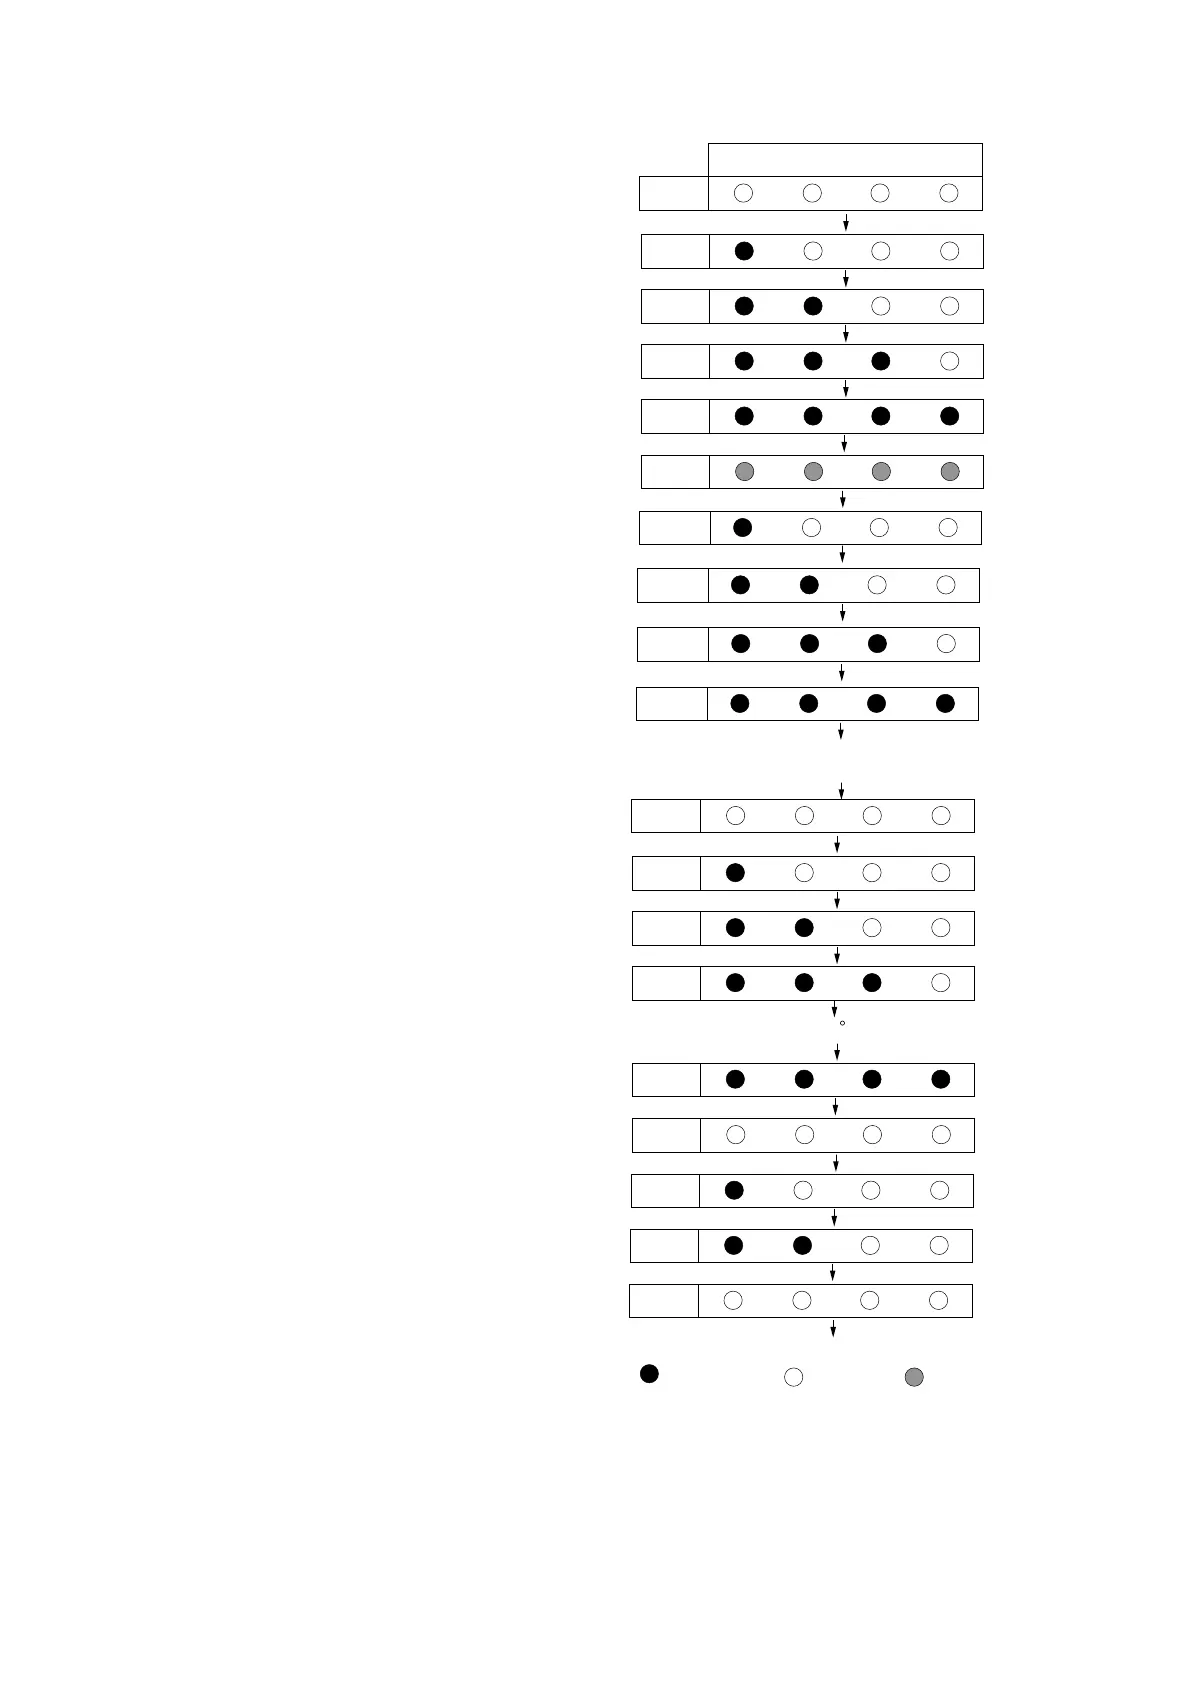
2.3 Diagnostic Test
This equipment has a diagnostic test which
checks the LED, key operation, ROM, RAM,
EEPROM, magnetic sensor, rate sensor
(PG-500 only) and loop back for proper
operation. Do this test after dismounting the
sensor.
1. Disconnect the power cable from the
equipment.
2. While pressing the [AUTO] and [DAMP]
keys together, reattach the power cable.
3. Release the [AUTO] and [DAMP] keys
when the AUTO LED lights.
Then, the test is executed in the sequence
shown in the right column.
*1: If STATUS LED does not light (NG),
this test cannot be carried out. Contact
your dealer.
Also, if the sensor is not turned within
one minute after the EEPROM test,
the test is carried out with the “Mag
sensor” is NG.
*2: The loop back test requires a special
test connector.
It is skipped when the test connector
is not connected.
AUTO TRUE CALB
STATUS
Start
CALIB
LED: OK
STATUS
LED: OK
AUTO LED
:
OK
TRUE LED
:
OK
All LEDs
blink twice.
AUTO lights
automatically.
AUTO key
: OK
DAMP key
: OK
ADJ key
: OK
Press the [AUTO] and [DAMP] keys together again.
Press the [AUTO] key.
Press the [DAMP] key.
Press the [ADJ] key.
EEPROM
: OK
Mag.
sensor: OK
ROM:
OK
: On (normal)
Rate
sensor:
OK
RAM:
OK
All LEDs
go off.
Loop back
:
OK*2
All LEDs
go off.
Normal operation
All LEDs
go off.
(PG-500 only)
Turn the sensor more than 180 until STATUS LED lights.*1
: Off (error)
: Blink
Sequence of diagnostic test
Bekijk gratis de handleiding van Furuno PG-500, stel vragen en lees de antwoorden op veelvoorkomende problemen, of gebruik onze assistent om sneller informatie in de handleiding te vinden of uitleg te krijgen over specifieke functies.
Productinformatie
| Merk | Furuno |
| Model | PG-500 |
| Categorie | Niet gecategoriseerd |
| Taal | Nederlands |
| Grootte | 4174 MB |


