Furuno MU-152 handleiding
Handleiding
Je bekijkt pagina 16 van 44
1. MOUNTING, WIRING
8
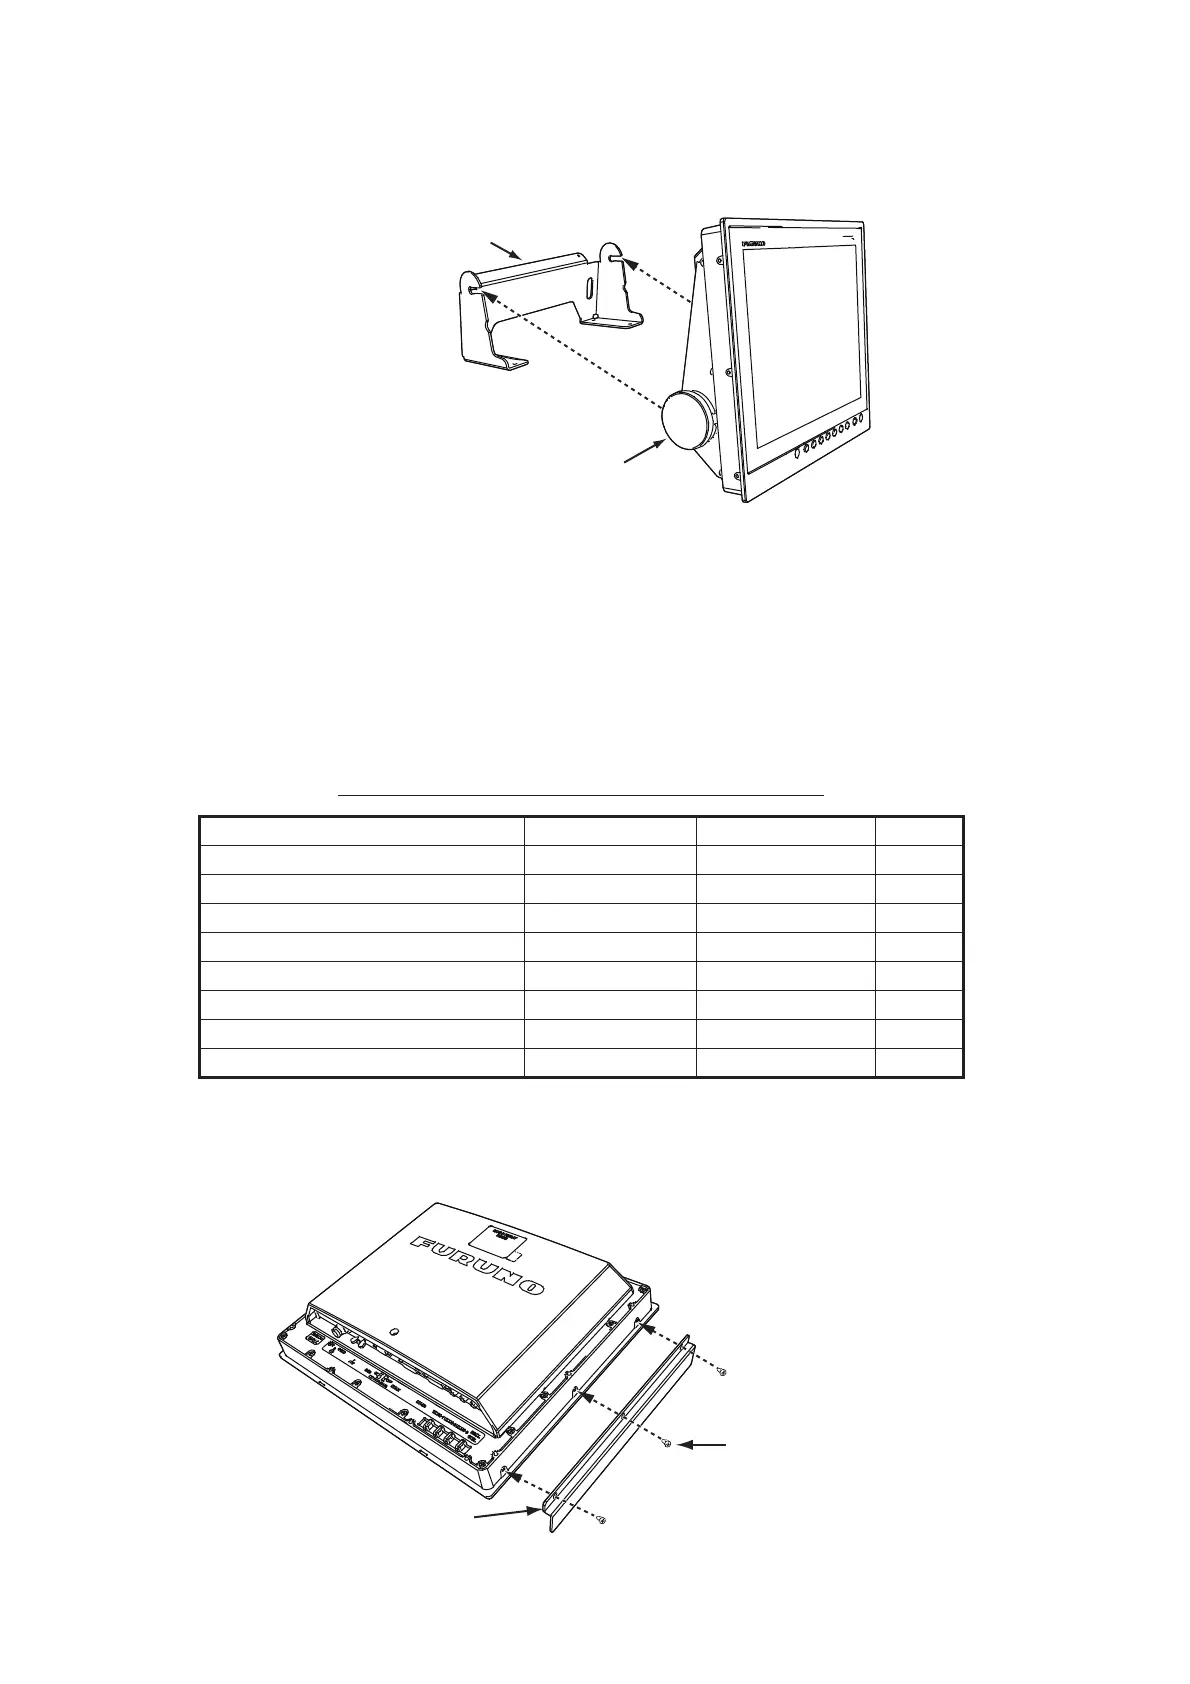
4. Connect all cables at the back of the monitor unit. See section 1.8.
5. Loosen the knobs of the bracket support and set them in the notches on the mounting bracket
(15).
6. Adjust the angle of the monitor unit and fasten the knobs tightly.
1.5 Flush Mounting, Fixed at Rear, with Hood (Op-
tion)
You can attach a hood when flush mounting the unit from the rear, using the hood assembly
OP26-3 (option).
Hood Assembly OP26-3 (Code No.: 001-080-840)
1. Make a cutout in the mounting location with the flush mounting template (included).
2. Attach the hood fixing plates 15 to the right and left of the monitor unit with flat head screws
(M3×8, 6 places, torque: 0.6 N•m).
Name Type Code No. Qty.
Hood (15) Assembly OP26-3-1 001-080-950 1
Hood Fixing Plate 15 26-005-2302-1 100-351-321-10 2
F-Mount Hood Packing 15 26-005-2305 100-351-710-10 1
Hood Packing Bottom 15 26-005-2306 100-351-720-10 1
F-Mount Hood Packing Side 15 26-005-2307 100-351-730-10 2
Knob M4 03-163-2303-2 100-343-602-10 4
Flat Head Screw M3×8 000-172-167-10 6
Flush Mounting Template C42-00908-B 000-172-635-11 1
Mounting bracket (15)
Knob
Flat head screw
Hood fixing plate 15
Bekijk gratis de handleiding van Furuno MU-152, stel vragen en lees de antwoorden op veelvoorkomende problemen, of gebruik onze assistent om sneller informatie in de handleiding te vinden of uitleg te krijgen over specifieke functies.
Productinformatie
| Merk | Furuno |
| Model | MU-152 |
| Categorie | Niet gecategoriseerd |
| Taal | Nederlands |
| Grootte | 5968 MB |


