Furuno GP-170 handleiding
Handleiding
Je bekijkt pagina 36 van 133
3. MARKS
3-6
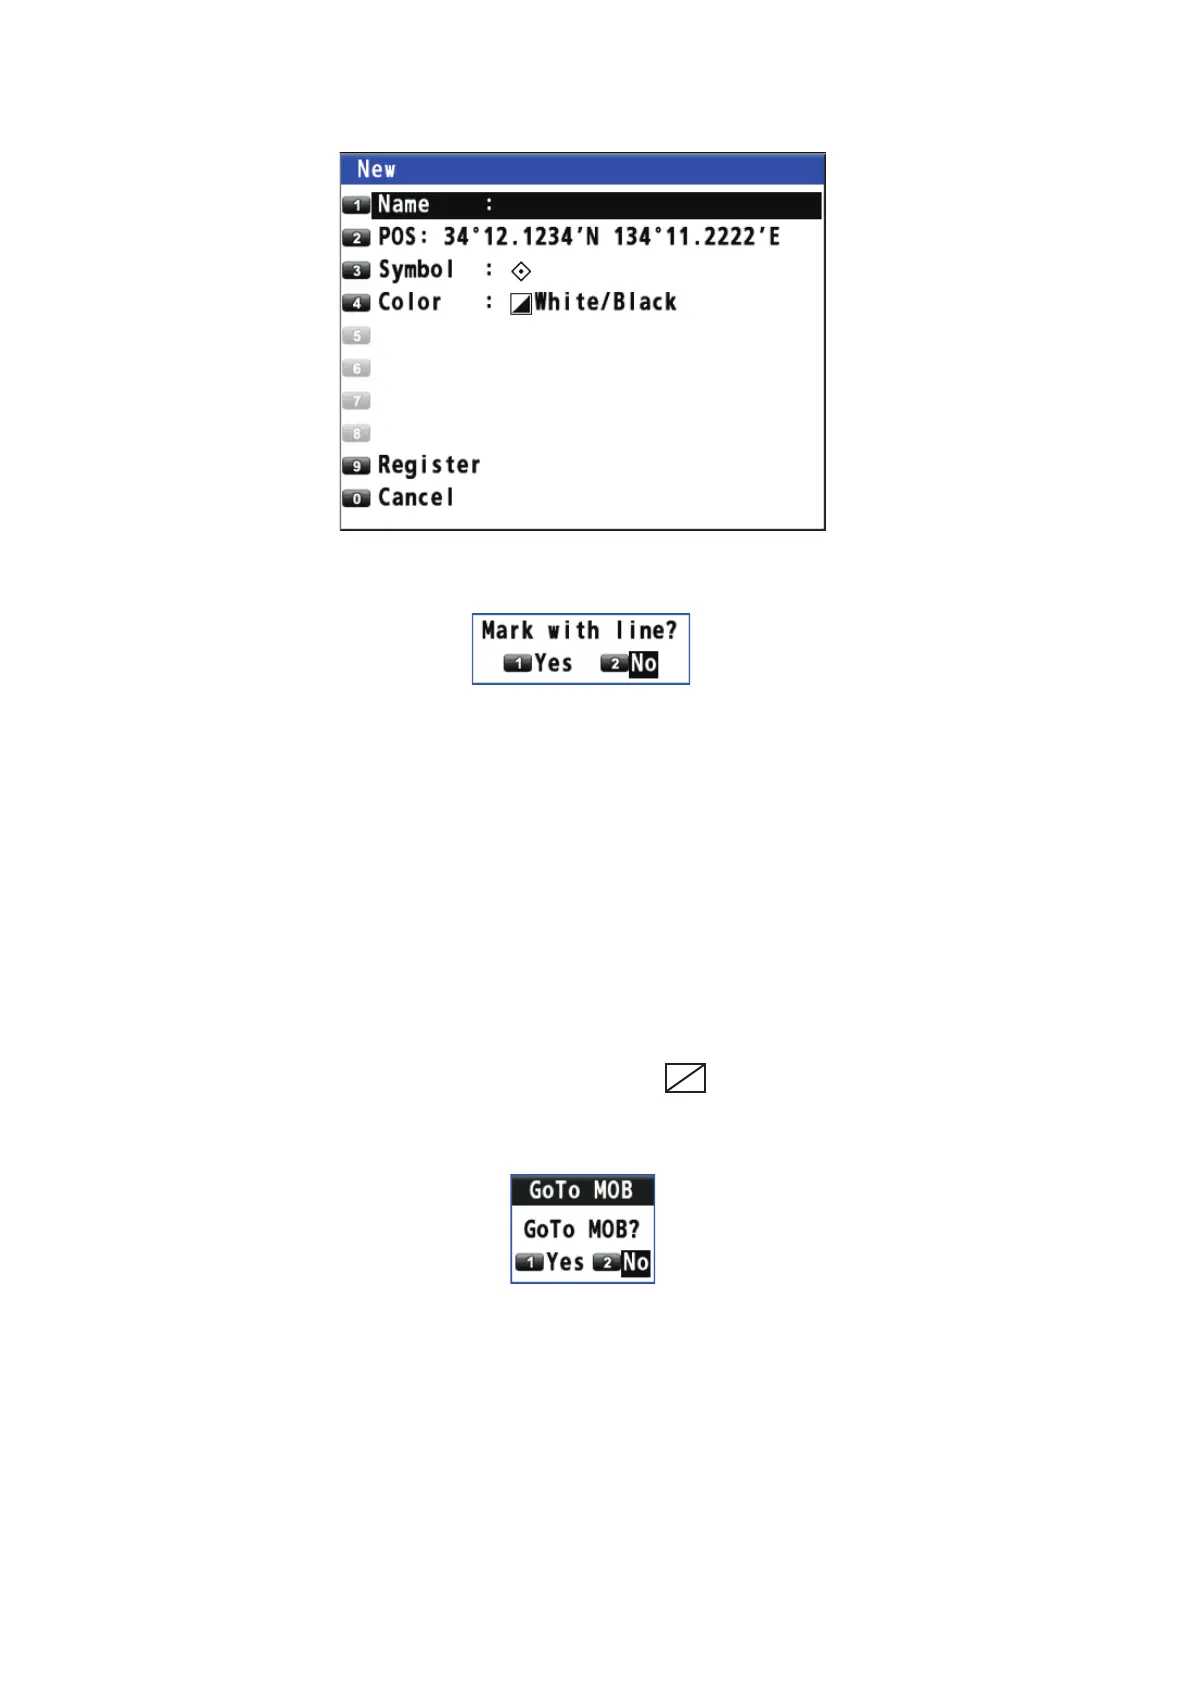
4. Select [3 OwnShip Position].
5. Change the name (see page 4-6), position, symbol or color if necessary.
6. Select [9 Register]. The confirmation message appears.
7. Select [1 Yes] or [2 No].
[Yes]: Marks are registered with connecting lines.
[No]: Marks are registered without connecting lines.
8. Press the MENU/ESC key to close the main menu.
3.3 How to Enter a MOB Mark
The MOB mark denotes man overboard position. You can use it as an aid to rescue.
Note: When the ECDIS synchronization is on, a MOB mark can not be entered from
the GP-170 (see section 9.8).
Press the MOB key to put a MOB mark on any display. When the key is pressed, own
ship's position is registered as a MOB mark ( ). The following message ap-
pears.
Select [1 Yes]. The position for the MOB mark becomes the destination. A line is
drawn between own ship and the MOB mark. This line shows the shortest course to
go to the MOB position. The bearing and range from own ship to the MOB position are
displayed at the right of the display. Only one MOB mark can be put on the plotter dis-
play, and each time the MOB key is operated the previous MOB mark and its position
data are written over.
MOB
Bekijk gratis de handleiding van Furuno GP-170, stel vragen en lees de antwoorden op veelvoorkomende problemen, of gebruik onze assistent om sneller informatie in de handleiding te vinden of uitleg te krijgen over specifieke functies.
Productinformatie
| Merk | Furuno |
| Model | GP-170 |
| Categorie | Niet gecategoriseerd |
| Taal | Nederlands |
| Grootte | 20908 MB |


