Furuno DFF-3D handleiding
Handleiding
Je bekijkt pagina 24 van 84
2. WIRING
2-8
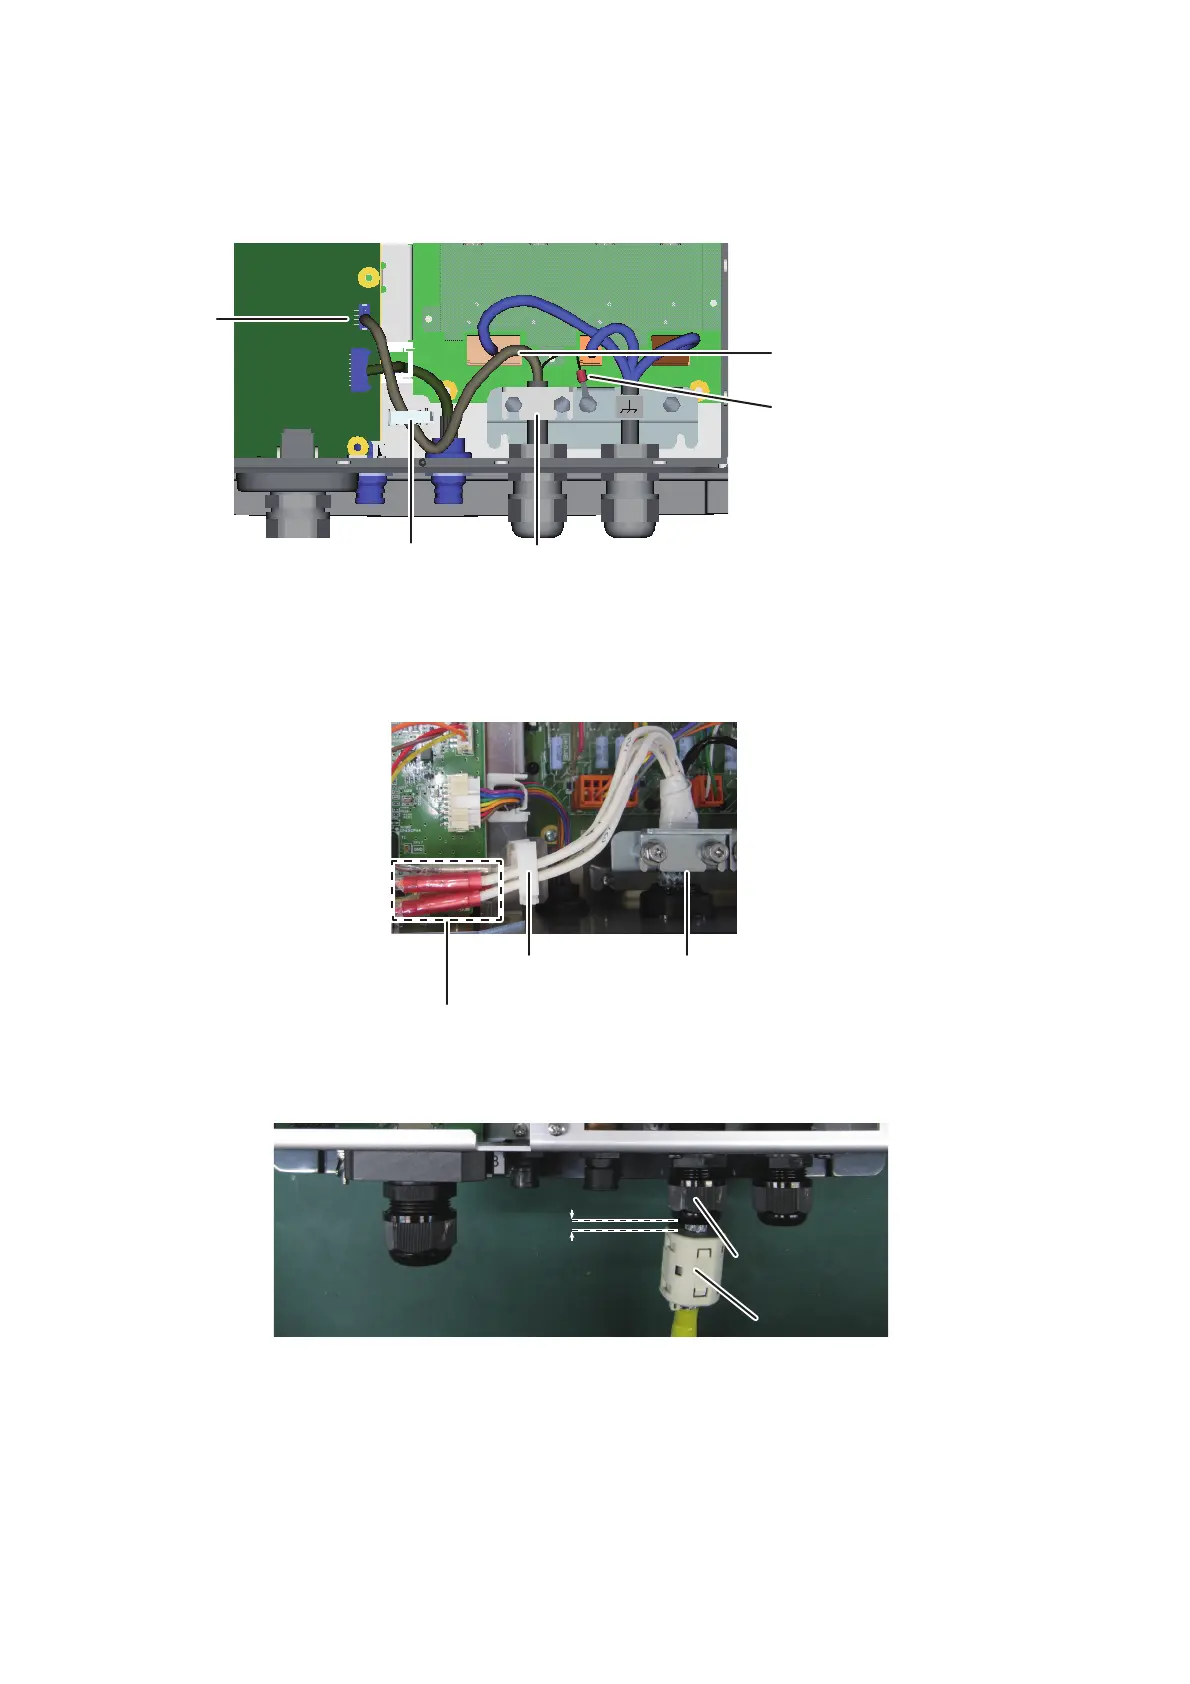
9. Connect the KP cable. Pass the PH connector through the clamp shown below,
then connect it to J9 on th DIGI board. Make sure the cable does not contact the
WAGO connector (TB3). Also, secure the shield of the external KP cable to the
plate where the transducer cable is fixed.
Note 1: As shown in the figure below, pass the cable through the cable saddle.
Make sure the crimp connectors are not clamped by the cable saddle.
Note 2: Confirm that the direction of the clamping plate is as shown below.
10. Attach the supplied EMI core (GRFC-10) to the cable for the external KP, approx.
10 mm from the super gland.
11. Reattach the inner and outer covers.
J9
Clamp
Lay vinyl sheath in the cable clamp and
secure the cable with the cable clamp.
Make sure cable does
not contact TB3.
Shield
Crimp connectors
Clamping
plate
Cable saddle
EMI coreEMI core
10 mm10 mm
Super glandSuper gland
Bekijk gratis de handleiding van Furuno DFF-3D, stel vragen en lees de antwoorden op veelvoorkomende problemen, of gebruik onze assistent om sneller informatie in de handleiding te vinden of uitleg te krijgen over specifieke functies.
Productinformatie
| Merk | Furuno |
| Model | DFF-3D |
| Categorie | Niet gecategoriseerd |
| Taal | Nederlands |
| Grootte | 12173 MB |


