Frigidaire FCRC3022BW handleiding
Handleiding
Je bekijkt pagina 14 van 20
IMPORTANT
Do not use abrasive cleaners or steel wool, they will scratch the
surface. Always rinse with clean water and polish dry with a soft
cloth.
To replace drip bowls and surface elements:
1. Slide the terminal end (A) on the element through the opening in
the drip bowl.
2. Align the element support (F) to rest on the rim inside the drip bowl
(G). If your drip bowl is equipped with a hold-down clip (E), align
the element support (F) opposite the terminal end with the slot in
the hold-down clip (E), and snap into place.
3. After the element is positioned in the drip bowl, line up the terminal
end (A) with the terminal plug (D), as shown on the picture.
4. Hold the surface element (B) and drip bowl (C) together, as level as
possible, and firmly push the terminal end (A) into the terminal plug
(D). Make sure element terminal is seated properly into terminal
plug. Make sure the surface element is level to reduce the hazard
of cookware sliding off the element.
7.3 General Cleaning
Refer to the table at the beginning of this chapter for more information
about cleaning specific parts of the oven.
Follow these cleaning precautions:
• Allow the oven to cool before cleaning.
• Wear rubber gloves when cleaning the appliance manually.
Remove soils using hot, soapy water. Do not allow food spills with a
high sugar or acid content (such as milk, tomatoes, sauerkraut, fruit
juices or pie filling) to remain on the surface as they may cause a dull
spot even after cleaning. Remove spillovers and heavy soiling as soon
as possible. Regular cleaning will reduce the effort required for major
cleaning later.
CAUTION!
Before manually cleaning any part of the oven, be sure all controls
are turned off and the oven is cool. The oven may be hot and can
cause burns. Remove all racks and accessories from the oven
before cleaning. Ammonia must be rinsed before operating the
oven. Provide adequate ventilation.
Cleaning Porcelain Enamel Oven
The oven interior is porcelain on steel.
To clean the interior use oven cleaners.
To remove heavy soil:
1. Place the dish of ammonia in the oven.
Let it sit overnight or for several hours with the oven door closed.
Clean softened dirt spots using hot, soapy water.
Rinse thoroughly with water and a clean cloth.
2. If soil remains, use a nonabrasive scouring pad or nonabrasive
cleaner.
If necessary, apply an oven cleaner following the manufacturer's
instructions.
Do not mix ammonia with other cleaners.
3. Clean any soil from the oven frame, the door liner outside the oven
door gasket, and the small area at the front center of the oven
bottom.
Use hot, soapy water for cleaning.
Rinse well with clean water and a cloth.
Aluminum Foil, Aluminum Utensils, and Oven Liners
WARNING!
Never cover any slots, holes, or passages in the oven bottom or
cover an entire oven rack with materials such as aluminum foil.
Doing so blocks airflow through the oven and may cause carbon
monoxide poisoning. Aluminum foil linings may trap heat, causing
a fire hazard.
• Protective liners- Do not use aluminum foil to line the oven bottom.
High heat can melt it, damaging the oven and reducing air
circulation, leading to poor baking results. Only use aluminum foil as
recommended in the manual to avoid electric shock or fire risks
• Aluminum utensils- Aluminum utensils have a lower melting point
than other metals. Use aluminum pots and pans with care.
• Oven racks- Do not cover oven racks with aluminum foil. It restricts
heat and airflow, affecting cooking results.
7.4 Replacing the Oven Light
CAUTION!
Be sure the oven is unplugged and all parts are cool before
replacing the oven light.
The interior oven light is located at the rear of the oven cavity and is
covered by a glass shield. The glass shield must be in place whenever
the oven is in use.
NOTE
Wear a cotton glove or use a paper towel when installing a new
bulb. Do not touch the new bulb with your fingers when replacing.
This will shorten the life of the bulb.
To replace the oven interior light bulb:
1. Turn electrical power off at the main source or unplug the
appliance.
2. Remove interior oven light shield by turning a quarter turn counter-
clockwise.
3. Replace bulb with a new T-4 type Halogen 25 watt appliance bulb.
4. Replace glass oven light shield by rotating clockwise.
5. Turn power back on again at the main source (or plug the
appliance back in).
Be sure to reset the time of day on the clock.
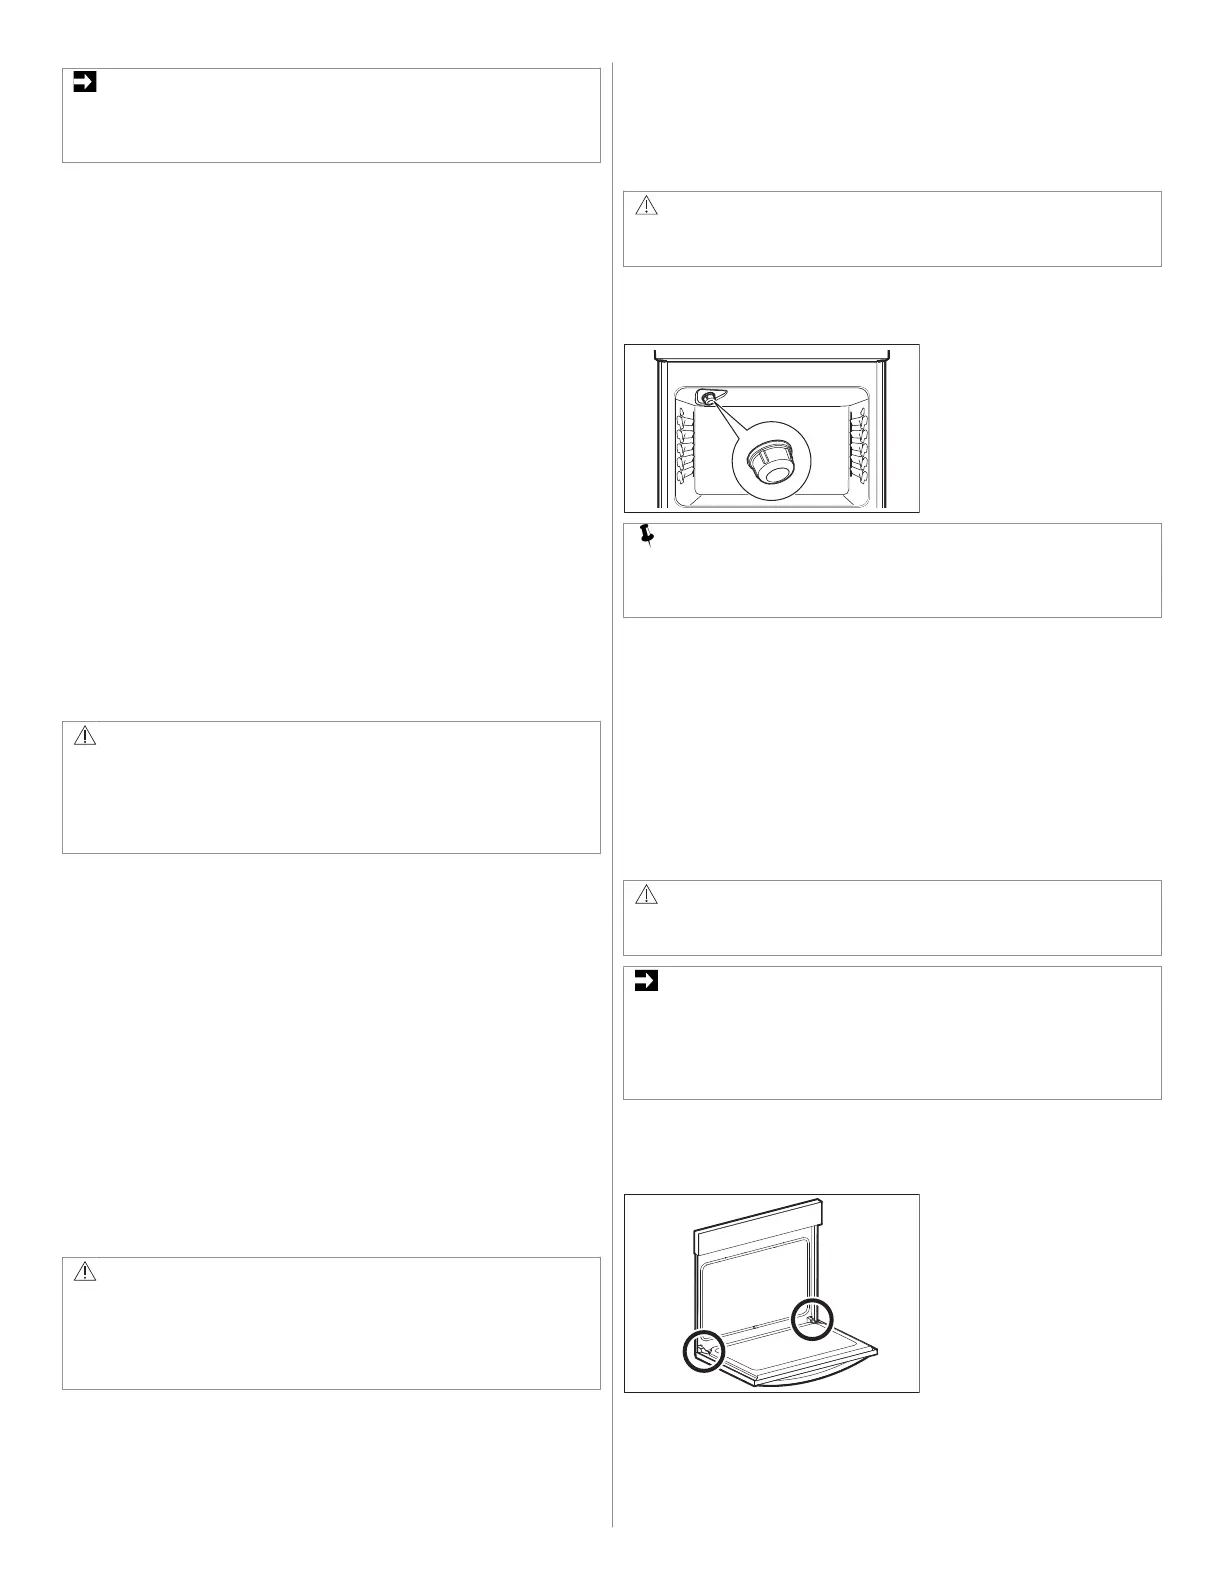
7.5 Removing and Replacing the Oven Door
CAUTION!
The door is heavy. For safe, temporary storage, lay the door flat
with the inside of the door facing down.
IMPORTANT
Most oven doors contain glass that can break. Do not hit the glass
with pots, pans, or any other object. Scratching, hitting, jarring, or
stressing the glass may weaken its structure, causing an increased
risk of breakage at a later time. Do not close the oven door until all
of the oven racks are fully in place.
To remove the oven door
1. Open oven door completely, horizontal with floor.
Figure A
2. Pull up the lock located on each hinge support toward front of the
oven until the lock stops. You may have to apply a little upward
pressure on the lock to pull it up.
14 ENGLISH
Bekijk gratis de handleiding van Frigidaire FCRC3022BW, stel vragen en lees de antwoorden op veelvoorkomende problemen, of gebruik onze assistent om sneller informatie in de handleiding te vinden of uitleg te krijgen over specifieke functies.
Productinformatie
| Merk | Frigidaire |
| Model | FCRC3022BW |
| Categorie | Fornuis |
| Taal | Nederlands |
| Grootte | 2178 MB |


