Fantini Cosmi ASPIRLIGHT BP handleiding
Handleiding
Je bekijkt pagina 6 van 24
ASPIRLIGHT BP
6
5. INSTALLAZIONE
5.1 DESCRIZONE DELLE PARTI
Barra di fissaggio 1x
Adattatori per connessione 2x
Guarnizioni 4x
Supporto di fissaggio a soffitto 1x
5.1.1 INSTALLAZIONE A PARETE
1. Montare la staffa di montaggio (A) orizzontale la parete, usando appropriati tasselli
2. Inserire i due adattatori di condotto (B) a ciascuna estremità della staffa di montaggio (A
)
3. Assicurarsi che gli adattatori (B) siano posti a filo a ciascuna estremità della staffa di montaggio (A) e le
guarnizioni siano fissate saldamente sulla parte superiore. (C)
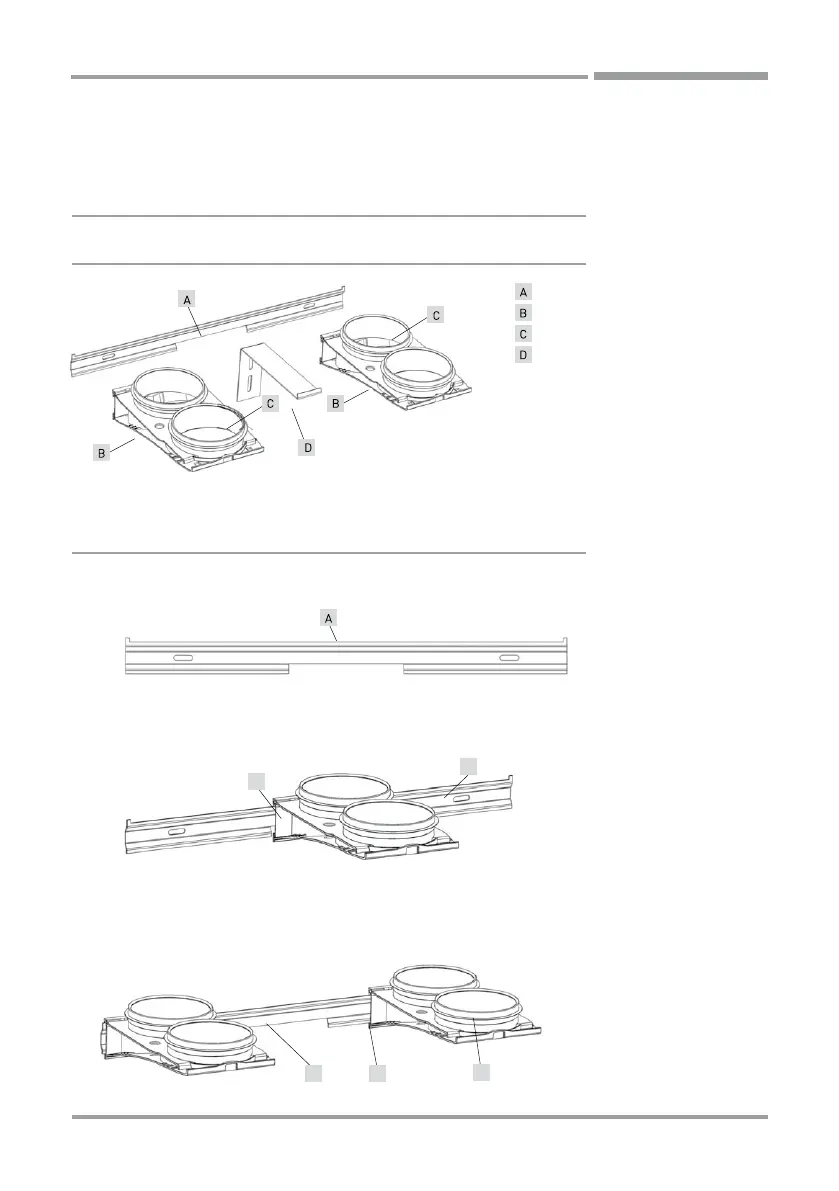
5.1 Unpacking the mounting bracket
Package contents:
5.1.1 Wall mounting
a) Fit the mounting bracket
A
horizontally to the wall,
using appropriate fixings.
b) Fit the two duct adapters
B
to each end of the moun-
ting bracket
A
.
c) Ensure that the adapters
B
are placed flush to each
end of the mounting bracket
A
and the spigot seals
C
are secured firmly on top of each spigot.
5 Installation
1
mounting bracket (1×)
2
duct adapter (2×)
3
spigot seal (4×)
4
ceiling mounting strip (1×)
ITHO
|
advance
9
1
2
4
3
B
A
A B
C
211.0107 Advance 226-0047 A4 Installer ENGELS.indd 9 14-02-11 15:39
Bekijk gratis de handleiding van Fantini Cosmi ASPIRLIGHT BP, stel vragen en lees de antwoorden op veelvoorkomende problemen, of gebruik onze assistent om sneller informatie in de handleiding te vinden of uitleg te krijgen over specifieke functies.
Productinformatie
| Merk | Fantini Cosmi |
| Model | ASPIRLIGHT BP |
| Categorie | Ventilator |
| Taal | Nederlands |
| Grootte | 2343 MB |
