Handleiding
Je bekijkt pagina 22 van 36
EN
2
22
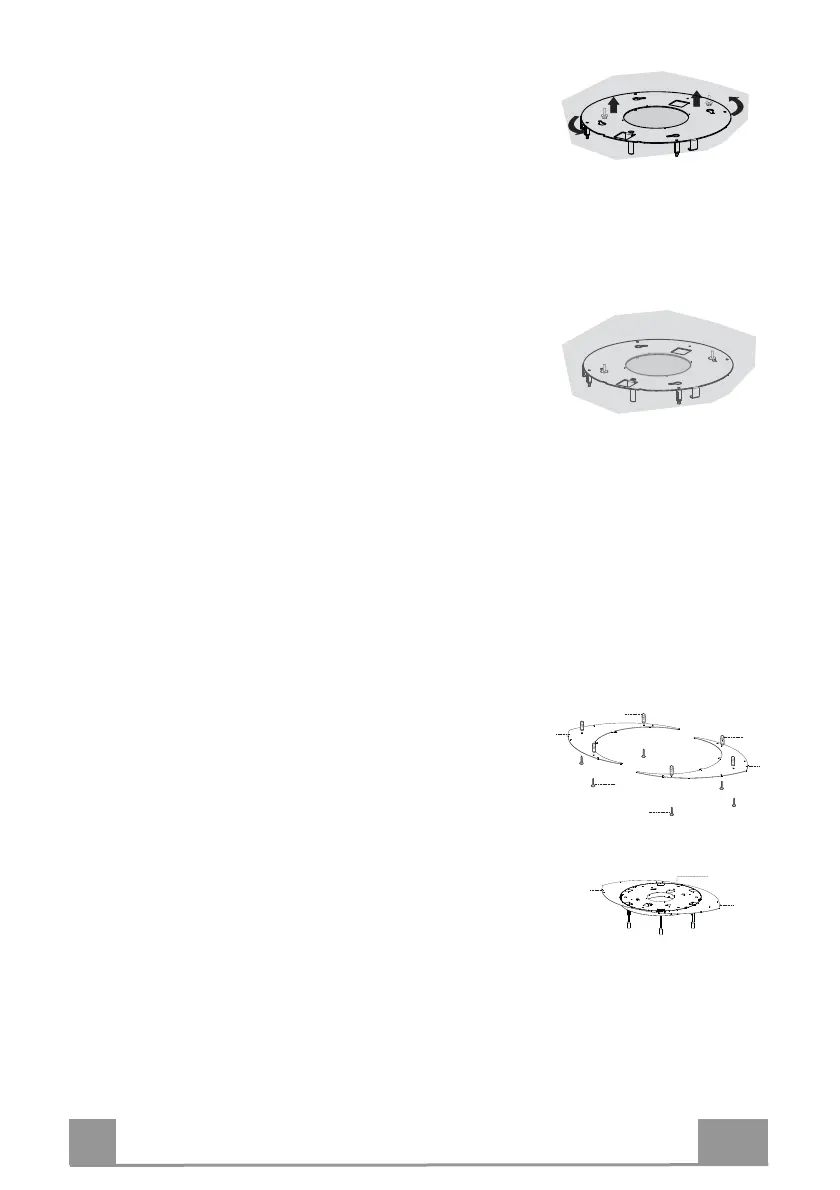
FIXING THE PLATE
• Lift up the fixing plate, taking care to ensure that the limit pawl
is positioned frontally.
• Fit the slots onto the two screws previously inserted in the
ceiling, and turn until they are at the centre of the adjustment
slot.
• Tighten the two screws completely and screw in the other two
provided; before locking the screws completely it is possible to
make adjustments by turning the piece, making sure that the
screws do not come out of the adjustment slot.
• The unit must be securely fastened both due to the weight of
the Hood and the stress caused by occasional sideways pres-
sure on the Appliance when in position. Once the unit has been
fixed, make sure that the plate is stable.
• In all cases where the Ceiling is not sufficiently strong at the
point of suspension, the Installation technician must strengthen
it with suitable plates and counterplates, anchored to
structurally sound elements.
2
1
1
2
FIXING THE PLATE EXTENSION (NEST MODEL)
• Take the 2 Extensions 2.1 and hook them in the slots provided
in Plate 2 which has already been fitted.
• Mark on the ceiling the centres of the holes in the plates.
• Remove the extensions.
• Drill a hole ø 10 mm (insert Plugs 11 supplied immediately).
• Hook up the extensions again and fix them using the screws
12h provided.
2.1
11
12h
12h
11
2.1
2
2.1
2.1
Bekijk gratis de handleiding van Faber Zoom Plus, stel vragen en lees de antwoorden op veelvoorkomende problemen, of gebruik onze assistent om sneller informatie in de handleiding te vinden of uitleg te krijgen over specifieke functies.
Productinformatie
| Merk | Faber |
| Model | Zoom Plus |
| Categorie | Afzuigkap |
| Taal | Nederlands |
| Grootte | 2549 MB |


